How to Make a One-Page Website with Elementor Pro in 10 Simple Steps

Have you ever visited a website where the homepage keeps scrolling and scrolling, no matter how far down the page you go? And when you click the navigation items at the top, all the links seem to point to somewhere on the home page?
If so, you’ve probably seen a one-page website in action.
The one-page website takes a different approach to the traditional website model. Instead of jumping from one page to another, all the content is on one page.
One-page websites have been a popular design trend for years, and there are many compelling reasons you should build one. Let’s look at these reasons next.
Benefits of One-Page Websites
Here are some benefits of one-page websites:
- They are easier to maintain since you only have one page to update.
- They give a better experience on mobile since you don’t have to jump from one page to another.
- It can help with conversions, as all the content is on one page, and users can just focus on the content.
- The reading experience is simple. Just scroll through the page and consume the content the more you scroll.
- One-page websites can lead to higher user engagement. Combined with a strong Call to Action (CTA), you can convert the user to take a specific action on the page.
Now that you know what one-page websites are and what makes them exciting, let’s roll up our sleeves and build one.
How to Build a One-Page Website with Elementor Pro
In this tutorial, we build a one-page website for a fictitious Acme Corporation.
In a typical website project, you gather a list of business requirements and then develop your site according to those specifications. But we skip this step here.
We show you the techniques for how to build a one-page website. Your task is to do the proper business research to create a website that fits your scenario.
1.Make Sure Your Toolbox Is Ready.
Before we start the website building process, make sure you can meet the minimum project requirements:
- Do you have a web host? In case you don’t, take care of that first. Here at eCommerce Booth, WPX Hosting is one of the hosting platforms we recommend. With our coupon code, you get a massive discount on their hosting plans.
- Purchase the Pro version of Elementor. Although you can build a one-page website with the free version of Elementor, I recommend the Pro version. It gives you all the powerful tools (like the theme builder) for the building process in one package.
- Install both versions of Elementor. The pro version builds on top of the free version, so that’s why you have to install the free version, too.

2. Install a Theme
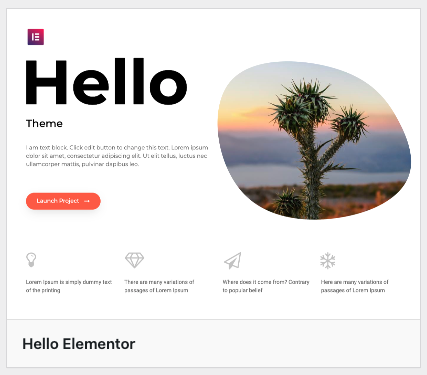
In our tutorial, we use the blank Hello Elementor theme from Elementor. While you can create your one-page website with any theme, the Hello Elementor theme makes our project faster and more straightforward.
In the WordPress admin panel, go to Appearance > Themes > Add New. Then enter Hello Elementor on the search form on the right. You should see the following search result:
Hover your mouse over the Hello Elementor theme preview and click Install.
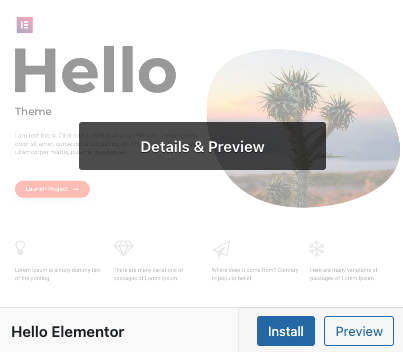
After successful installation, the text on the Install button changes to Active. Click the button, and the theme activates.
3. Pick Your Template
In step #2, you installed a theme, but it didn’t give that much look to your site. After all, it was just a blank template you can build upon.
But fear not, you don’t have to design the whole one-page layout from scratch (unless you want to). To speed up the design process, we can take advantage of the ready-made templates created by the Elementor team.
So, on the top of the WordPress admin panel, click on the New link at the top, then choose Page:

Continue clicking on the blue Edit with Elementor button on the top navigation bar to open the page in the Elementor editor. In the center of your page, you should see the following buttons:

Click on the Add Template button to pick your preferred template:

You should now see the template library, with all the templates you can use in your one-page website project.
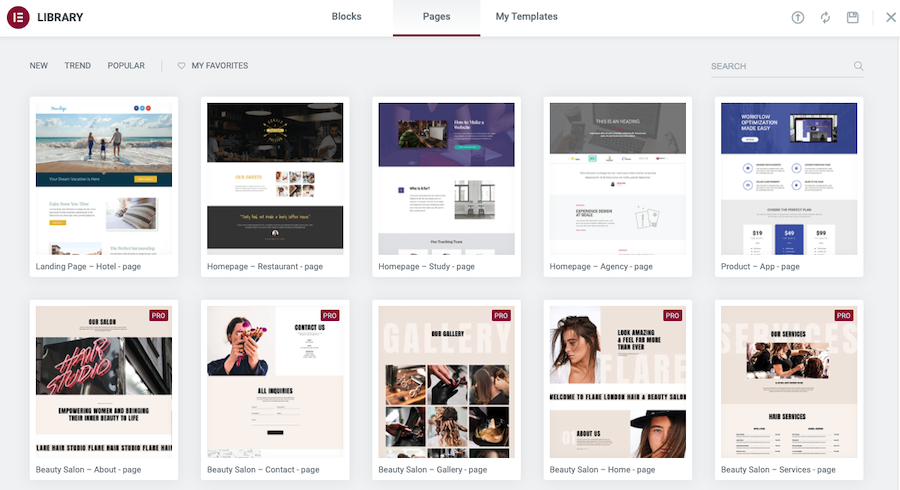
For our project, I chose the Product template:

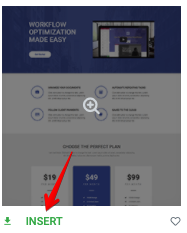
Just hover over the thumbnail image and click the Install link:
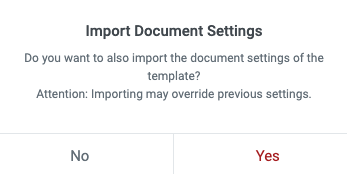
In the Import Document Settings window, click Yes:
You should now see your page with the chosen template in Elementor.
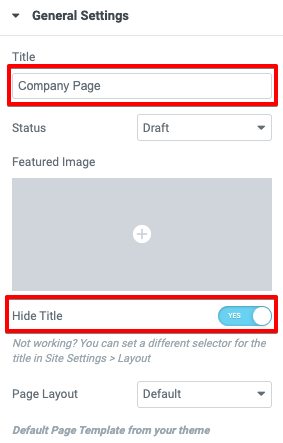
One final thing to do is to change the default page title and hide it. As you can see, in my demo, it looks like this (the name is different from yours):

The Elementor #2054 is just a default page title that Elementor gave to the page when you created it.
Since this title is visible in the page list in WordPress, and the name is not very descriptive, I changed the title to “Acme Corporation” I then removed the title in sight.
All you have to do is to click the settings (the gear icon) at the bottom-left:
Then, under General Settings, change the title and set the Hide Title option to Yes:
You have now picked the professional-looking template as the basis for your one-page website.
4. Plan and Configure Your Page Sections
Before we start tweaking the outlook of our site, there are two things we need to do first:
- Plan proper page sections. These sections divide the page into different areas, and you can fill each of them with specific content.
- Identify each section so that the menu system works flawlessly.
In the first part, we can identify the following sections of the website:
- Home
- Services
- Prices
- Testimonials
- Contact (*)
The only section missing from our site is the Contact section. I’ll add it later during the process. Also, I won’t pay that much attention to the content inside these areas. I’ll leave that exercise to you.
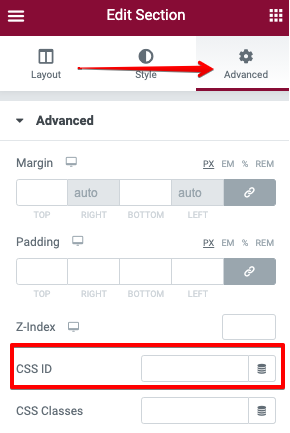
Let’s pay more attention to the identifying part. Each page section should have a unique CSS ID so that when the visitor clicks on a menu item, he/she jumps to the correct part of the page.
In the page editor, move your mouse on top of any section. Once you do that, you should see a blue rectangle around it, accompanied by three icons on top of the section:
Click on the icon in the middle (the dots in two rows, aka the Edit Section icon), and the Edit Section menu becomes visible on the left. There, choose the Advanced tab, and enter the section ID without the # character into the CSS ID field:
In our case, our page sections and their corresponding IDs are as follows:
| Page Name | CSS ID |
| Home * | – |
| About | about |
| Services | services |
| Prices | prices |
| FAQ | faq |
| Testimonials | testimonials |
* No need to define this section. The home menu item links back to the front page.
Keep things simple and name the sections the same way as the menu items. Once you have identified the sections, it’s time to start modifying the menu itself.
5. Design a (Sticky) Menu
You may think that a one-page website doesn’t need a menu since you only have one page to deal with. But this is not the case.
Navigation is an essential part of the user experience, and the visitor should be able to jump smoothly into different parts of the page from the menu.
First, hover your mouse over the menu area. Next, you’ll see an Edit Header command appear at the top of the section:

Just click on the text so that the section activates. When you hover your mouse over the menu section again, it looks like this:

Then, click the Edit Section icon to access the edit mode:

Move your mouse pointer on top of the menu items. The menu should be now inside a blue rectangle:

Right-click on your mouse and choose Edit Nav Menu:
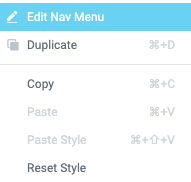
After you have done the previous step, the Edit Nav Menu becomes active on the left:
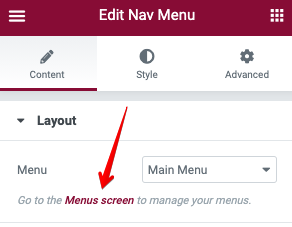
The menu is a regular WordPress menu, and you can access it by clicking the Menus screen link:

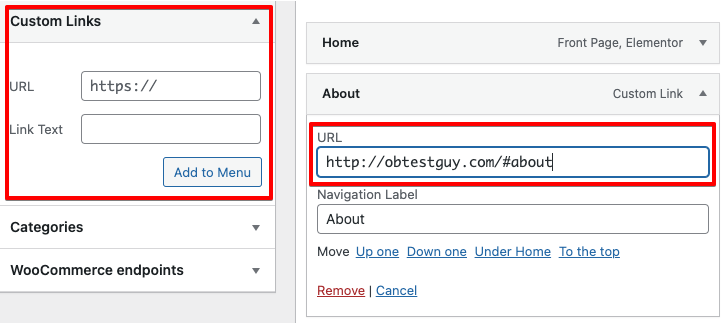
To make the menu reflect what we are building, change the menu to look like this:
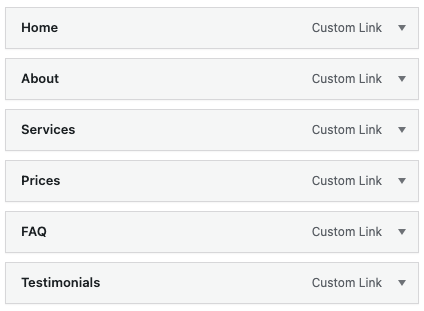
Make sure that you change all the link types into Custom Links. Also, every custom link needs the appropriate CSS ID as we defined in step #3.
Once you have done the changes to the menu, save the changes by clicking on the Save Menu button on the bottom right.
Make It Sticky!
To enhance the user experience, you can make a sticky header/navigation with Elementor. In this case, the header area stays put while you scroll down the page.
- Hover over the header (or menu) area and click on the Edit Section icon:

2. Go to the Edit Section window on the left, then choose the Advanced tab.
3. Under Motion Effects, make sure you have set the following settings:

Make sure to test the sticky menu to see how well it works across different devices. Also, be prepared to adjust your header design accordingly to enhance the user experience.
For instance, in my sticky header, I noticed that I needed design changes, as the menu became very difficult to read when scrolling the page.
6. Build a Header
While you have many ways to create a header with Elementor, we’ll pick an existing template design and work on that.
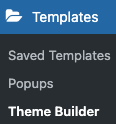
In WordPress admin, go to Templates > Theme Builder:
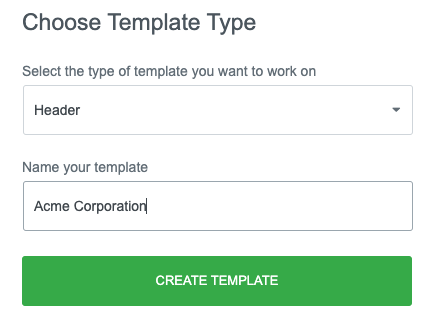
At the top of the page, click Add New. In the next view, choose the Template type as header and give the template a name. Once you have set those values, click the Create Template button:
In the Library view, you can see all the available templates. In my case, I chose this one:
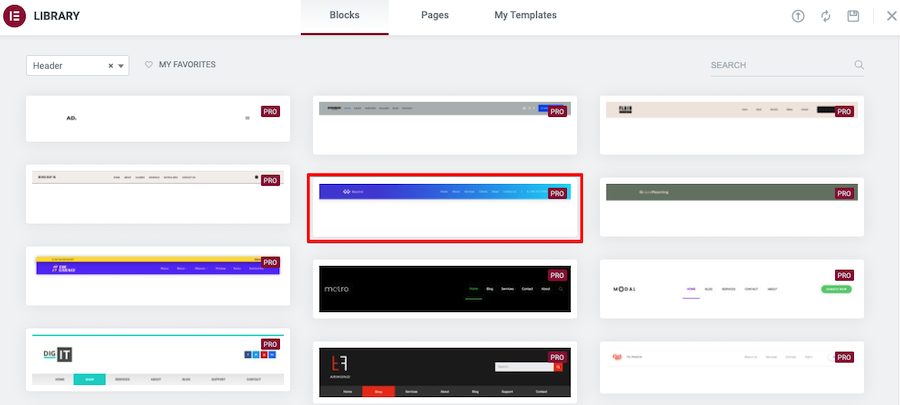
Just hover your mouse over the preferred template, and click the appearing Insert link. After this, the header opens in edit mode.
Here, I have modified just three parts of the template.
First, I changed the logo of our fictitious Acme Corporation by hovering over the graphic and clicking the pen icon:
On the left, you can now see the Edit Image panel. There, hover over the image and click Choose Image:
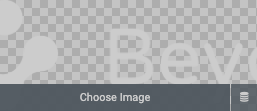
Finally, pick your logo from the WordPress media library or upload it from your computer.
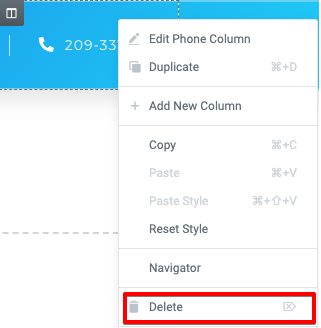
Another tweak to the header is to remove the phone number displayed on the right. So hover the mouse over the number, right-click with your mouse, and choose Delete:
Once you have done the design tweaks, click the Publish button at the bottom-left:

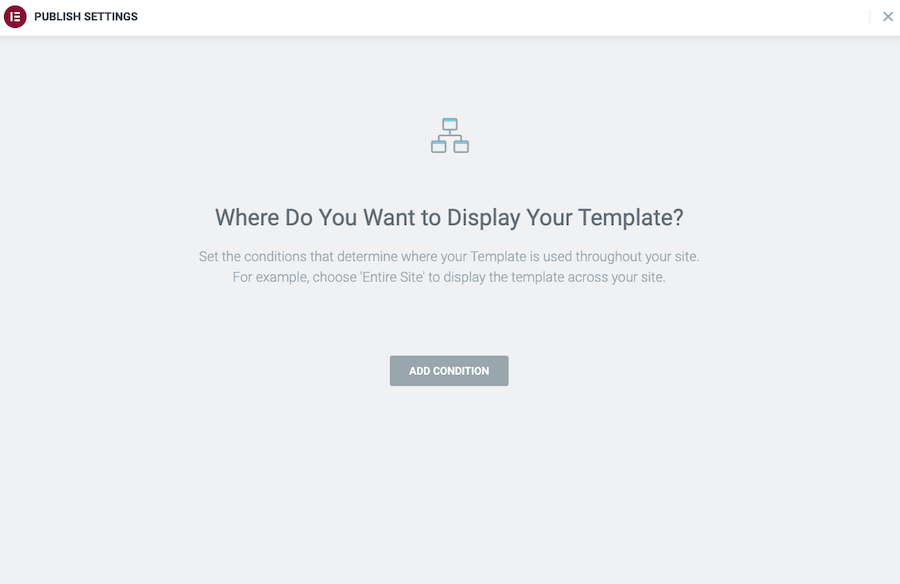
On the next screen, you have to define where you are going to display the new header.
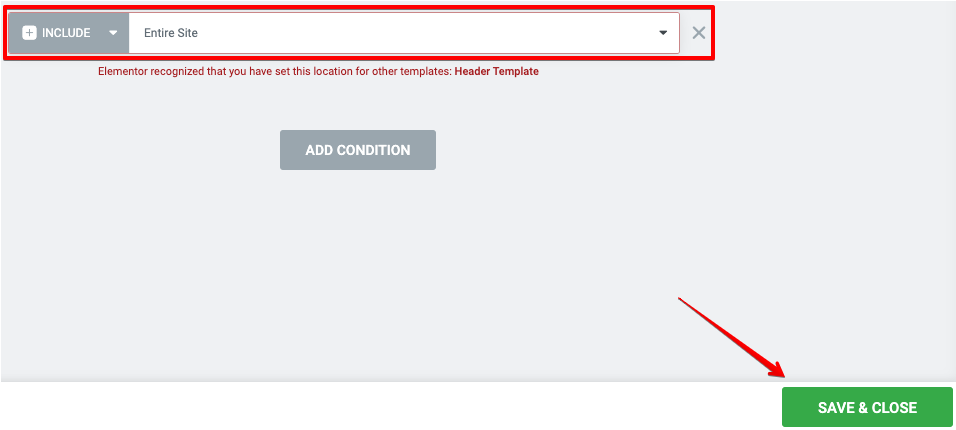
Just click the Add Condition button:
Make sure the Entire Site is selected, then click the Save & Close button:
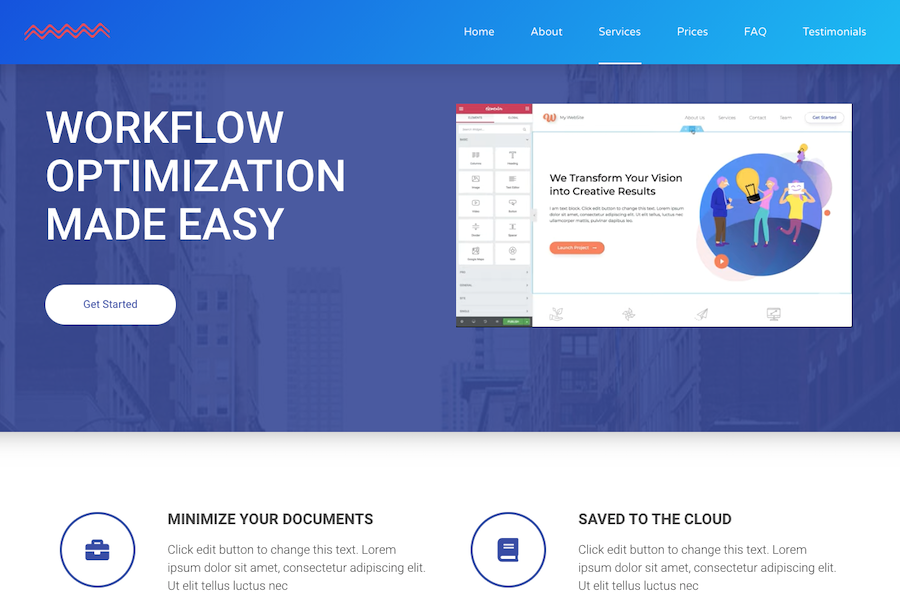
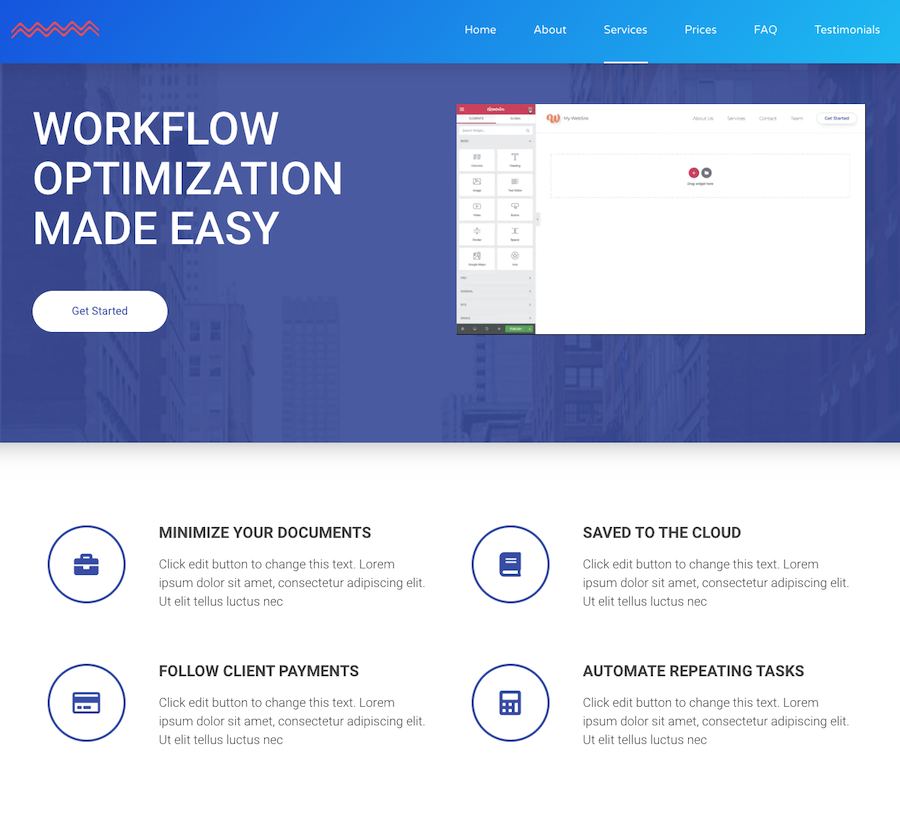
When you preview the site, it looks like this:
7. Build a Footer
Building the footer works the same way as in the header.
In WordPress admin, go to Templates > Theme Builder:
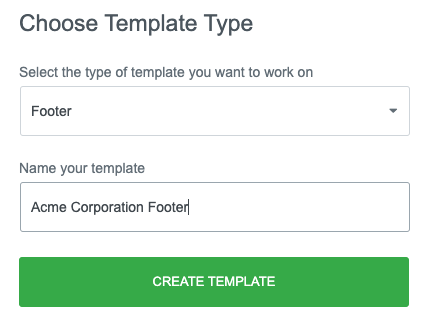
At the top of the page, click Add New. In the next view, choose the template type as Footer. Then, click the Create Template button:
In the Library, pick the footer design you like, hover over the preview image, and click Insert:
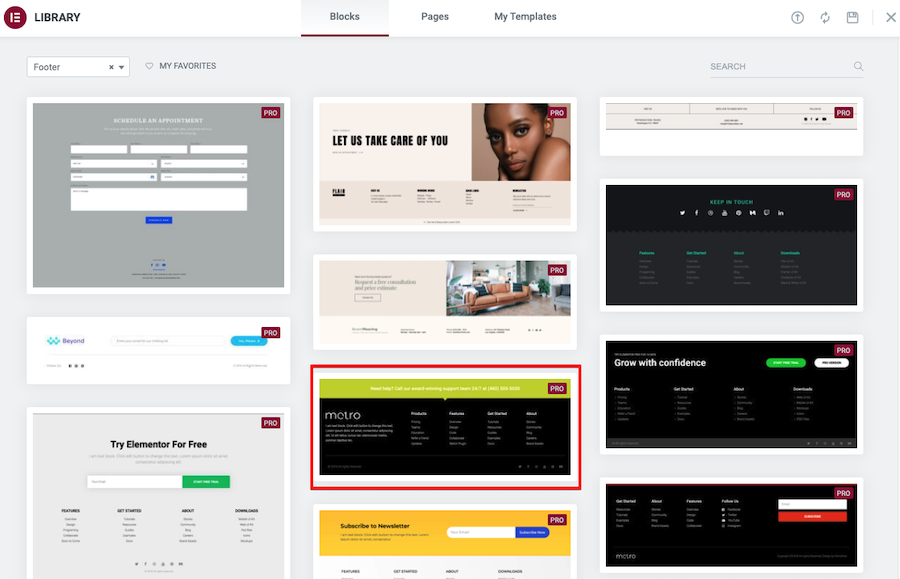
Then make the necessary adjustments to the template. And once you are ready, click the Publish button.
On the next screen, you have to define where you are going to display the new header.
Just click the Add Condition button and make sure that the Entire Site is selected:

Finally, click the Save & Close button to save your changes.
8. Add New Sections
When you build websites with Elementor, you’ll often have to add new sections to your pages.
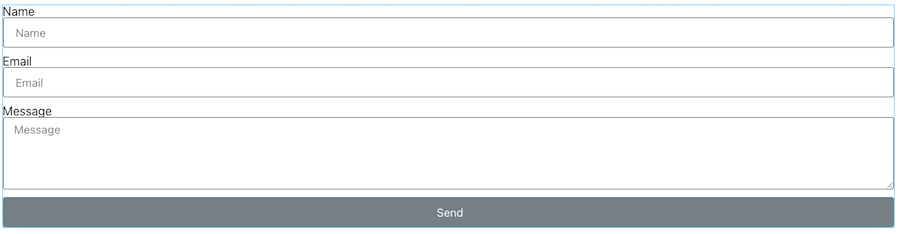
For instance, our website doesn’t have a contact form yet, and the user cannot contact our company at all. So for the contact form, you’ll have to add a new section to your one-page website.
I will show you how to create a new section and add the form, but I’ll leave the form configuration to you as an exercise.
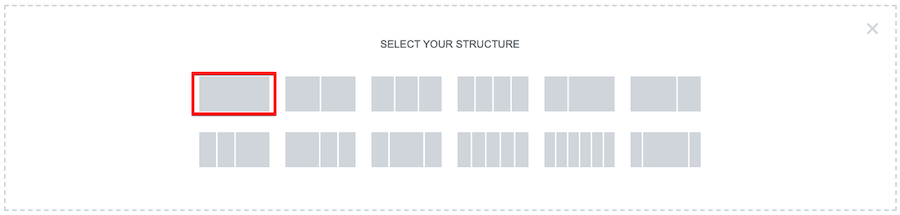
Just before the footer, click on the Add New Section icon:

Then pick the best section for the situation:
Drag the form from the Elements list to the new section. When you do that, the section turns blue:
You can then configure the new section with these steps:
- Give the section a CSS ID value.
- Add a new navigation item at the top menu. Link the item to the new section.
If you are unsure how to do the previous tasks, refer back to step #4 in this tutorial.
9. Finalize the Settings
There are still some steps left to do before you can announce the new site to the world.
First, on the Elementor editor, click the Publish button at the bottom-left corner. This action ensures that your website moves from a draft state to published.
Then, go to the WordPress admin panel and Settings > Reading. In the reading view, set the newly published page as the front page of your website:
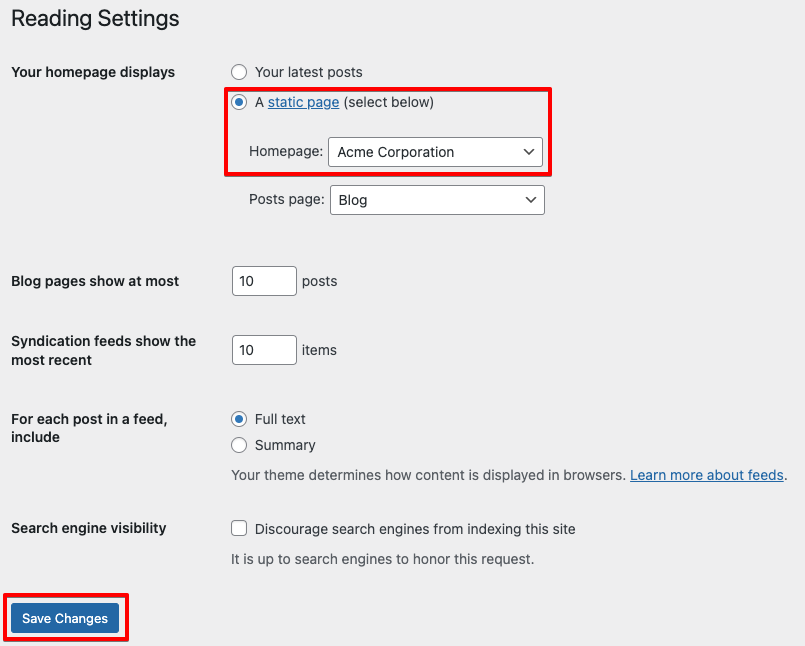
Finally, click the Save Changes button to confirm the change.
When you visit your website, it loads as a one-page website:
10. Test, Test, Test!
This step may be daunting, but you still have to do it. With proper testing, for instance, you ensure that your website works flawlessly with every device.
To check your site with various devices, take a look at these icons on top:

The desktop mode is selected by default. But you can easily switch between smartphone and tablet modes by clicking any of the icons.
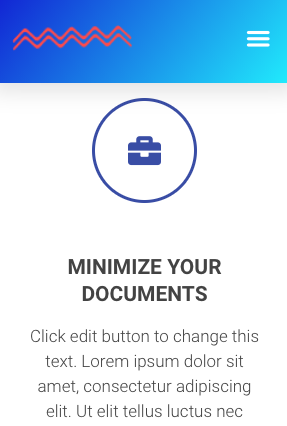
For instance, this is how our site looks on tablet:

And this is how the site looks on a smartphone:
Lastly, check the navigation to see that it works as expected and all the content and elements are in place.
You are now a proud owner of a one-page website. Hooray!
One Page Website with Elementor: The FAQ
- Is the one-page website the same as a landing page?
While there are some similarities between these page models, they are still different.
For example, a landing page focuses on a specific type of content, like selling a product or a service. In contrast, a one-page website is your entire site with all the content on one page.
- How do I make a one-page website for free?
Install the free version of Elementor. Then install the Elementor – Header, Footer & Blocks Template. This plugin is also free.
Please keep in mind that even if the page-building tools are free, you still have to pay for web hosting and domain registration.
- Which themes are compatible with Elementor?
It would be tempting to say every theme is compatible with Elementor. But as the Elementor team says, their page builder is compatible with most of the themes. Before using a theme, make sure to check the Elementor compatibility from the theme developer first.
- Should I build a one-page website?
No matter which page infrastructure you choose (one-page or multi-page), there are both pros and cons to it. In your case, you have to consider the business needs carefully before making a final decision.
For instance, one-page websites are easier to use from a visitor’s perspective since everything is on one page. Then again, if you want to build a blog, the traditional website works much better in that scenario.
The Conclusion
In this tutorial, I showed you how to build a one-page website with Elementor Pro.
Although there were many steps, the overall process was relatively simple. Especially if you take advantage of the ready-made templates, you will get your one-page up and running in no time.
Now over to you:
Have you built a one-page website with Elementor? Do you have any tips or tricks that you’d like to share with us?
If so, leave a comment below.
Leave a Reply