WordPress Landing Page: How to Build One With 3 of the Top Plugins

If you’re looking for an effective and easy way to build a WordPress landing page then you’re in the right place! 👏
In this guide, we’ll introduce three of the best plugins that will help you craft an awesome landing page and then show you how to build your landing page in each.
The lineup for today is Elementor, Divi, and Thrive Architect.
Why these WordPress landing page plugins?
If you do even the slightest amount of research online, you’ll quickly find out that there are more WordPress landing page plugins than you can shake a stick at. There are literally tens of solutions on both the free and paid ends of the spectrum. So why did we select Elementor, Thrive Architect, and Divi for this post?
This all comes down to what each of these plugins represents:
- Elementor is the most popular free page builder plugin for WordPress. It has a user base of over 5 million people and delivers an exceptional range of free features. This makes it the best solution for those who want to keep things on a budget. 💸
- Divi is one of the most popular page building frameworks for WordPress overall. The Divi package includes not only a page builder plugin but also a whole WordPress theme based on the same page building engine. Plus, you also get access to additional plugins and templates for the same subscription fee. It’s the best solution for users who want to build their whole website with one tool rather than use a combination of different themes and plugins. 💪
- Thrive Architect bridges both worlds with a bit more focus on the business side of things – letting you build landing pages and sales pages specifically. This can be your solution if you’re a bit more conversion-focused and the main thing you want from your website tools are measurable business results. 📈
👉 Pick your go-to plugin based on the info above and see how to build a great WordPress landing page with it below:
- How to build a landing page with Elementor
- How to build a landing page with Divi
- How to build a landing page with Thrive Architect
How to build a landing page with Elementor
Here are the steps:
- Install Elementor
- Create a new landing page with Elementor
- Customize your landing page with Elementor
- Add new content to the landing page
- Save and publish your landing page
Step 1: Install Elementor
Elementor is a plugin that you can easily install via the WordPress dashboard. Log in and go to Plugins → Add New.
Enter “Elementor” into the search box. You’ll see the plugin on the list. Click on the Install Now button and then on the Activate button when it appears.
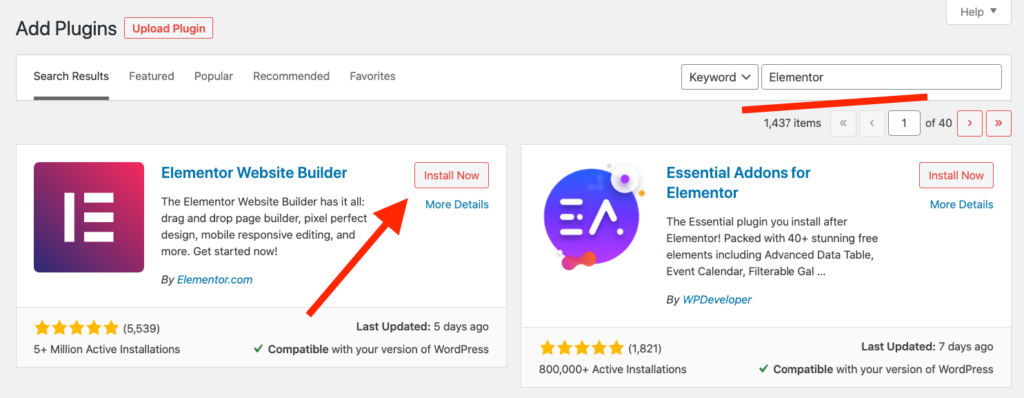
Later on, you can also get the pro version of Elementor, which comes with additional features and content blocks you can put on your landing page.
Step 2: Create a new landing page with Elementor
Start working on your landing page normally. Go to Pages → Add New. Click on the Edit with Elementor button that’s at the top.

This will open up the main Elementor interface.
At this stage, you can do your work in two different ways:
- either start from scratch and build your landing page element by element
- start from a template and modify it to suit your needs
I’m a fan of the second approach since it’s easier for a beginner to handle. To start, click on the directory icon in the center, this one:

You’ll see Elementor’s catalog of ready-made templates. Pick one that you like and click on the Insert button next to it. When selecting a template, pick something that matches the overall purpose of your landing page.
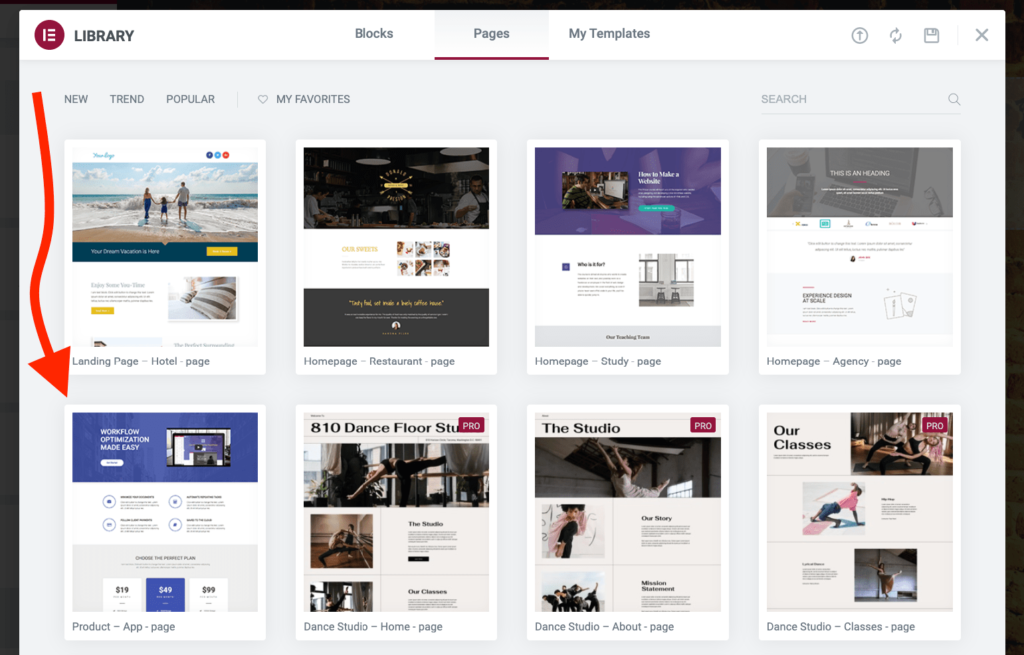
Don’t worry about the landing page not looking 100% ideal. We’re going to modify it in the next step.
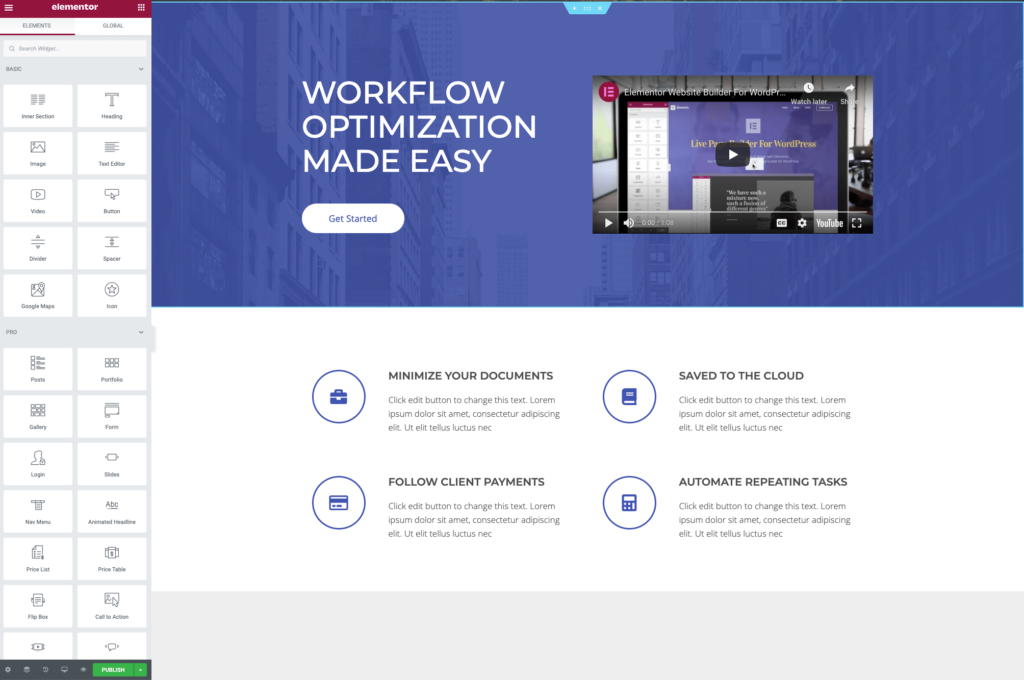
Step 3: Customize your landing page with Elementor
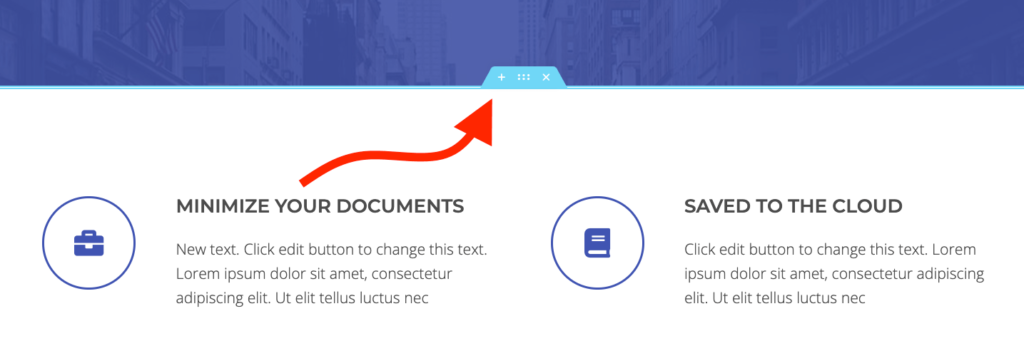
The first thing that you’ll want to do is realign the sections that are on the page already. You can do that by grabbing onto the six-dot icon at the top of each section and dragging it up or down the page.
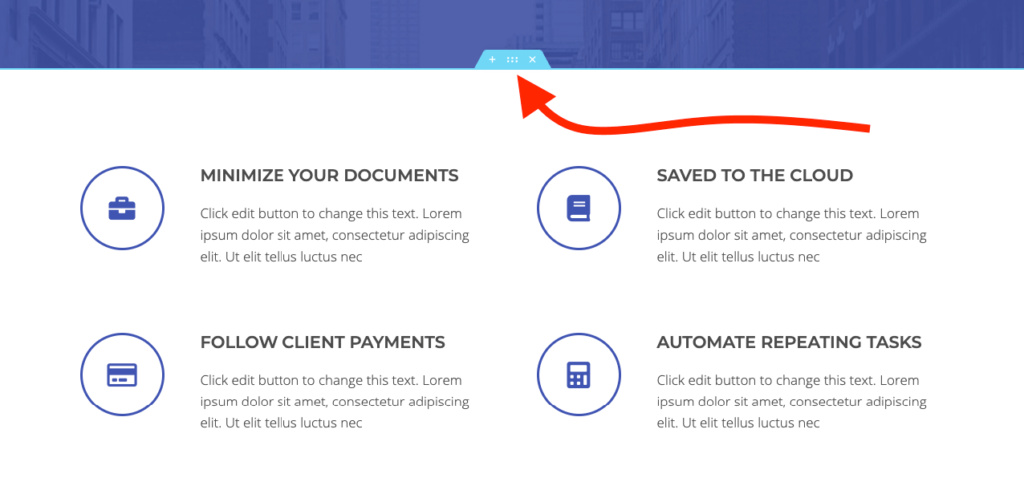
In case you don’t need some of these sections, you can click on the “X” icon next to the six dots and delete the whole thing.
Editing any of the content that’s on the page is easy as well. Just click on anything that you want to modify. You’ll see the editing interface appear in the sidebar.
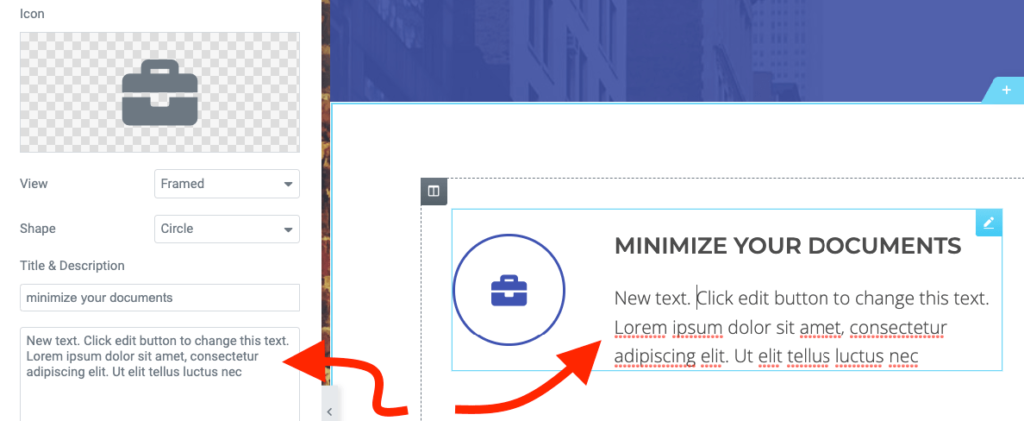
The same goes for any icon or graphic you might want to replace. You can see a toolbox icon in the image above. Clicking on it will bring up the icon library where you can select from hundreds of stock icons.
You can replace any of the images that are on the page in the same way. Click on the image and then replace it through the sidebar.
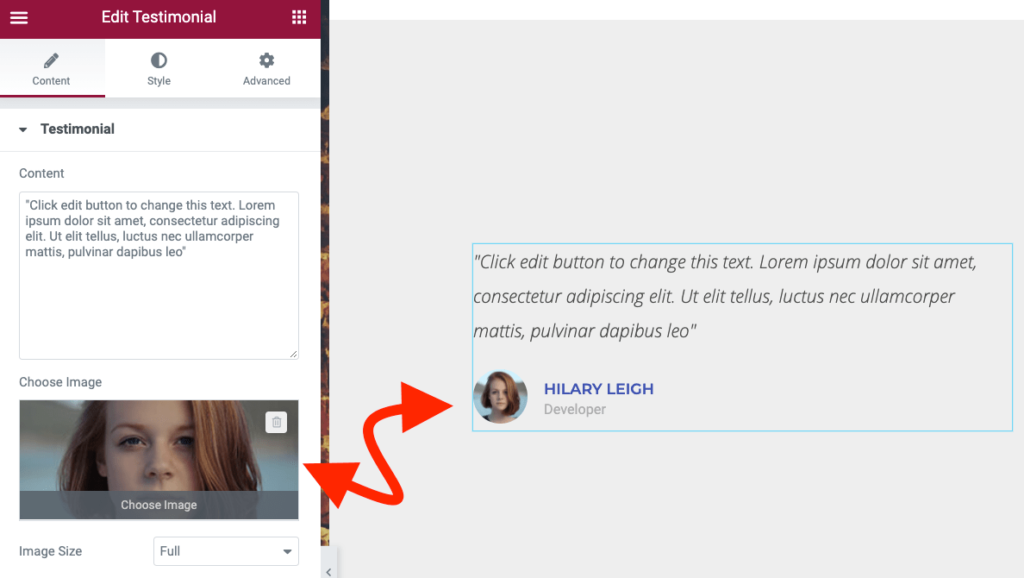
Another key thing you’ll most likely want to do is adjust the styling of each section – things like colors, backgrounds, and fonts.
To do that, click on the same six-dot icon above the section that you want to adjust. Then, from the sidebar, click on the Style tab.
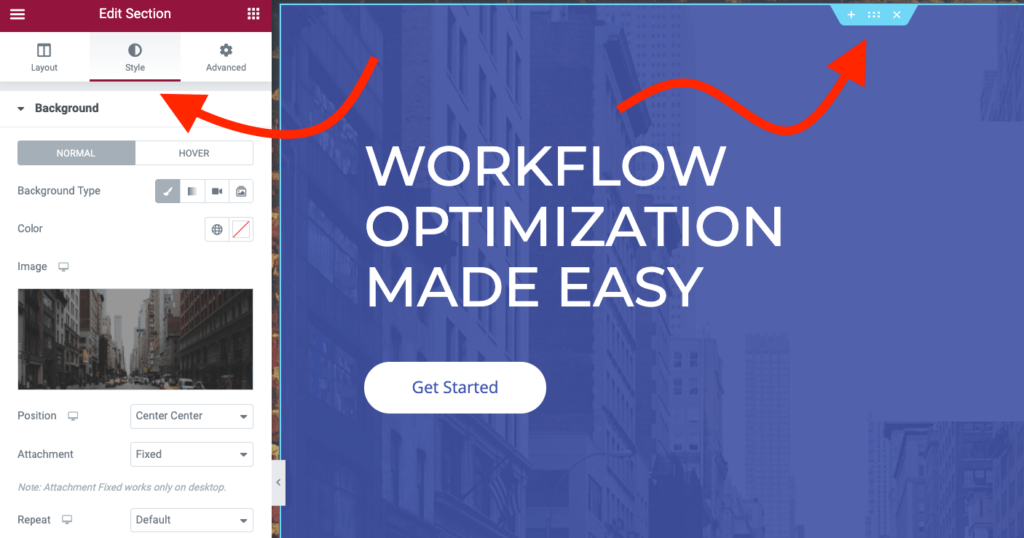
This is where you can set things like:
- the background of the section
- background overlay
- borders
- typography
Making adjustments here is pretty easy to grasp. Go through each option in the sidebar one by one and see its effect on the page preview.
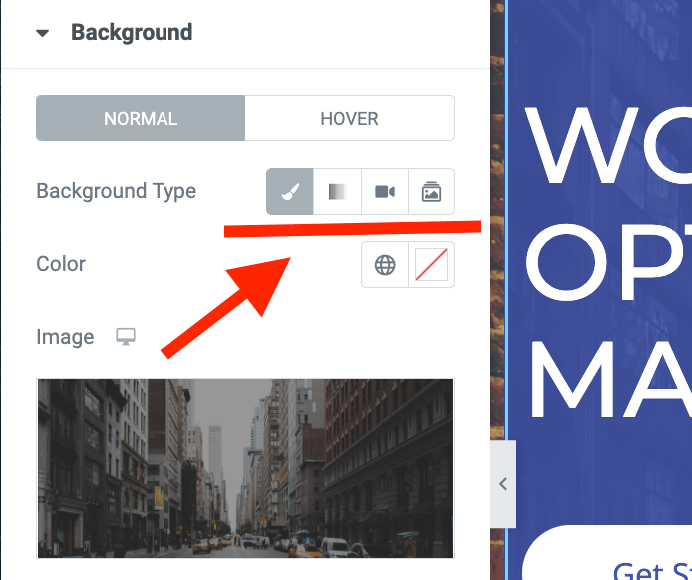
One great thing about Elementor that has a huge impact on your landing page’s appearance is the possibility to set not only solid-color backgrounds but also gradients, image backgrounds, slideshows, or even video backgrounds.
Step 4: Add new content to your WordPress landing page
Editing what’s already on your WordPress landing page is not the only thing you’ll want to do. Elementor also allows you to pick from a catalog of content blocks, which you can freely add to your page.
To do that, click on any of the “+” icons next to the six-dot icons.
When adding a new section, first select the section layout that you like – basically, pick the number of columns you want. Then, click on the new “+” button that’s in the center. You’ll see your choice of new content blocks in the sidebar. There’s a lot to choose from here, and even more if you’re on the pro version of Elementor.
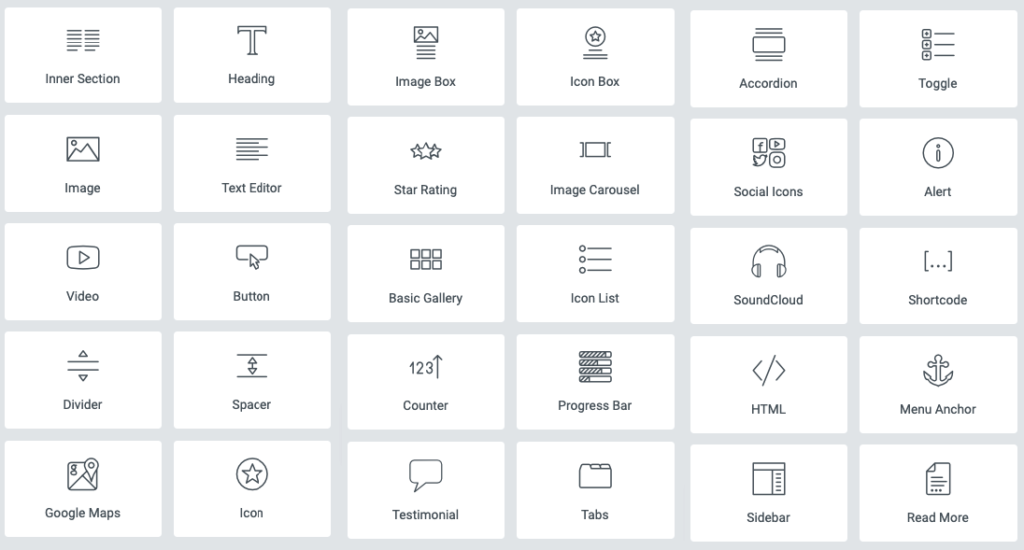
Depending on the block you’ve selected, you’ll see a different set of options. Click on the six-dot icon to view them.
You’ll find the main settings in the Layout tab and the looks-related things in the Style tab. You can add as many elements to your landing page as you want. Adjusting them works through the same interface, too. Experiment with what’s there until your landing page looks like you want it.
Step 5: Save and publish your landing page
The last step is to publish your landing page. To do this, click on the Publish button that’s in the bottom left corner.

And that’s all! Your WordPress landing page is now live! 🍾
How to build a landing page with Divi
Here are the steps:
- Install Divi
- Create a new landing page with Divi
- Customize your landing page with Divi
- Add new content to the landing page
- Save and publish your landing page
Step 1: Install Divi
First, you must decide which version of Divi you want to use:
- the Divi theme – comes with classic WordPress theme elements, plus a visual website builder
- the Divi Builder plugin – just the visual builder on its own
If you’re planning to keep your current WordPress theme and just add some new landing page building functionality to it, you should go with the Divi Builder plugin.
Both the theme and the plugin are available under the same subscription fee – $89 / year.
In this guide, we’re going to use the plugin. To install Divi Builder, you first have to download it from your customer profile at Divi’s website.
Then, go to Plugins → Add New in your WordPress dashboard. Click on the Upload Plugin button and select the Divi archive from your desktop. Click on Install Now.
Uploading Divi to your server can take a minute since it’s a large file. You’ll see the following screen when it’s done:

Click on Activate Plugin to complete the process.
Step 2: Create a new landing page with Divi
Start building your WordPress landing page by going to Pages → Add New. Click on the Use Divi Builder button that’s in the center.
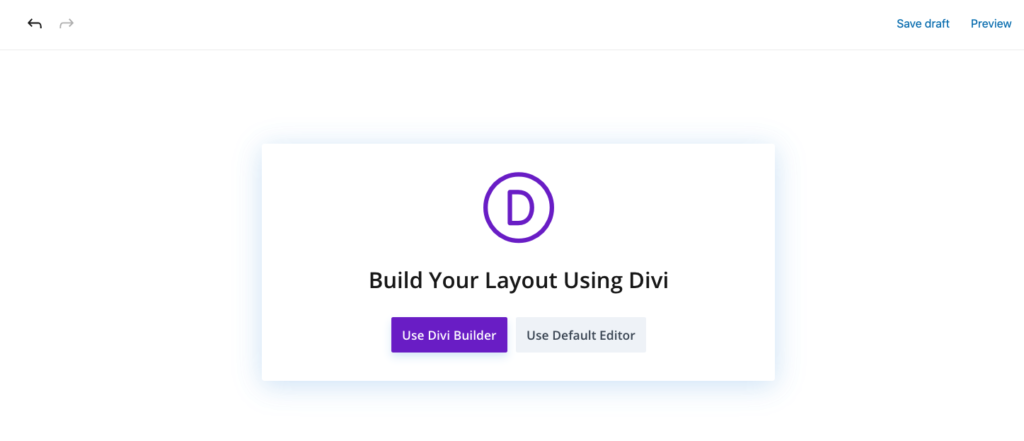
A quick onboarding tour will pop up. Check it out to see how to navigate Divi’s basic interfaces.
Divi allows you to build a new landing page in three main ways:
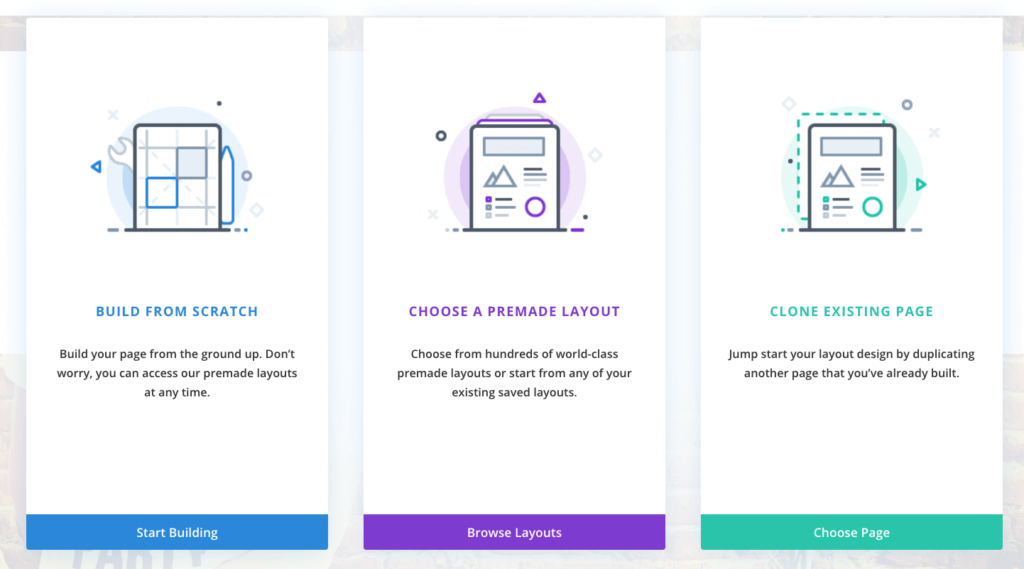
The most effective path is to go with a ready-made template and then modify parts of it to make that WordPress landing page fit your needs.
To begin, click on the middle block and choose from a pre-made layout. Divi comes with hundreds of templates, categorized based on niche and purpose.
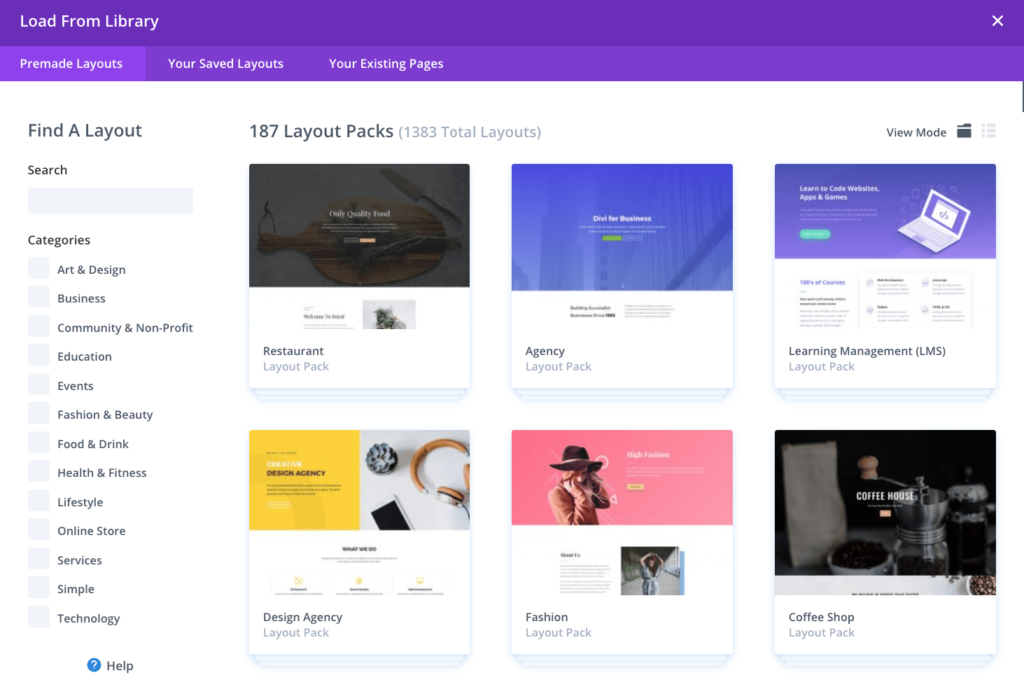
Once you pick any of the layout packs, you’ll see all the individual templates that are part of it.
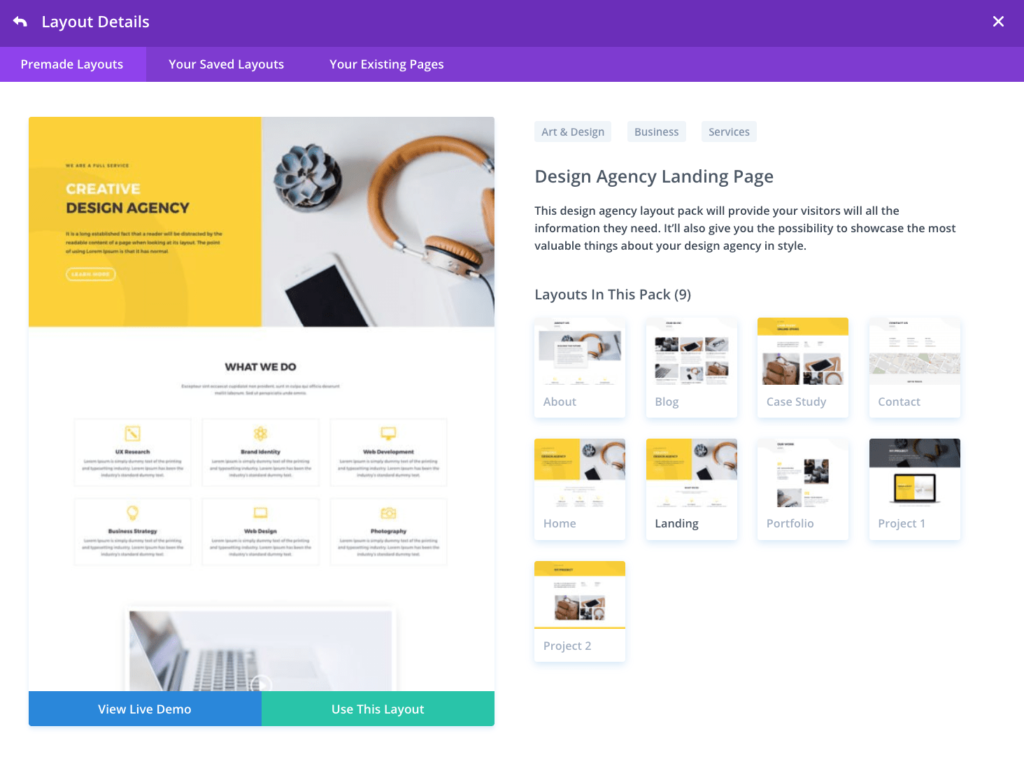
To import a template, click on the Use This Layout button. The import can take a minute. When it’s done, you’ll see your WordPress landing page’s current design in all its glory. Now let’s customize it!
Step 3: Customize your landing page with Divi
The first thing you might want to do is realign some of the sections on the page. To do it, grab onto the blue-arrows icon in the top left corner of the section that you want to move, and then drag it up or down the screen.

Any section can also be deleted by clicking on the trash can icon that you can see in the screenshot above.
To edit any text, just click on it and begin typing. In the same place, you can also style your text by adding bold or italics, changing the color, and so on.

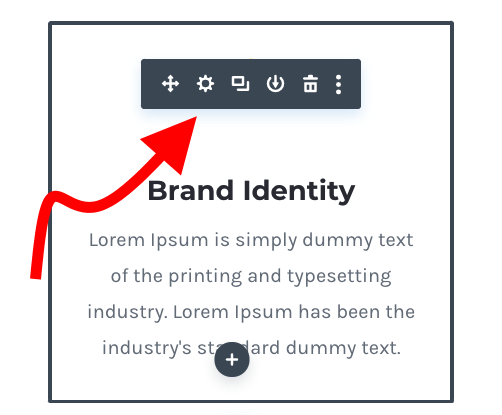
Replacing images or icons is done in a very similar way. Click into the block that contains the image/icon, and then click on the black gear icon next to it.
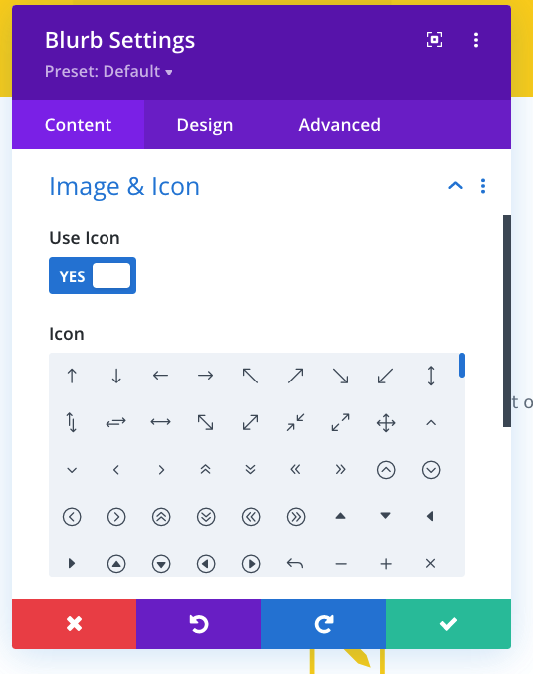
This will open up a new editing panel. Scroll to the tab labeled Image & Icon. You can select your new icon from the list.
You’re also not stuck with the styling of any of the elements that have come with your pre-made WordPress landing page template. Anything can be tweaked.
Look for the gear icons next to any section or any individual block of content on the page. After clicking on it, a new window will pop up. This is where you can do all your customizations.
There are three tabs available. The second one – Design – is where you can find most looks-related options.
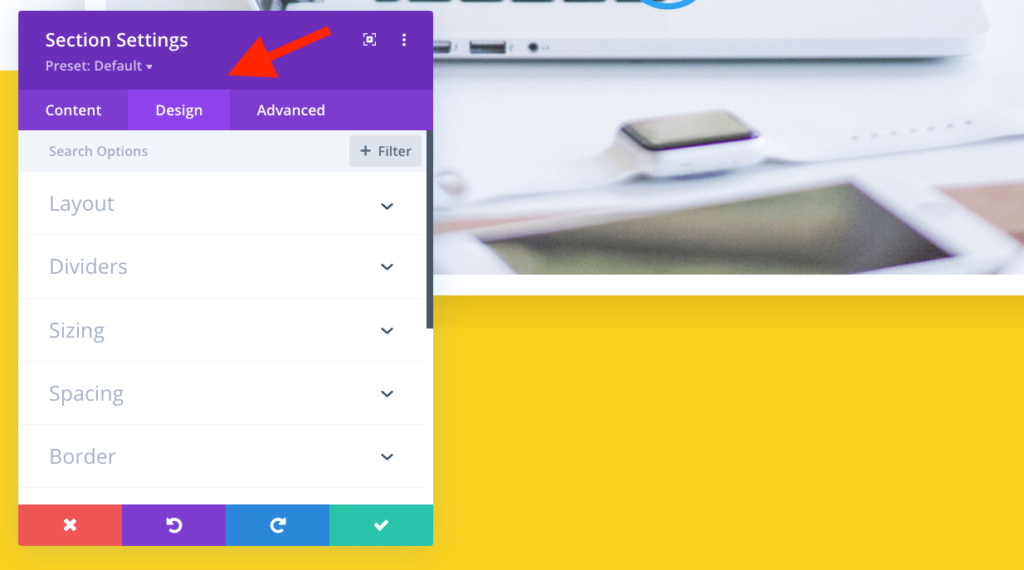
Some of the things you can edit here:
- the layout of the element in question
- widths, heights, and other sizing settings
- borders
- shadows
- animations (fade-ins, bounces, zooms, and more)
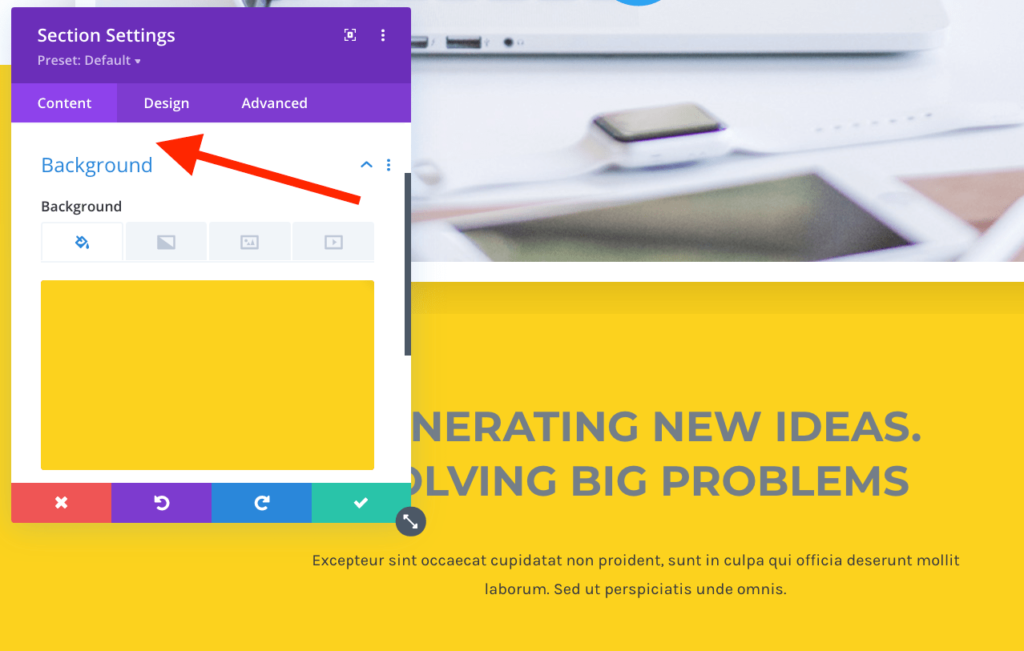
If you want to change any element’s background, this can actually be found in the Content tab. Divi supports solid color backgrounds, gradients, images, and even videos.
Step 4: Add new content to your WordPress landing page
Most of the time, you’ll also want to add new elements to your landing page. You can do that by clicking on any of the “+” buttons either between the existing sections or at the very bottom of the page.
You get a choice of a couple of section types.
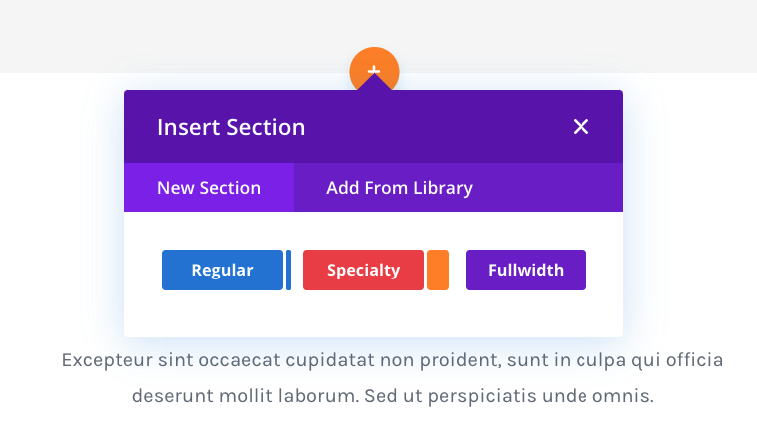
Click to see what the differences between them are, but in general, every section type can house all kinds of content.
With the section type selected, you will be able to pick from Divi’s many individual content blocks.
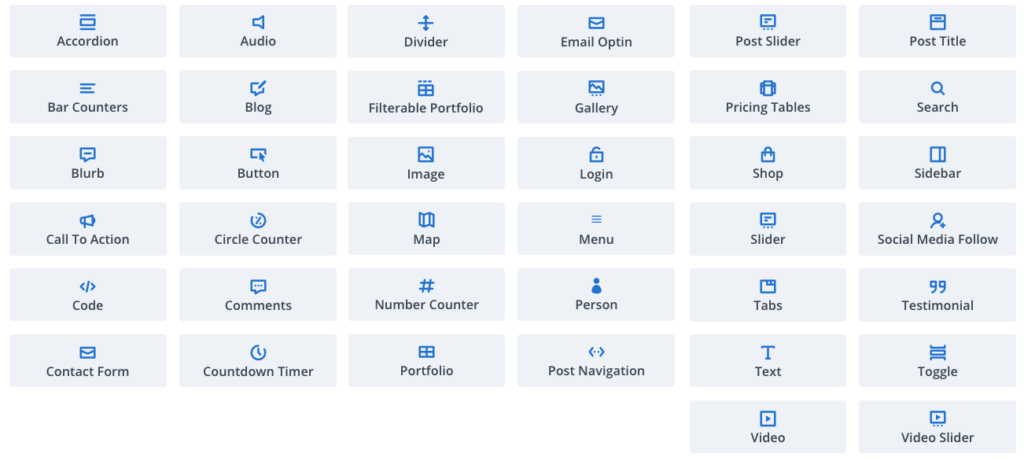
After selecting any of them, you’ll see a window that’s similar to the ones we’ve seen before – you can adjust the new block’s styling and content here.
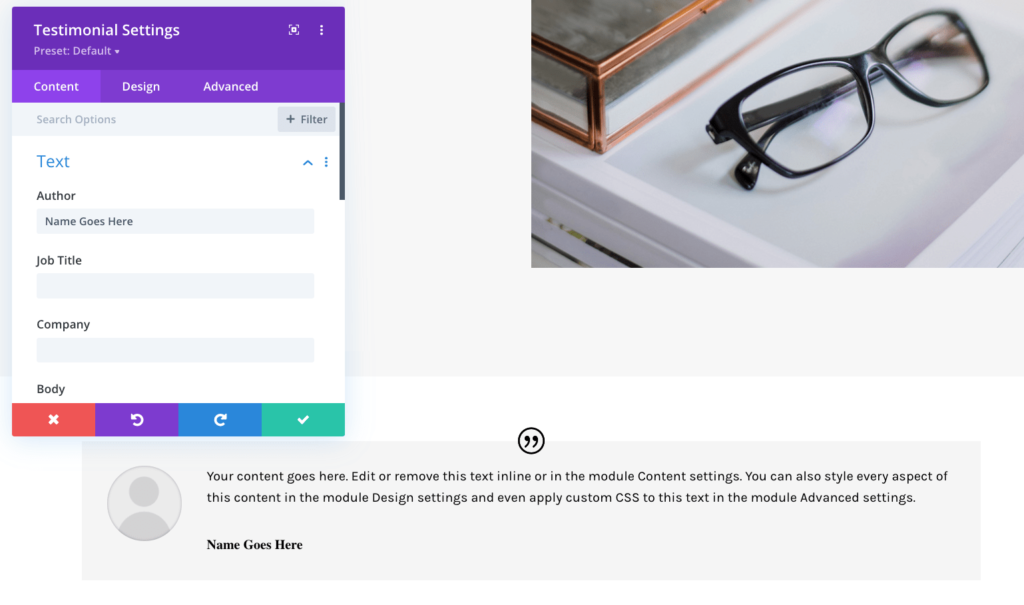
Experiment with what’s available. You can add any number of content elements to your WordPress landing page and then customize them accordingly.
Step 5: Save and publish your landing page
When your work is done, it’s time to publish the new landing page. To do this, click on the three-dots icon at the bottom of the screen and then on Publish.

And that’s all! Your WordPress landing page is now live! 🍾
How to build a landing page with Thrive Architect
Here are the steps:
- Install Thrive Architect
- Create a new landing page with Thrive Architect
- Customize your landing page with Thrive Architect
- Add new content to the landing page
- Save and publish your landing page
Step 1: Install Thrive Architect
Thrive Architect is available either as a standalone plugin or part of the larger Thrive membership (giving you access to eight more tools and plugins):
- Thrive Architect on its own starts from $67 / year
- Thrive membership is $19 / month
No matter which you choose, installing Thrive Architect works the same. Go to your customer profile and download the Thrive Product Manager plugin.
Once you have it, go to Plugins → Add New in your WordPress dashboard. Click on the Upload Plugin button and select the plugin’s ZIP from your desktop. Click on Install Now.
When the file finishes uploading, click on Activate Plugin.
In your WordPress dashboard sidebar, click on Product Manager and proceed according to the prompts to validate your website.
Next, click on Install product next to Thrive Architect.
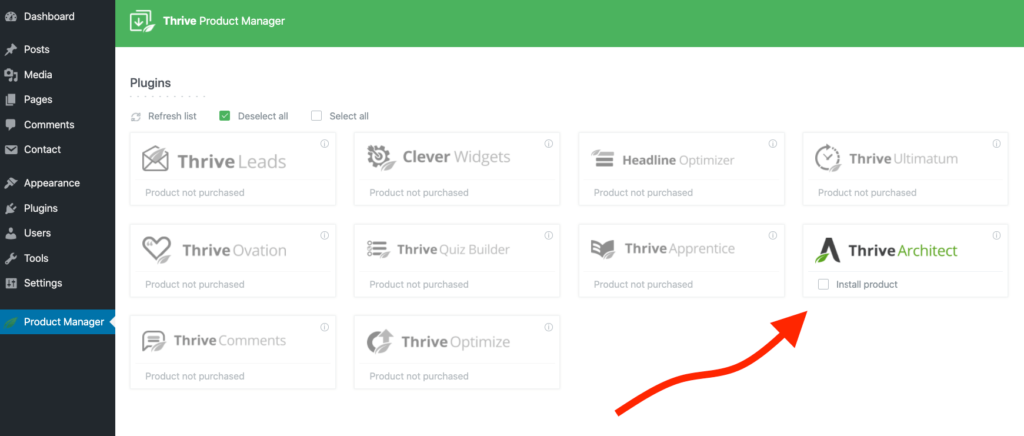
The installation should take less than a minute.
Step 2: Create a new landing page with Thrive Architect
To start working on your landing page, go to Pages → Add New. Click on the big Launch Thrive Architect button.
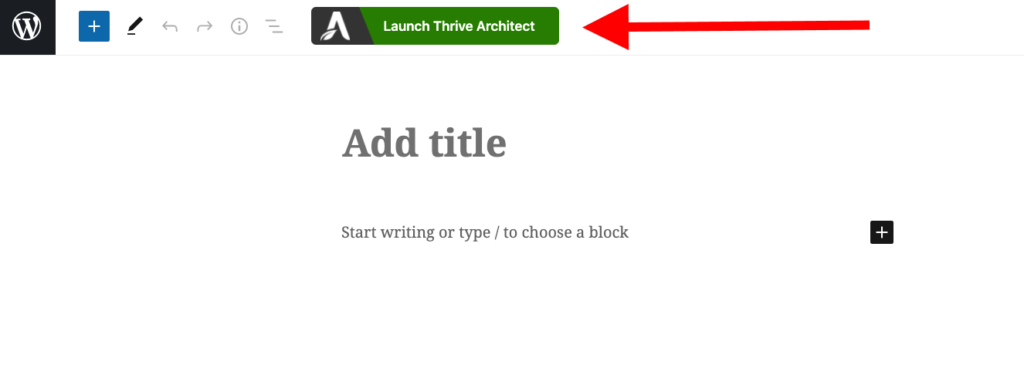
Thrive Architect already knows what you probably want to build, so it’ll suggest getting started with a pre-made landing page.
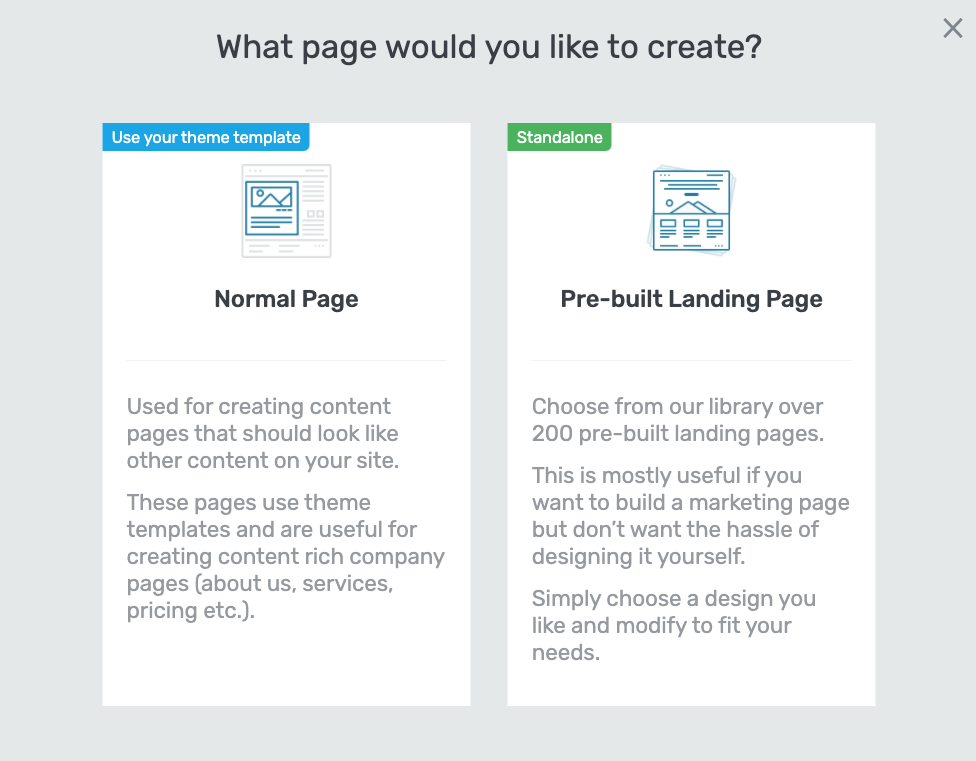
Thrive Architect has 60+ modern landing page templates in the catalog (called smart landing pages) and more than 200 legacy landing pages (older creations).
The smart landing page directory has many interesting designs that fit different niches and purposes (sales, email promo, etc.).
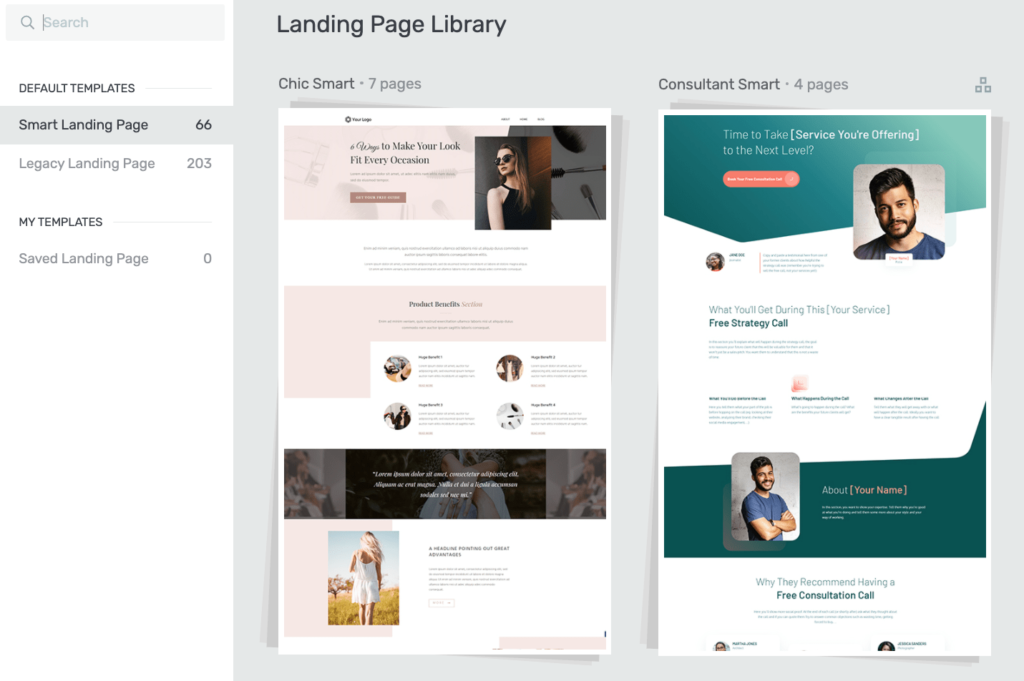
Each landing page template is actually a collection of a handful of individual landing pages that can be displayed at different stages – for example, the main landing page, the “thank you” page, the confirmation page, etc.
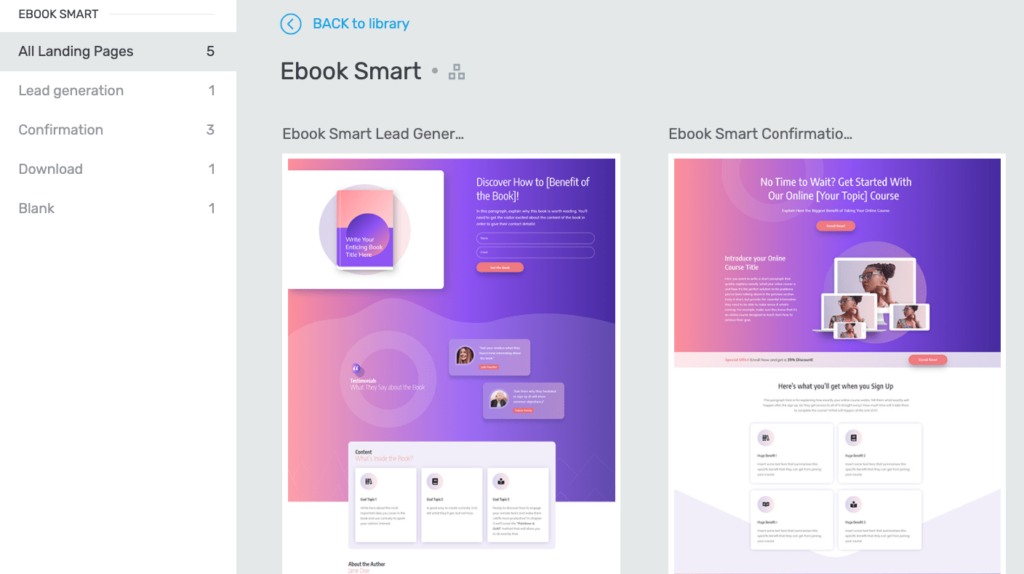
You can import a landing page design that you like by clicking on it and then on the Apply Template button.
Step 3: Customize your landing page with Thrive Architect
The Thrive Architect interface offers a lot of options and controls for different things on the page. You can access the landing page’s main settings in the right sidebar, the customizations in the left sidebar, and then there’s the main canvas in the center.
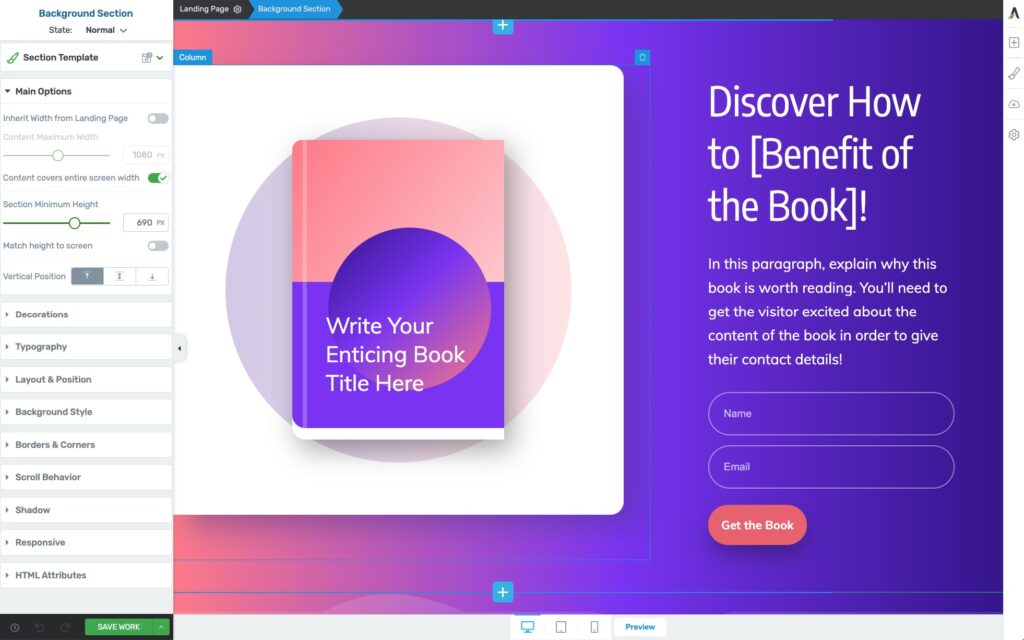
To realign any of the sections, just grab onto one of the arrows icons in the top right corner of the element, and drag it up or down the page.

You can also delete any section by clicking on the trash can icon (see in the screenshot above).
Text content can be edited by clicking into it and typing.

Any section or block also has its own set of settings and customizations. Just click into the block to see them.
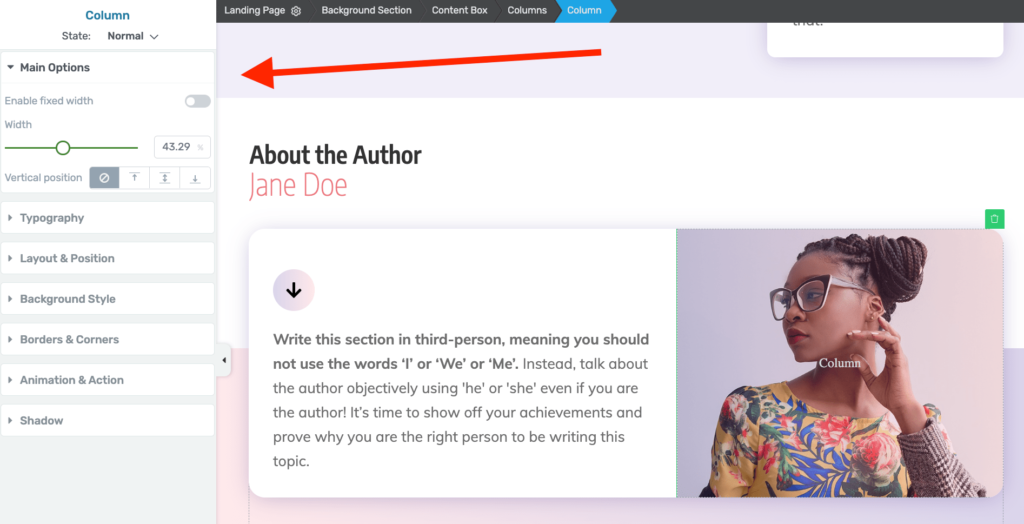
Depending on the block you’ve selected, you can adjust:
- general layout settings (widths and sizes)
- typography
- backgrounds
- borders
- animations
- shadows
- HTML attributes
- scroll behavior, and more
Step 4: Add new content to your WordPress landing page
Thrive Architect comes with tens of different content blocks that you can add to your WordPress landing pages. You can pick your block after clicking on the “+” button in the right sidebar.
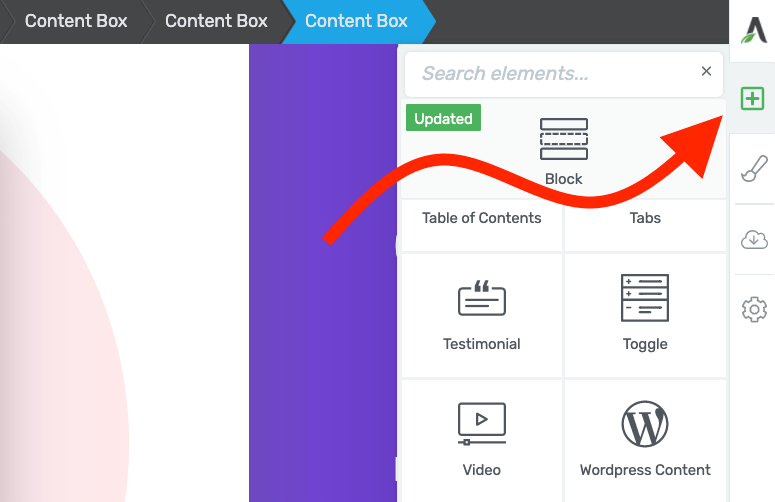
The content blocks you’ll find here should be more than enough to satisfy any landing page needs.
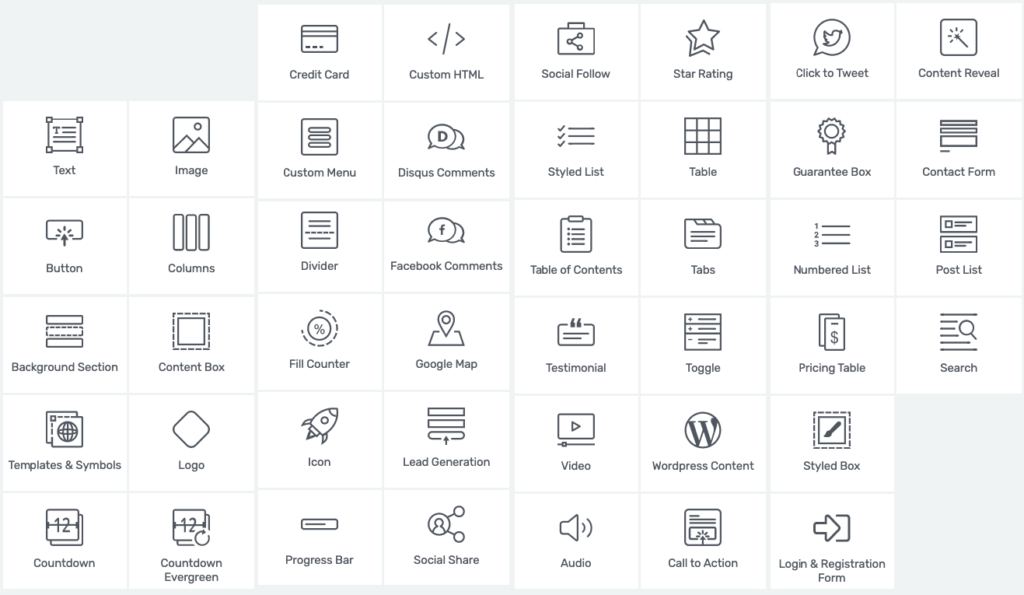
You can add them to your page either by dragging and dropping them into place or just clicking on them in the sidebar, in which case they’ll be added at the bottom.
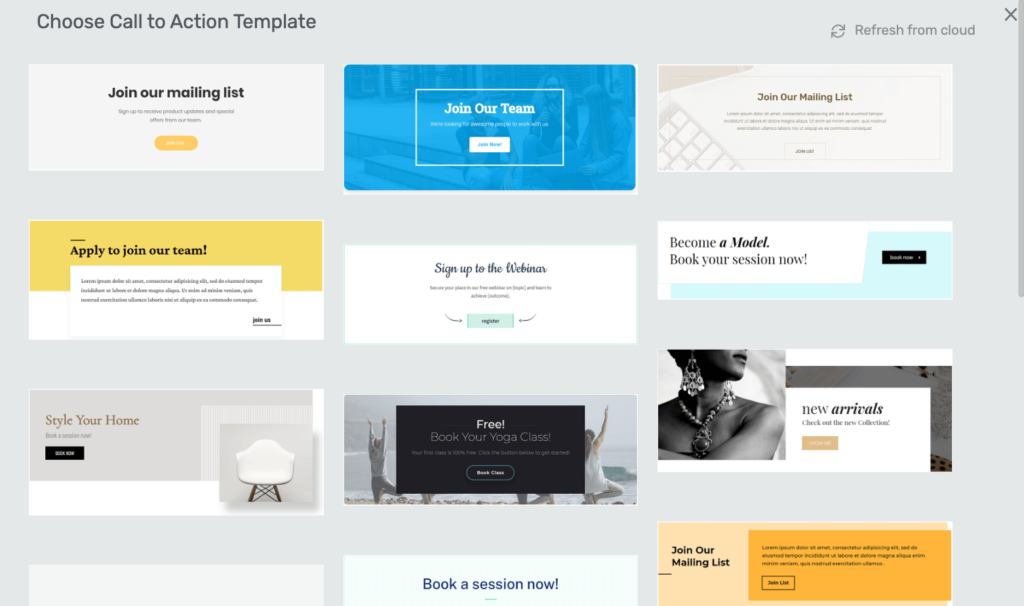
For some types of blocks, you’ll be able to select from some pre-made designs of the block itself. Here’s what this looks like for the call to action block:
To customize your new block, click on it to see the options available.
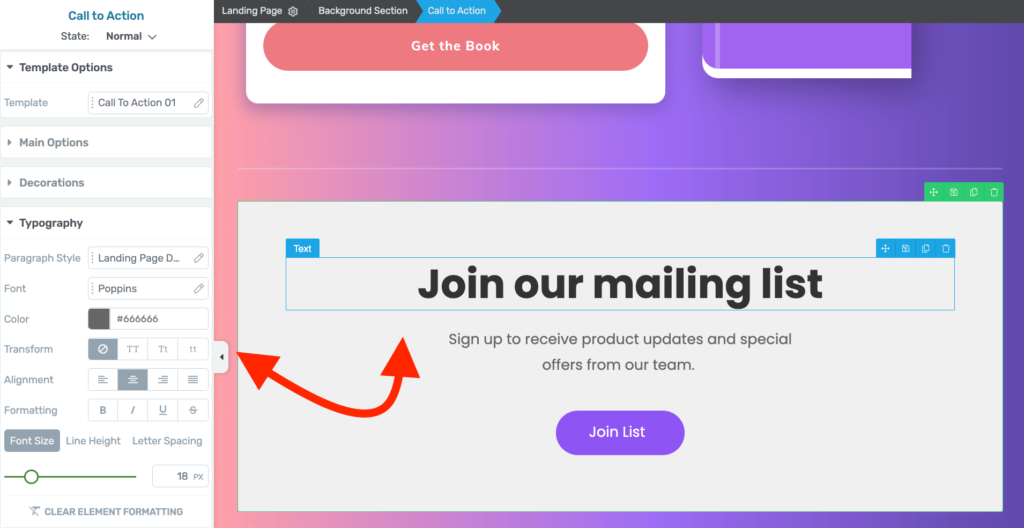
When working on your WordPress landing page, it’s best to go through the available content blocks one by one and see what fits your landing page’s purpose.
Step 5: Save and publish your landing page
When you’re done, don’t forget to save your work. Click on the arrow next to the SAVE WORK button in the bottom left corner of the screen, and then click on Save and Return to Post Editor.
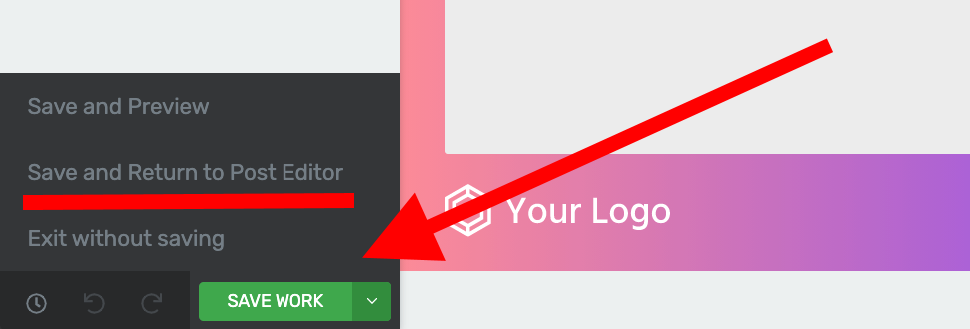
To publish your page to the public, click on the main Publish button in the WordPress dashboard.
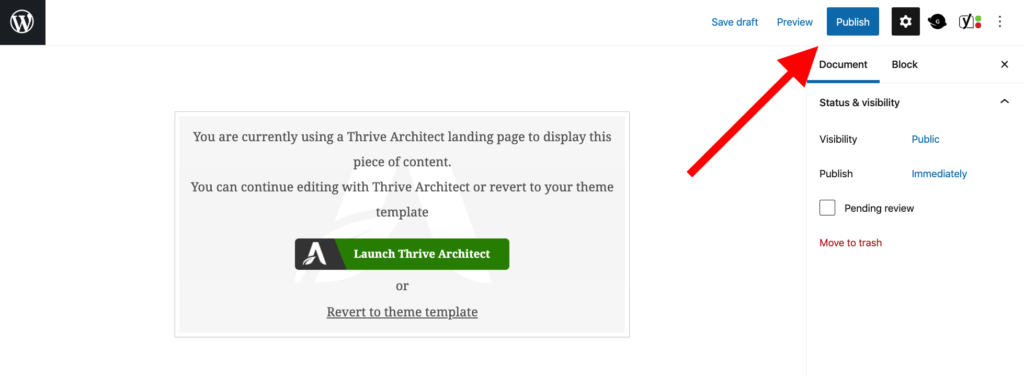
And that’s all! Your WordPress landing page is now live! 🍾
Summary on best WordPress landing page plugins
As you can see, each of these WordPress landing page plugins can do a very similar thing for you – let you build a beautiful and optimized landing page! The difference is in how each plugin delivers on this promise and the features available along the way.
- Elementor is the perfect solution for users on a budget who don’t want to spend anything on their landing pages. 💸
- Divi is great if you want to move to a whole WordPress design framework that can handle not only your landing pages but also the design of the entire site. 💪
- Thrive Architect is perfect for users who value results-oriented tools that bring not only the toolbox necessary to build a good landing page, but can also help you optimize that landing page and the experience users have with it. 📈
What do you think of these WordPress landing page plugins? Feel free to share which is your favorite one.

Really great article.
However, neither the Elementor Canvas or Elementor Full Width works for me. Canvas still continues to show navigation menus, while Full Width continues to show sidebars. I want a landing page with no sidebars. What should I do?
Be that as it may, neither the Elementor Canvas or Elementor Full Width works for me. Canvas still keeps on demonstrating route menus, while Full Width keeps on indicating sidebars. I need a presentation page without any sidebars. What would it be a good idea for me to do?
Disable menu and sidebar on your WordPress dashboard settings on the landing page you are creating.
Thank you!
However, when I choose Elementor Canvas then click on Edit with Elementor only a blank screen appears. Any suggestions?
Hello.
I have created a landing page which I do not want other website viewers to see. This is for advertisement purposes. I have not added it to my navigation menu for this reason. When trying to use the URL for that page as my final URL for my advert it is not found by google.
Please, any advice on what I can do?
Sorry I meant my page is not found by google