How to Create and Sell Courses in WordPress with LearnDash (Step by Step Guide)

Do you have a great idea for a course but don’t know how to put it online? If so, you should look at the LearnDash plugin, which helps you create and sell courses on the WordPress platform.
LearnDash is more than just a simple LMS (Learning Management System). It contains features like:
- Drag and drop course builder.
- Quiz tool for creating quizzes for your audience.
- Discussion forums for better user engagement and interaction.
- Memberships for accessing multiple courses at once.
- Integration to various systems, like Zapier, MailChimp, Stripe, and more.
I could continue with the impressive features, but this list was just a teaser. Instead, I encourage you to learn more about the product by reading our comprehensive LearnDash review.
The purpose of this article is to show you how to create and sell LearnDash courses in WordPress. So let’s start our journey with the necessary prerequisites first.
The Technical Prerequisites
After you have purchased the LearnDash plugin, go to the LearnDash home page, and log in to your membership account by clicking on the Account link on top:

Once you are in, click on the Downloads link under the My Account heading:

After downloading the plugin to your computer, go to your WordPress admin panel and click on Plugins > Add New. Then click the Upload Plugin button at the top left.
On the next page, click on the Choose file button and find the zip file (learndash-v<version number>.zip) on your hard drive.

When you have located the file, the Install Now button will become active. Click on it to begin the installation. And on the next screen, click on the Activate Plugin to activate LearnDash.
The Final Step of the Installation
You still have one step to do in the installation process.
Go to the new menu item in the WordPress admin panel named LearnDash LMS. Open it, and choose Overview.

Then, under the LearnDash Bootcamp title, enter your product license in the Enter Your License section and click Save license:
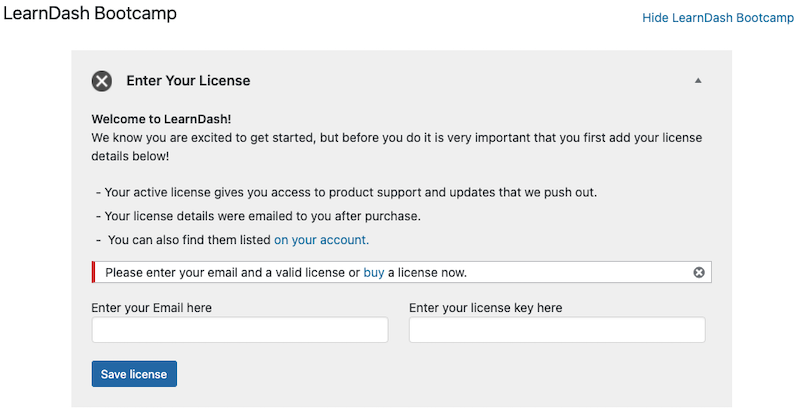
If you are unsure about your license, log into your account on the LearnDash website and click on the License Details link to check your license information. You should have also received the license in your inbox after you purchased the LearnDash plugin.
Once you have the license information in place, you can access updates and support. You can also access the LearnDash add-ons menu item when you enter your license key.
You have now finished the initial setup and are ready to start creating your first course with LearnDash.
Please Read This Before Moving Forward
It’s useful to build the course in a restricted environment. Once everything is ready, you can then go live with the product.
I built the example course in a test environment and published it at the beginning of step 8. But even then, the course was a bit incomplete, and it would have been too early to let anyone access it.
So build your project first in a testing environment so that only you can access it. Once everything is ready, then it’s time to announce it to the public.
How to Create Your First Course with LearnDash
In this section, we create the structure for your course with the Course Builder tool. Not all the steps are mandatory, and you can skip the ones you don’t need for now.
1. Create a Course Page
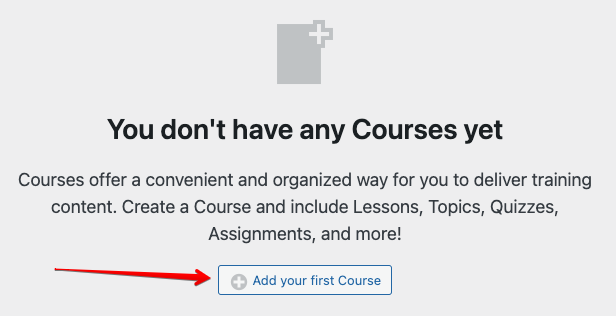
Creating a course starts by going to LearnDash LMS > Courses. On the page, click on the Add your first Course button:
On the next screen, you can enter the course title and add a description under it. You can also access the course settings on the right.
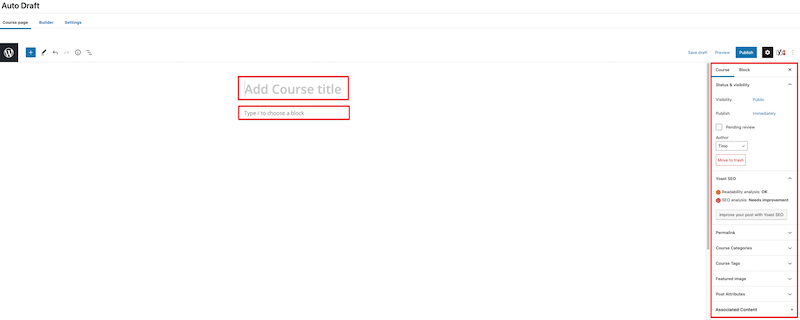
Once you have the title and the description in place, click the Save draft link at the top-right.
Organization is the key when you work with LearnDash. The courses you’ll create will almost always follow the structure of sections, lessons, and topics – in that particular order.
So let’s start with the Sections first.
2. Create Sections
Click on the Builder link at the top left, and you’ll land on the builder view.
The Course Builder is the heart and soul of LearnDash, a place where you create the section headings, lessons, topics. It’s a place where you can also build Quizzes and Assignments.
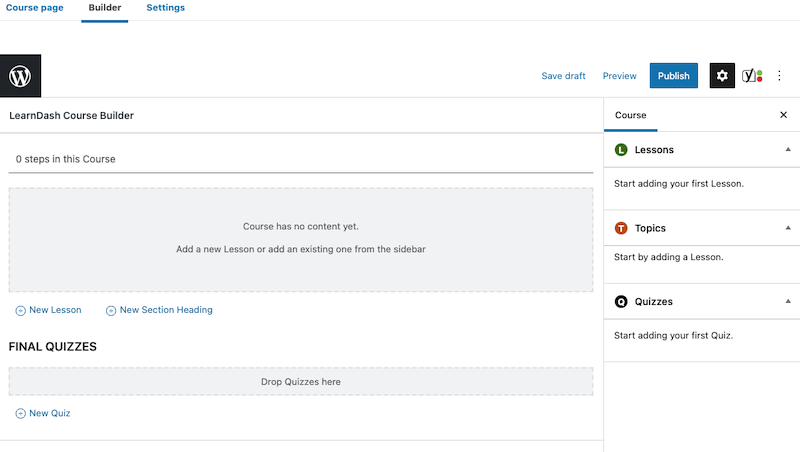
Click on the New Section Heading link first:

This link will open the Section Heading field, where you can enter the appropriate section title:

Once you have entered the title, click on the Add Section Heading button on the left.
Right now, you may be wondering: What’s the point of having sections in the first place?
Sections are a convenient way to organize your course content even more, but you can do well without them.
Since Sections are just for organizational purposes, they do not include any course content. For instance, if I were to create a course about WordPress, it would have sections like this:
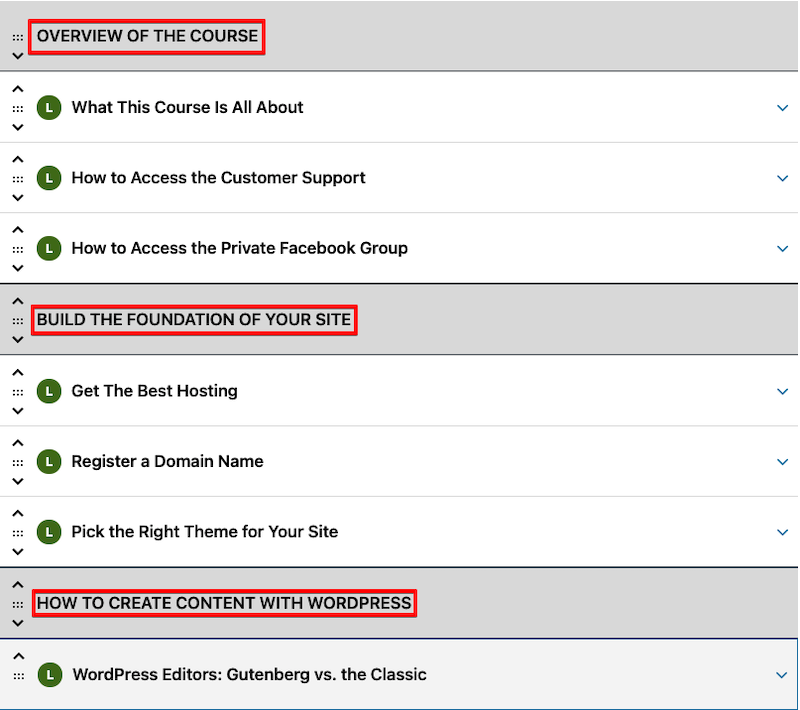
Each section groups similar lessons together, and this makes the course content easier to grasp.
3. Create Lessons
The next step in structuring your course is to add lessons under the sections. To do that, click the New Lesson link in the Course Builder:

Then enter the name of the lesson and click on the Add Lesson button. The new lesson is added under the latest section in your course, but you can naturally move it under any section you want.
For instance, after I added lessons to my imaginary WordPress course, they looked like this:
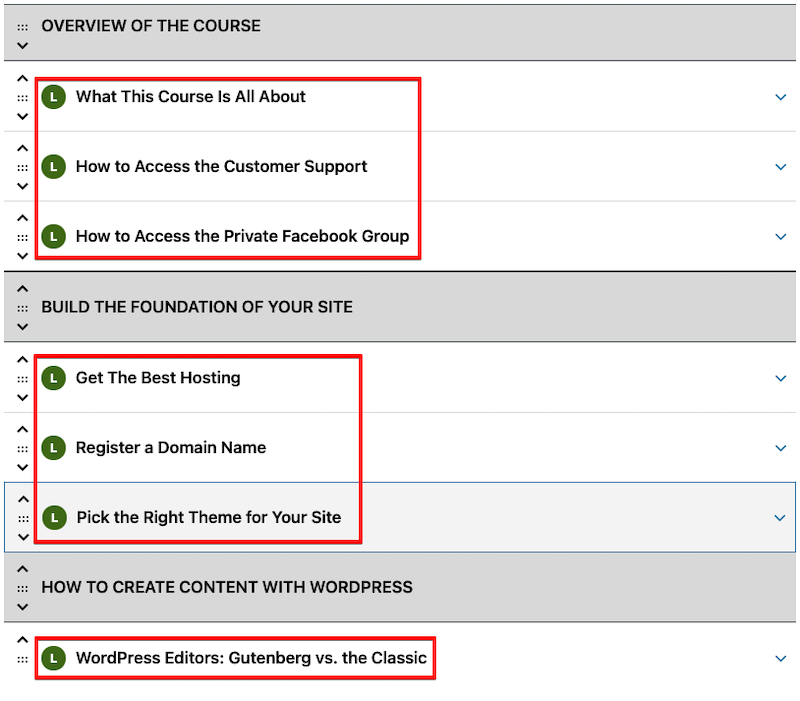
The final step is to create the actual content in your lessons.
You can do that right away when creating a lesson heading or through the WordPress editor by clicking on the LearnDash LMS > Lessons, picking the lesson, and clicking on the Edit link:

You will then land on the familiar WordPress editor view, where you can add the content.

If you want to manage lessons afterward, you can go to the front page of the WordPress admin and choose LearnDash LMS > Lessons.
4. Break Lessons into Topics (Optional)
If you want to organize your course even further, you can do so by using topics.
To add a new topic, click the arrow pointing downwards in a selected lesson:

You will then enter a view, where you can add the actual topic by clicking on the New Topic link:

Once you do that, enter the topic name into a text field and then click on the Add Topic button:

You can also add new topics afterward. Just go to the WordPress admin front page and choose LearnDash LMS > Topics.
5. Create Quizzes (Optional)
One way to add more user engagement to courses is to have quizzes. They can measure how well a student has learned a particular subject, and they can also act as a way to motivate students.
To add a new quiz, go to the front page of your WordPress admin panel and choose LearnDash LMS > Quizzes. Then click on the Add New button on the top-right and enter the quiz title:

After adding the title, save the quiz as a draft and click on the Builder link at the top. Then click on the New Question link:
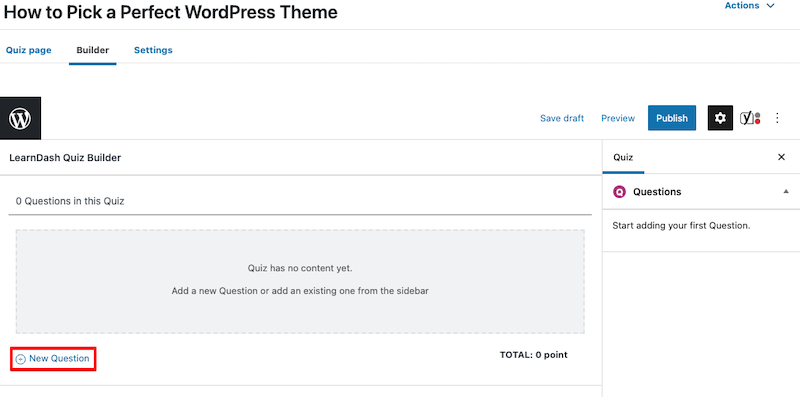
Add the first question and click on the Add Question button:

You can now see the question you just added. The next step is to add answers to it. You can do that by clicking on the arrow pointing down:

By default, you have a single-choice answer selected to your question, but you can change the answer type by clicking on the arrow pointing down on the right:
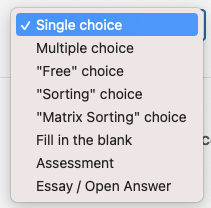
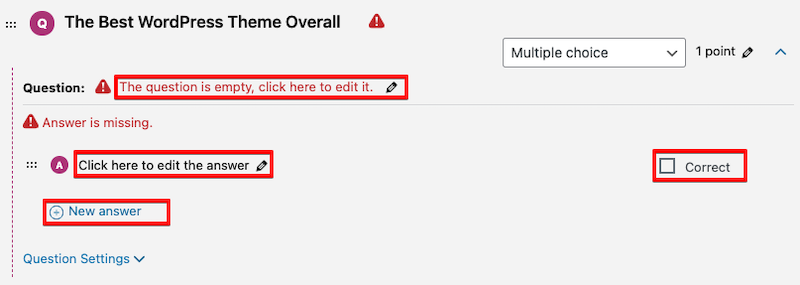
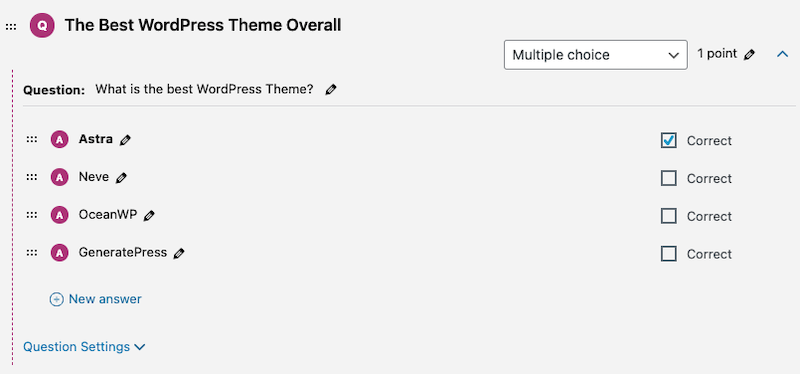
For instance, here I chose the Multiple choice type, entered the actual question, and added the answers:
After entering all the information, my quiz looked like this:
When you click the Question Settings link at the bottom of the question/answer view, you can find more settings related to the question:
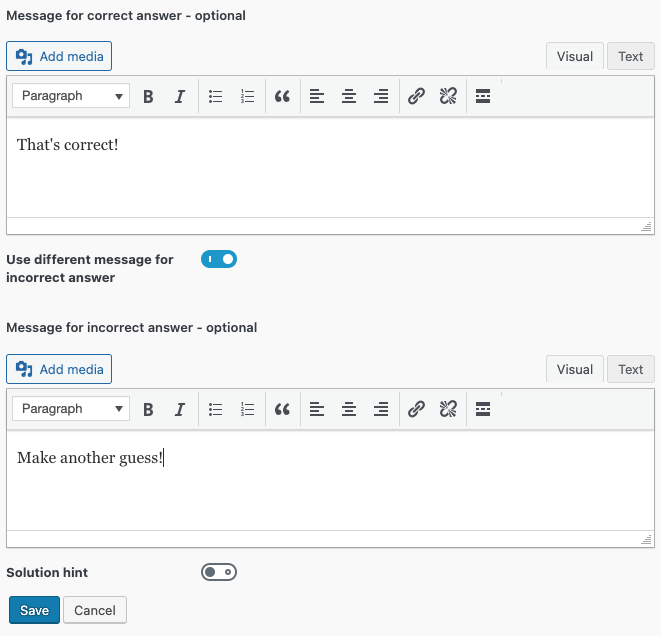
If you have defined the optional messages for correct and incorrect answers, save the changes by clicking the Save button. And on the next screen, click the Save draft link to capture your general settings.
You can now repeat the steps with another question to complete your quiz for your online course.
6. Set Assignments (Optional)
Assignments help your students to reinforce what they have learned. It’s also a great way to engage the student more deeply with the topics they are studying.
To reach the assignments UI, go to the WordPress admin panel. Then go to LearnDash LMS > Assignments:
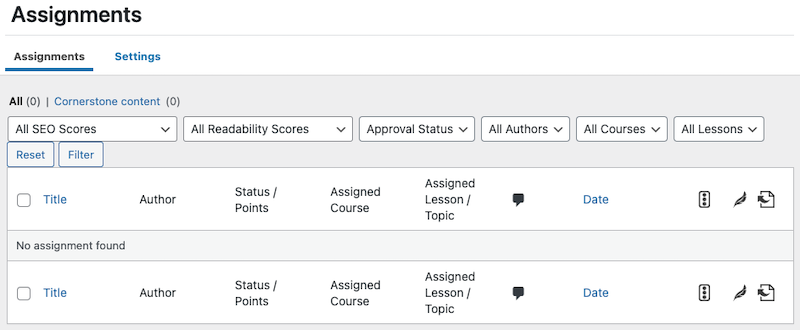
In the assignments view, click on the Settings link to view the most important settings. I didn’t change anything in this view:

You can enable the assignments on a lesson or topic basis.
For example, I enabled the assignment in one of the lessons in my imaginary WordPress course.
To do that, I went to LearnDash LMS > Lessons. Then I chose the lesson I wanted to hook up with an assignment and clicked the Edit link:

I then went to the lesson settings:

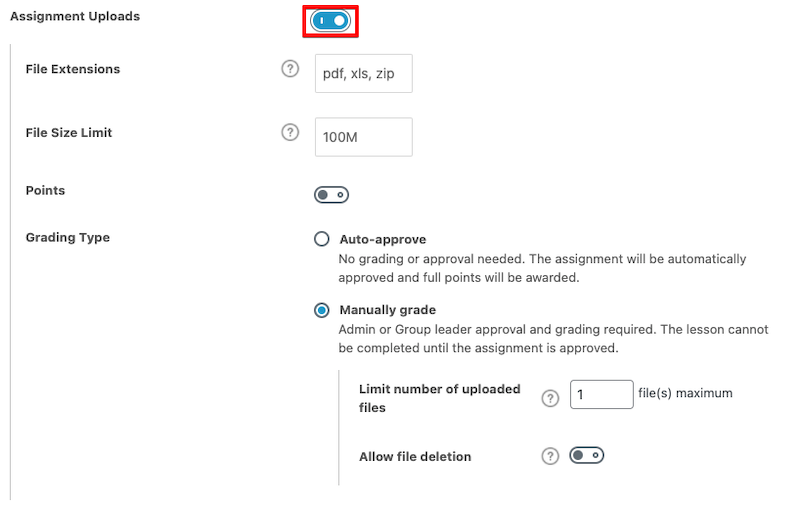
Finally, I activated the Assignments section by turning on the Assignment Uploads setting:
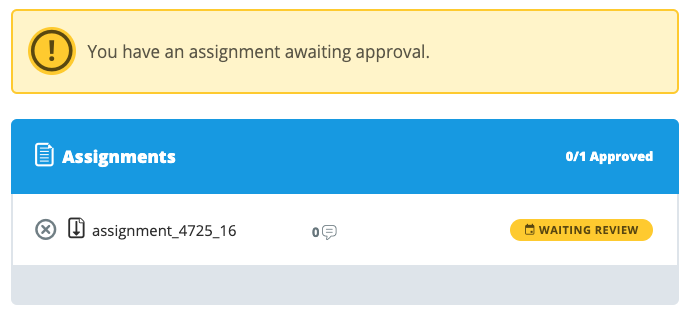
When the student wants to submit their assignment, they will see an upload form at the end of the lesson (or topic). After uploading the work, they will see a view like this:
But enabling the assignments is not enough.
As a course creator, you should also add clear instructions for the assignment and expectations from a student. To do that, you can write a description inside the lesson content:
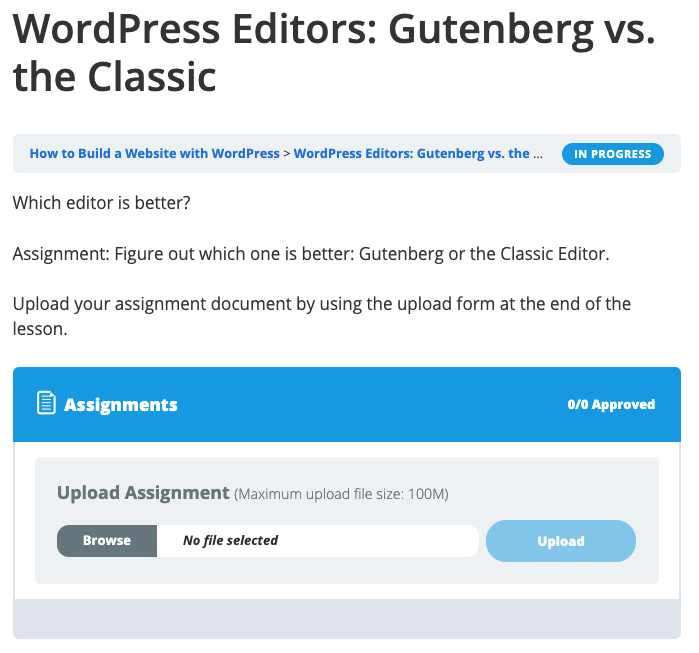
The best place for the instructions is at the very end of the lesson.
When a user has added an assignment, you can go to the LearnDash LMS > Assignments to manage them. You can also download them to your computer or approve them:

If you have set the assignment, make sure to save your changes by clicking on the Save draft link.
7. How to Sell Your Course
LearnDash also supports payment gateways, like Stripe, 2Checkout, or WooCommerce. So if you are interested in them instead, head over to the LearnDash add-on page for more information.
However, in our example, we use PayPal, the default payment processor, to sell our courses.
But first, we have to enable PayPal. So head over to LearnDash LMS > Settings > PayPal Settings.
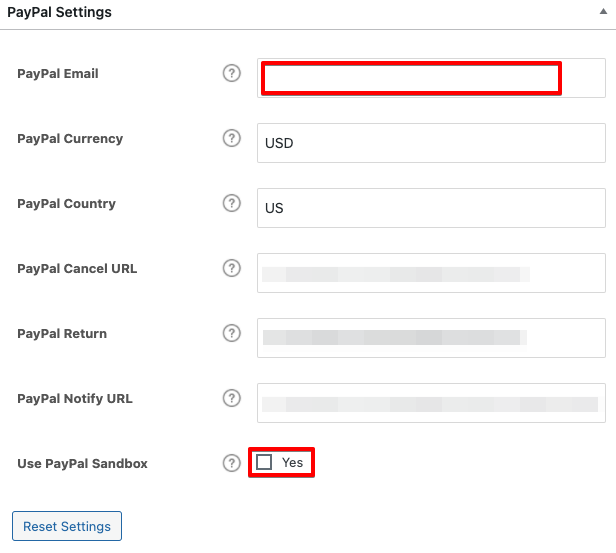
In this view, you should enter your PayPal email address in the first field. You can also change the currency and the country options, while the PayPal Cancel URL, PayPal Return, and the PayPal Notify URL fields are automatically filled in.
One particular setting you should pay attention to is the Use PayPal Sandbox. When you turn that on, you ensure that payments aren’t processed.
It’s helpful to keep this option checked as long as you test the payments to see that they work as expected.
If you made changes to your PayPal settings, click Save on the right of the screen.
Another important setting to change is the access mode so that people can’t access the course without buying it.
To do that, go to LearnDash LMS > Courses. Hover the mouse over the course name and choose Builder:

Then go to Settings and find the Access Mode section:
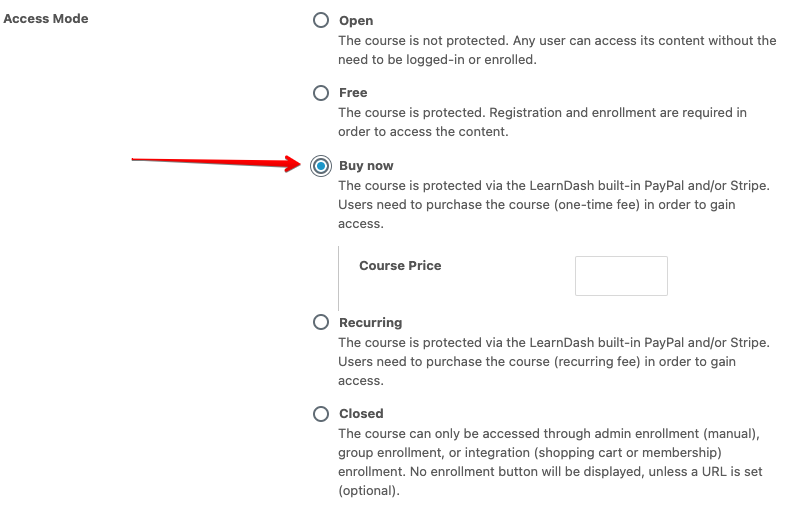
There choose the Buy Now option and enter the price for your course. Alternatively, you can also select the Recurring option if you plan to charge students based on recurring fees.
8. How to Access Your Course
Now it’s time to publish your course to test how students will see and access your training.
So go to LearnDash LMS > Courses, choose the course, and click the Edit link. Once there, click on the Publish button on the top right.
In that same view, take a look at the Permalink section on the right:
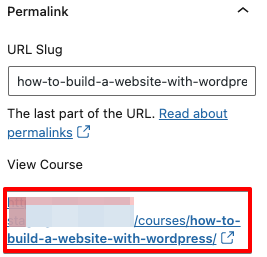
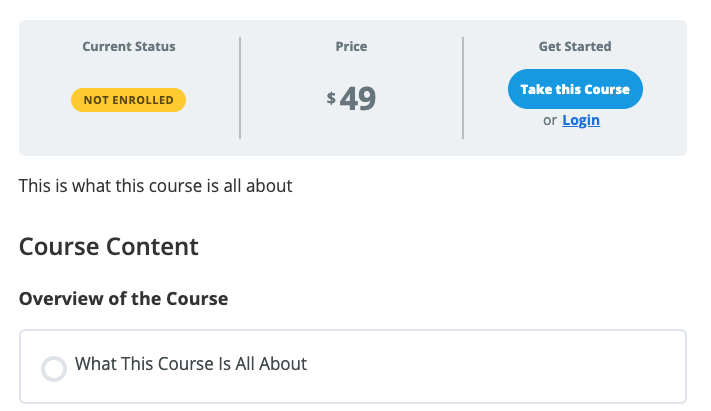
That is the URL your students use to access the course. Copy it to the clipboard, and then log out from the WordPress admin. When you enter the URL in your browser, you will see the course login page.
9. Setting Up the Login Screen
When you click the Login link, you will see a standard WordPress login screen.
A better way to display the login is to adjust it to fit your brand.
In WordPress admin, go to LearnDash LMS > Settings. Under General settings, you can find the Design & Content Elements section:
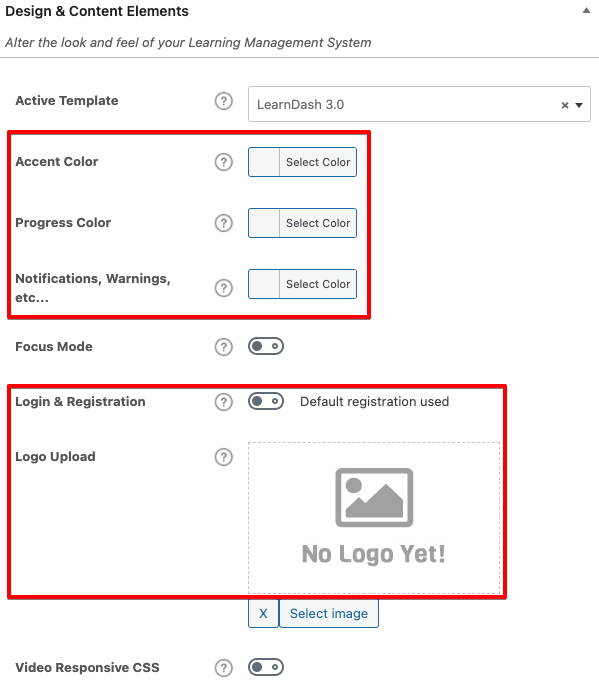
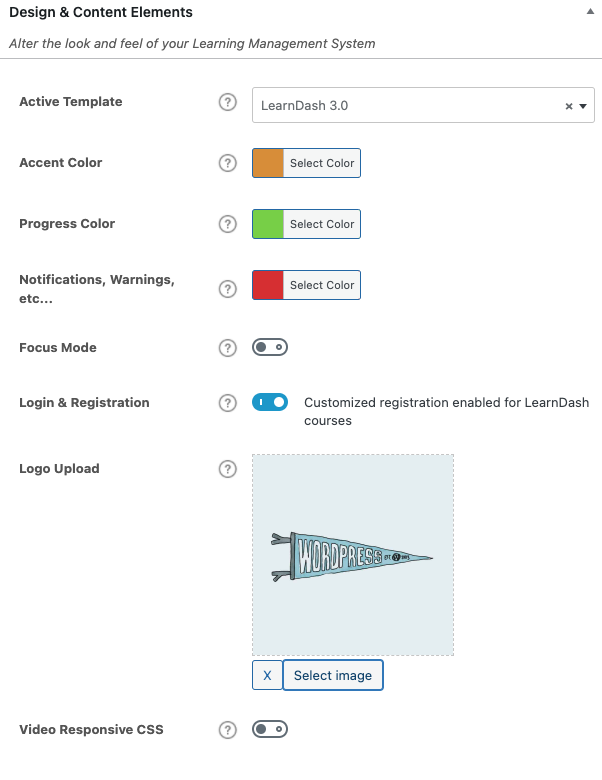
Leave the Active Template setting as is but pay attention to the Accent Color, Progress Color, and Notifications and change them accordingly. Also, toggle on the Login & Registration, and upload the logo.
After you have made these changes, click Save. In my case, the settings looked like this:
Please note that to enable user registration, you will also have to configure WordPress too.
First, go to the WordPress admin panel > Settings. In the General Settings, under the Membership section, click on the Anyone can register checkbox to enable the registration.
10. Displaying the Course Page with CourseGrid Add-on
You have now set up your course. However, there is still one question that we need to address: How do your students access the course?
In this section, we look at two ways to accomplish this.
- Single Course
At its simplest, all you have to do is add a link to the course page on your main menu.
Go to your WordPress admin and then go to LearnDash LMS > Courses. Hover over the course name and choose Edit:

On the right-hand side of the screen, find the Permalinks section. Under the View Course heading, you will see the link to your course. Copy it to the clipboard.

Then head back to the WordPress admin front page and click on Appearance > Menus.
Find the Custom Links section on the next view and paste the copied course link into the URL field. Also give your menu item a meaningful name:
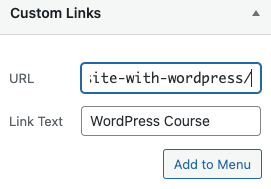
Next, click the Add to Menu button to add your menu item. Then, click on the Save Menu button on the bottom-left to save your changes:

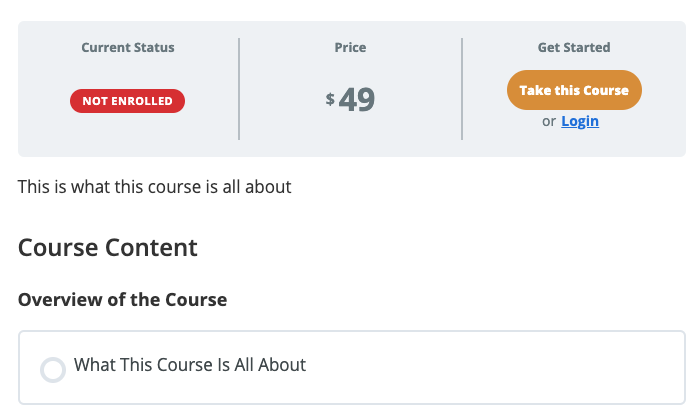
When you click the new link on your menu, you will then land on the course front page:
- Multiple Courses
If you are offering multiple courses through your website, one possible way to display them is by using a free add-on called LearnDash CourseGrid.
So head over to LearnDash LMS > Add-ons, choose the LearnDash Course Grid, and click Install Now:

On the next screen, click the Activate Plugin button.
At its easiest, displaying multiple courses is as simple as creating a new page in WordPress and embedding a [ld_course_list] shortcode into it.
But to give you more configuration options, we take advantage of the Gutenberg block editor.
In the WordPress admin panel, go to Pages > Add New. Then add a title for your course listing page and click on the plus icon to add a new block:

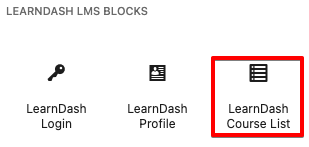
Scroll down the block list until you find the LearnDash LMS Blocks section. Once there, find the LearnDash Course List block and click it to install it:
Next, click inside the block to activate it. In case you don’t see additional configuration options at the right, click on the three vertical dots:
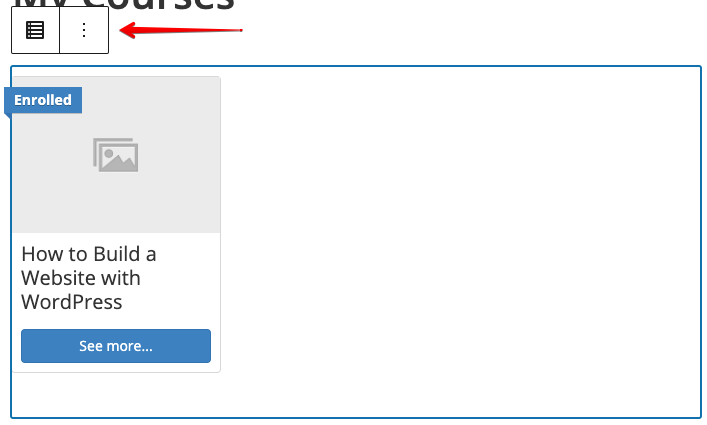
Then choose Show More Settings. This way, you can find more ways to configure how the course list is displayed (the screenshot shows just a partial list of options):
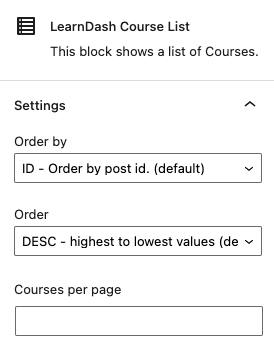
Make your tweaks if needed, and hit the Publish button again to verify your changes.
Taking Your Course Even Further
What’s nice about LearnDash is that you can improve it further with the plethora of add-ons. We already touched on this topic a bit in the previous section with the CourseGrid add-on.
The easiest way to access these add-ons is to go to LearnDash LMS > Add-ons. From there, you can find all the plugins that are available for LearnDash:
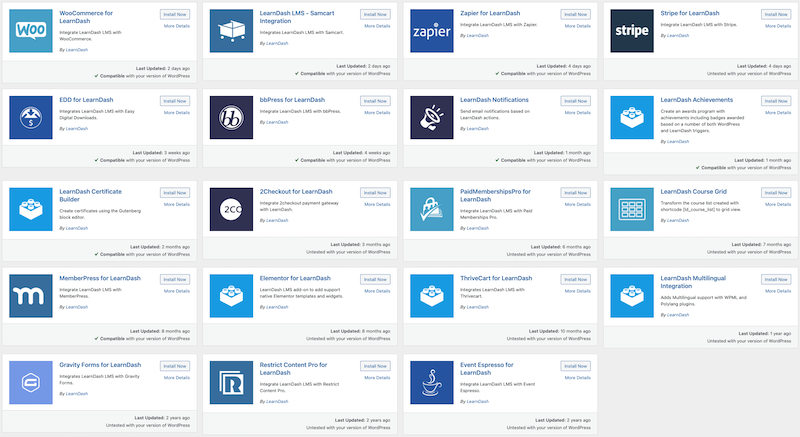
And if you want to access even more plugins, take a look at the 3rd party add-ons created by the LearnDash community.
Conclusion: How to Create and Sell Courses in WordPress with LearnDash
LearnDash LMS is a comprehensive course platform for your WordPress website. The solution should give you everything you need to create a successful online course.
Just remember that this article only shows how to build a course from a technical perspective. Your job is to come up with compelling content that people are eager to buy.
I hope you can now start building your first(?) online course with these instructions. The world is waiting for what you have to offer!

Leave a Reply