How to Customize the WooCommerce Product Page (With and Without Code)

Want to know how to customize the WooCommerce product page? Your product pages are some of the most important pages on your eCommerce store. A well-designed product page can optimize conversions, reduce complaints and returns, and even increase your average order value
The product page in WooCommerce uses a WordPress template that is pretty basic. It’s functional and includes the basics of what you’d expect to see on a product page, but there’s not much flexibility for customization in WooCommerce itself.
While you can change the design and basic functionality of your product pages by using a different WooCommerce theme, sometimes you’ll want to make a specific change without installing a whole new theme.
There are several methods you can use to customize your product pages, depending on what exactly you want to do and how experienced you are with writing code for WordPress.
I’ll be giving an overview of the following 4 options in this article:
- The WooCommerce Blocks Plugin
- Manual Customization with Code (visual and functional changes)
- Visual Page Builders Compatible with WooCommerce
- WooCommerce Extensions
If you’re comfortable with back-end coding and you’ve already done some WordPress development, manual customization of the product page template offers the most flexibility and you don’t need to buy or install any extra plugins or extensions.
However, if you’re not confident with editing code or if you just want a quick functional (not design) change and you don’t mind paying for the convenience, a WooCommerce extension or plugin is the easy option.
If you’re using a page builder for your WooCommerce site, you can build or customize your product page visually using the built-in functionality. Not every page builder has specific elements for WooCommerce but those that do include:
- Divi
- Elementor
- Visual Composer
- Beaver Builder (Beaver Themer add-on required)
- Oxygen
If you’re not using a visual page builder but would like to do so for your product pages only, the WooBuilder Blocks plugin is probably your best option.
This plugin uses custom Gutenberg blocks so you can easily design your own WooCommerce product pages.
1. Using the WooBuilder Blocks Plugin to customize WooCommerce Product Pages
Let’s start with the easiest way to customize your product pages.
WooBuilder Blocks is a WordPress plugin that makes it easy to customize and design your own WooCommerce product pages using Gutenberg blocks.
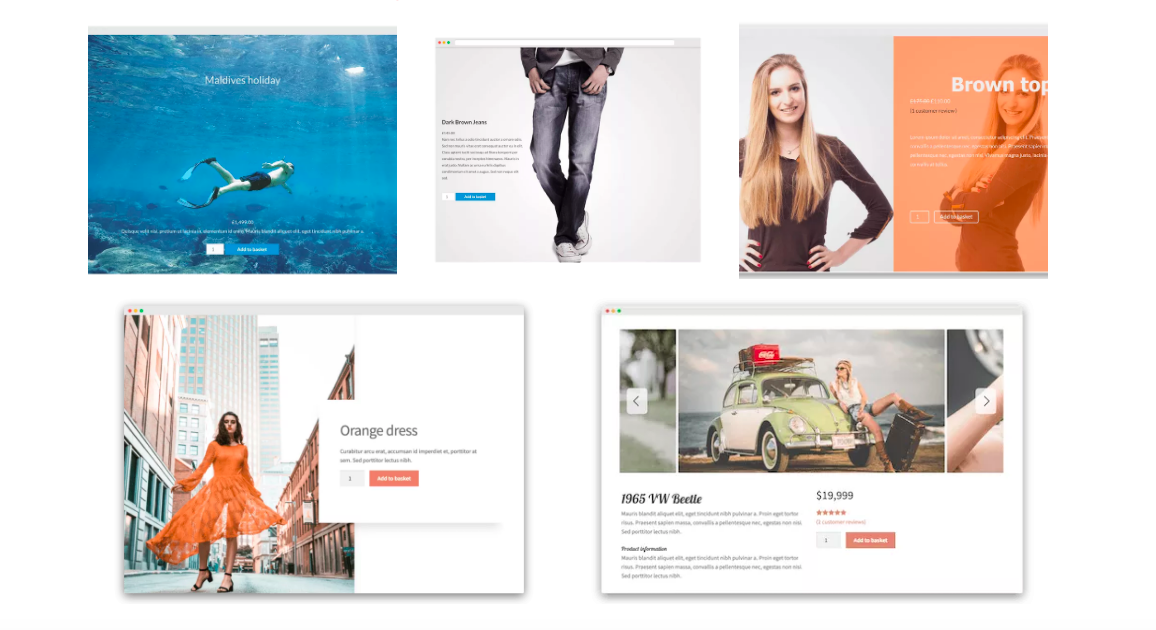
The plugin comes with a collection of WooCommerce blocks including:
- Product title
- Product image
- Product price
- Add to cart
- Short description
- Product reviews
- Related products
- Product tabs
- Product carousel block
- Request quotes
- Sales countdown
You can also use any 3rd party Gutenberg block to create your product pages.
WooBuilder Blocks works with any WooCommerce product type and all the official WooCommerce extensions.
You can create a unique product page for each product or create templates and assign them to products based on category or tag.
The plugin also comes with a library of beautiful pre-built product page templates that you can use right out of the box.
Price: $49 per year or $199 one-time payment for a single site license. Other license options available for multiple sites.
2. Manual Customization of the Product Page Template with Code
If you’re comfortable doing a bit of coding, you can edit the WooCommerce product templates manually.
While it makes sense to use a plugin or extension for more complex functionality, simple changes are quick and easy to make. This also means that you’re not risking the security or speed of your site by installing extra plugins
Making Visual Changes to Your Product pages with Custom CSS
If you have some knowledge of CSS, you can easily make small design changes right from the WordPress dashboard.
So let’s take a look at a quick couple of examples of customizing the product page with the free Storefront theme, which looks like this:
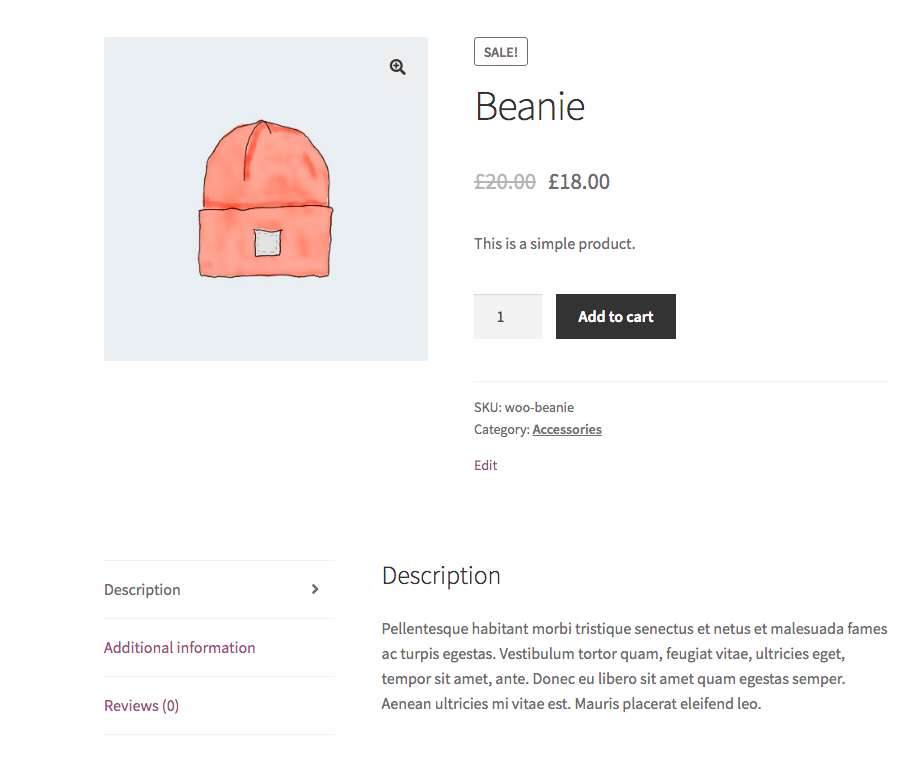
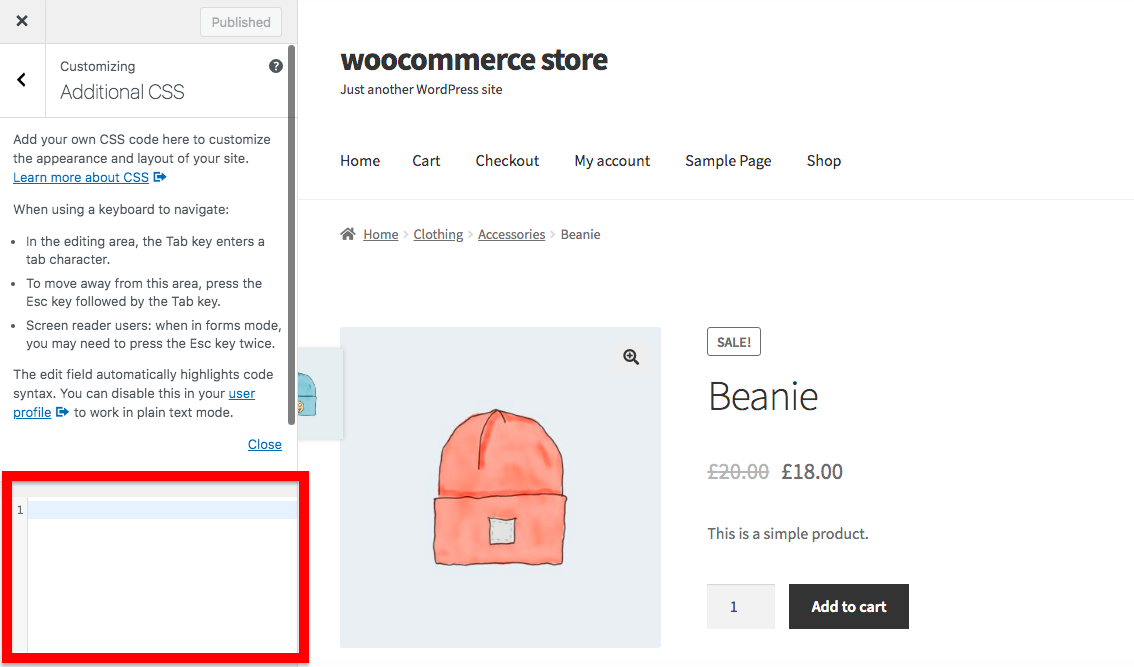
The easiest way to add custom CSS to your theme is by using the WordPress theme customizer. However, keep in mind that any changes you make will be lost if you change your theme.
To access this, go to Appearance > Customize in your WordPress dashboard.
Scroll down and click “additional CSS” in the menu.
In the site preview pane, navigate to one of your product pages.
You can type your custom CSS in the editing field highlighted in red.
The following html elements are used on the WooCommerce product page:
- Product titles: .woocommerce div.product .product_title
- Variation labels: .woocommerce div.product form.cart .variations label
- Add to cart button: .woocommerce div.product .button
You can check the name of other elements if you’re using Chrome by going to View > Developer > Inspect Elements in the browser menu. You can then hover over an element you want to style to see its label and current styling attributes.
You can also customize the look of general html elements on your product page by using “.woocommerce div.product” as a prefix.
For example, applying style rules to “.woocommerce div.product h2” will change the appearance of all h2 headers on the product pages only.
Let’s take a look at some examples:
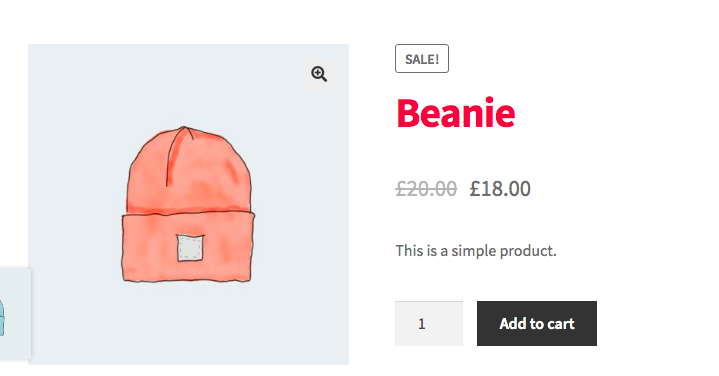
Changing the color and weight of the product title:
 .woocommerce div.product .product_title {
             color: #f54251;
             font-weight: bold;
 }
(Tip: If you go to Google and search for “hex color picker”, it will give you a handy color picker tool you can use to generate hex codes for CSS.)
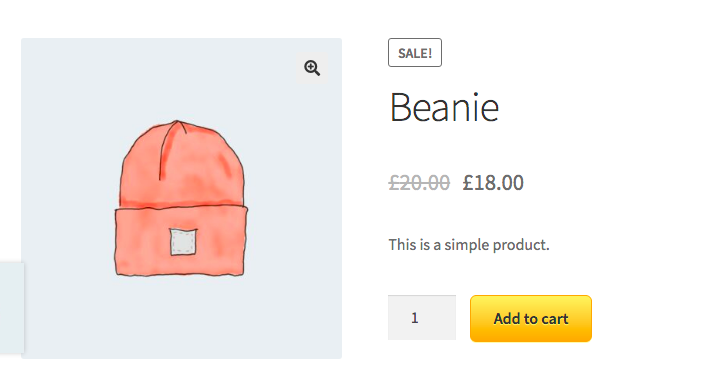
Amazon-style “Add to cart” buttons
 .woocommerce div.product .button
 {
             box-shadow: 0px 1px 0px 0px #fff6af;
             background:linear-gradient(to bottom, #ffec64 5%, #ffab23 100%);
             background-color:#ffec64;
             border-radius:6px;
             border:1px solid #ffaa22;
             color:#333333;
             text-decoration:none;
             text-shadow:0px 1px 0px #ffee66;
} 
When you’ve finished making your styling changes, make sure to click the “Publish” button at the top of the customizer menu to save the CSS to your theme files.
Using Hooks to Add or Remove Content on the Product Page Template
While it’s fairly simple to adjust the appearance of your product pages with CSS, making changes to the actual elements that are shown on the product page is a little more complicated.
If you don’t have at least some basic coding knowledge and experience customizing WordPress functions and creating WordPress themes, you’re probably better off using a plugin to make your desired changes.
Otherwise, if you’re up for the challenge, the following is a very simplified overview of how to make those customizations manually.
WooCommerce uses two template files to build product pages:
- single-product.php – this builds the structure of the page template.
- content-single-product-php – this fills the template with the content for each product.
You can use WooCommerce hooks to insert or remove elements from the template.
All the product page hooks are listed in a comment in the content-single-product.php file.
To add or remove an element using hooks, you’ll need to create a WordPress child theme and add some code to the functions.php file to make your changes.
The functions to add and remove elements on the product page are:
- remove_action()
- add_action()
These functions also take a parameter representing the priority of each element. You can reorder elements by removing them and adding them back with a higher priority.
For example:
// move product description below title

remove_action( 'woocommerce_single_product_summary', 'woocommerce_template_single_excerpt', 20 );

add_action( 'woocommerce_single_product_summary', 'woocommerce_template_single_excerpt', 6 );
This code removes the product description and adds it back in with a higher priority, so it displays below the title (which has a priority of 5).
Obviously there’s a lot more detail we could go into this but it goes beyond the scope of this article.
If you’re interested in learning more about writing your own custom code for WooCommerce, check out the WooCommerce Theme Developer Handbook and the WooCommerce Developer Wiki for detailed guides and examples.
3. Customize Your WordPress product page with a Visual Page Builder
It’s probably not worth installing a page builder plugin just to edit your product pages (if you want to do this, the WooBuilder Blocks plugin is a better option.)
But if you’re already using a page builder on your site, the chances are you can use it to create WooCommerce product pages just like you would build any other page on your site. However, you’ll need a builder that comes with specific WooCommerce blocks/elements/sections. Some, like Elementor come with pre-designed product pages you can use as-is or customize to your liking.
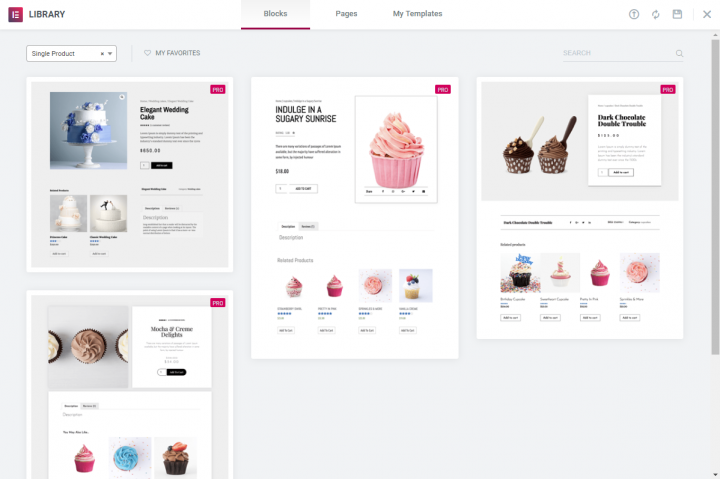
The actual process of customizing your product pages will depend on the page builder you’re using. To learn how to customize the WooCommerce product page, here are some links to official tutorials for the most popular page builders:
4. WooCommerce Extensions to Customize Product Pages
WooCommerce offers several extensions you can use to customize your product pages by adding extra features. These are essentially plugins that change the structure of the WooCommerce product template without you having to go in and make changes to the code.
You can’t make these functional changes with visual page builders. So, if there’s something specific you want to add to your product pages, you’ll have to either code it manually or use a plugin or extension.
Here is just a selection of the extensions available:
Product Add-Ons
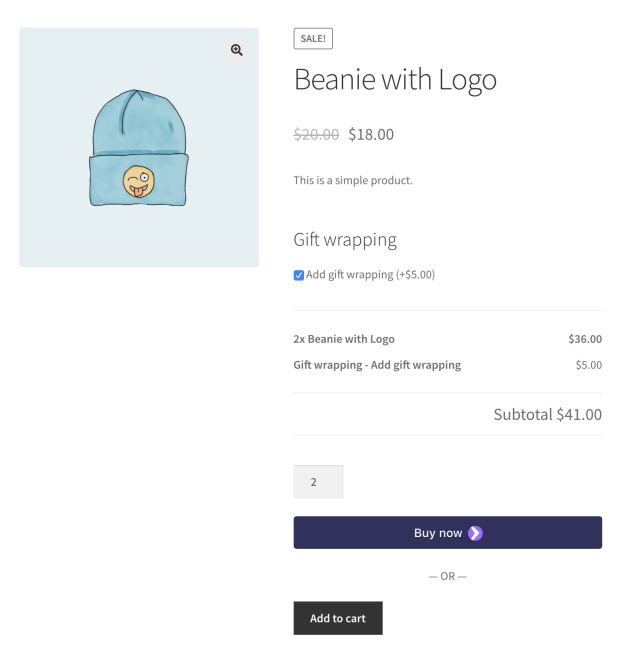
The Product Add-Ons extension enables your customers to upgrade their order by choosing optional add-ons such as gift wrap, a custom message, adding a personal engraving, or donating to a charity.
With this extension you can add options via text boxes, dropdowns, text areas, custom price inputs (so customers can add a tip or donation), and sample images. You can activate add-ons globally or on a per-product basis.
💵 Price: $49 a year
Additional Variation Images
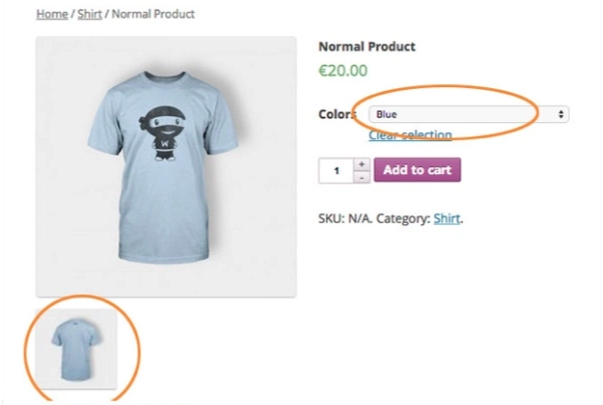
The Additional Variation Images extension allows you to add additional gallery images for each product variation.
This means that users browsing your store will be able to see a different product image when they select a product variation such as a different color. The other product images are hidden once a variation is selected.
Price: $49 a year
Name Your Price
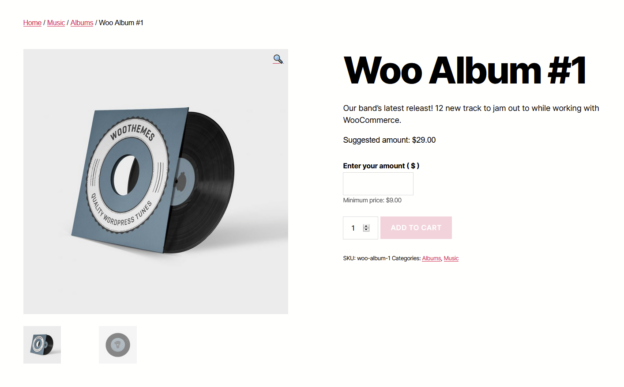
The Name Your Price extension allows customers to enter their own price for an item at checkout. You can opt for a completely free entry so customers pay what they want or enforce a minimum price.
This plugin is also ideal for accepting donations or tips on products you’d normally give away for free.
Other potential uses include:
- Selling gift certificates
- Online invoice payments
- Researching the prices your customers are willing to pay.
💵 Price: $49 a year
Recommendation Engine
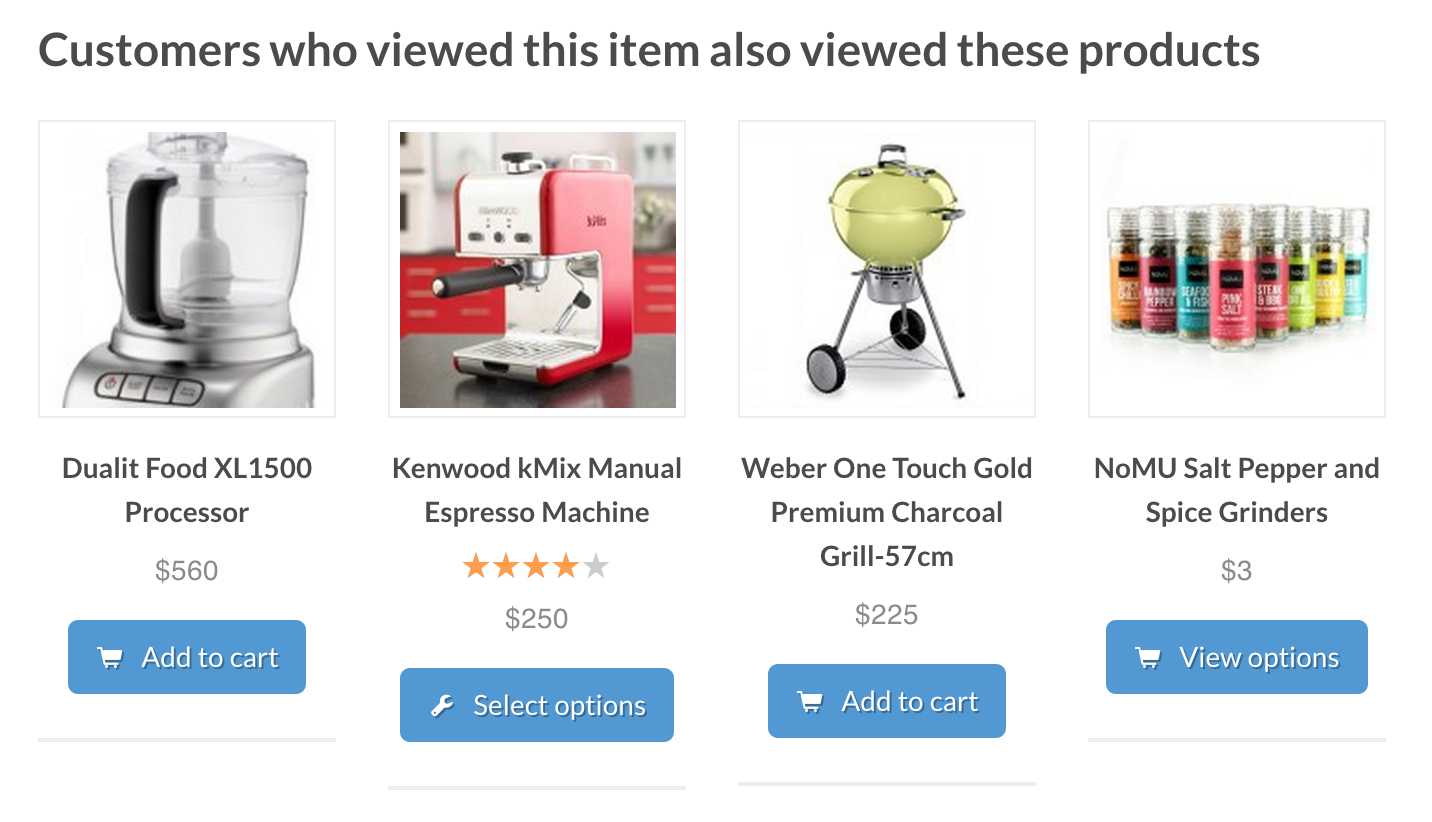
The Recommendation Engine extension will display Netflix and Amazon style product recommendations on your product pages. This can prompt users to buy more items per purchase and view items that they may not have otherwise considered.
You can choose to display related products by view, purchase history, or frequently purchased together.
💵 Price: $79 a year
Product Video by WooCommerce
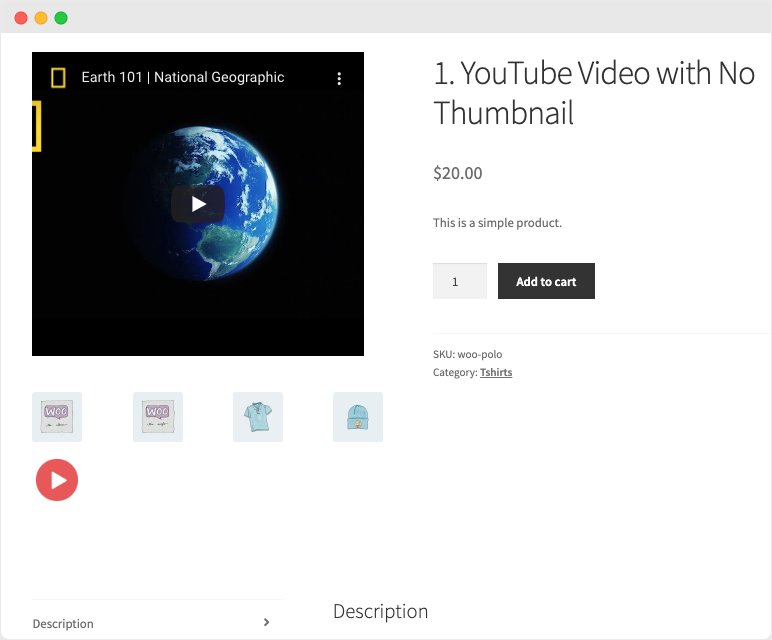
By default, the standard WooCommerce product pages only allow you to upload static images to the product gallery, not videos.
The Product Video extension enables you to upload or embed videos from YouTube, Vimeo, Dailymotion, Metacafe, or Facebook.
You can replace the featured product image with a video, add multiple videos to each product, and play videos in the page, as full screen, or as a pop-up. You can also choose to show or hide videos on listing pages.
💵 Price: $49 a year
Product Badges
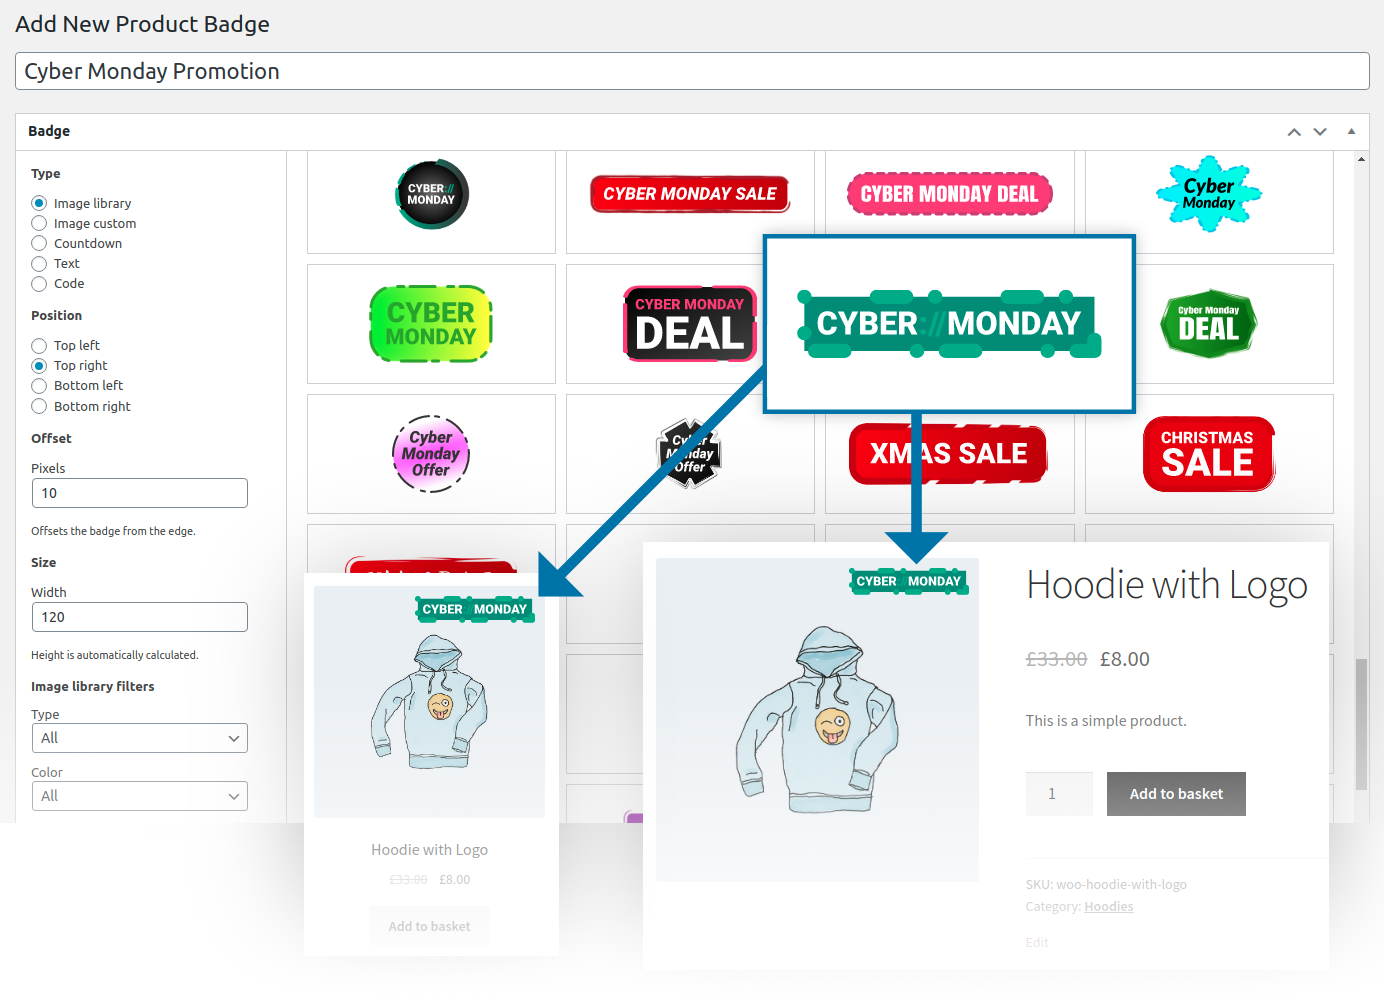
The Product Badges extension comes with over 140 pre-made badges for sales and promotions including Black Friday, Christmas, Cyber Monday, Easter, and more.
You can also upload your own custom product badges, create your own text badges or countdown badges, or use code to create a custom badge.
💵 Price: $49 a year
Summary
There are many different ways to customize the default WooCommerce product page. It may take a bit of research and experimentation to find the quickest and easiest way to achieve the exact changes you want to make.
Hopefully, this guide has been helpful in breaking down how to customize the WooCommerce product page and the different ways you can design your own product pages.
The WooCommerce development team is always working on updates to make the plugin more flexible and user-friendly.
Over the last couple of years they’ve already released several updates to make the plugin more compatible with Gutenberg blocks.
While you can currently customize the WooCommerce Cart, Checkout, Account, and Shop pages with Gutenberg, there’s currently no way to build your own product pages with blocks without using additional plugins.
The team has suggested that additional Gutenberg functionality for product pages is on the cards for future updates.
For now, your best bet is to use a plugin like WooBuilder Blocks or a visual page builder like Elementor or Divi if you want to design your own product pages.

Leave a Reply