How to Set Up WooCommerce & Square POS (Step by Step)

Using Square POS with your WooCommerce site is an easy way to accept credit card payments with no setup or monthly fees. In this guide, we’ll talk you through how to set up WooCommerce and Square POS so you can start taking credit card payments on your site within an hour.
Ecommerce is a rapidly growing market but even in 2020 eCommerce only accounted for 14% of all sales in the US.
To maximize their sales and customer reach, many businesses opt for a combination of both online and offline sales. If you own one of the many eCommerce businesses that also sell offline, POS software can help you to manage your inventory and take payments easily and safely.
Square POS is one of the most common and popular POS systems in use today. You can use POS as an app on a mobile phone or tablet without any additional hardware or you can opt to purchase equipment including registers and card readers.
Integrating Square POS with your WooCommerce store is a way to take secure credit card payments via your website or any offline channel. It’s also an easy way to keep your product inventory up-to-date and manage your customer details in one place.
What is POS (Point of Sale) Software?
A Point of Sale system is a central hub to manage all the payments, inventory, and customer information for your retail business.
This is usually in the form of an electronic cash register, although tablet-based POS systems are popular in restaurants and cafes and are becoming more common in stores.
While traditional POS systems can only be used in-store, cloud-based POS systems are becoming more popular. Using a cloud-based POS means that you can access it from any location using any mobile device connected to the internet.
Not all retail businesses use a POS system. Many brick-and-mortar retail stores rely on a combination of a manual cash register, bookkeeping software, and other manual systems.
Online stores that only sell online also do not need a POS system, as they rely on the backend of the eCommerce platform they’re using to do the same job as a POS. However, some may choose to use the payment processing features of a POS even if they don’t use stock and customer management features.
Why Link a POS to Your WooCommerce Store?
If you mostly sell online but sometimes sell your products in person, you’ll need a POS. This applies if you sell your products:
- In a physical store or pop-up shop
- In locations like trade shows, craft fairs, and farmers markets
When you link your POS to your online store, it allows you to manage your inventory in real-time. This means you never run the risk of selling items online that are already sold out. This will save you time in administration and customer service and provide a better experience for the customer.
You can also simply use a POS as a method of taking credit card payments from your customers. This will give you additional flexibility if you might want to expand beyond online sales in the future.
What is Square POS?
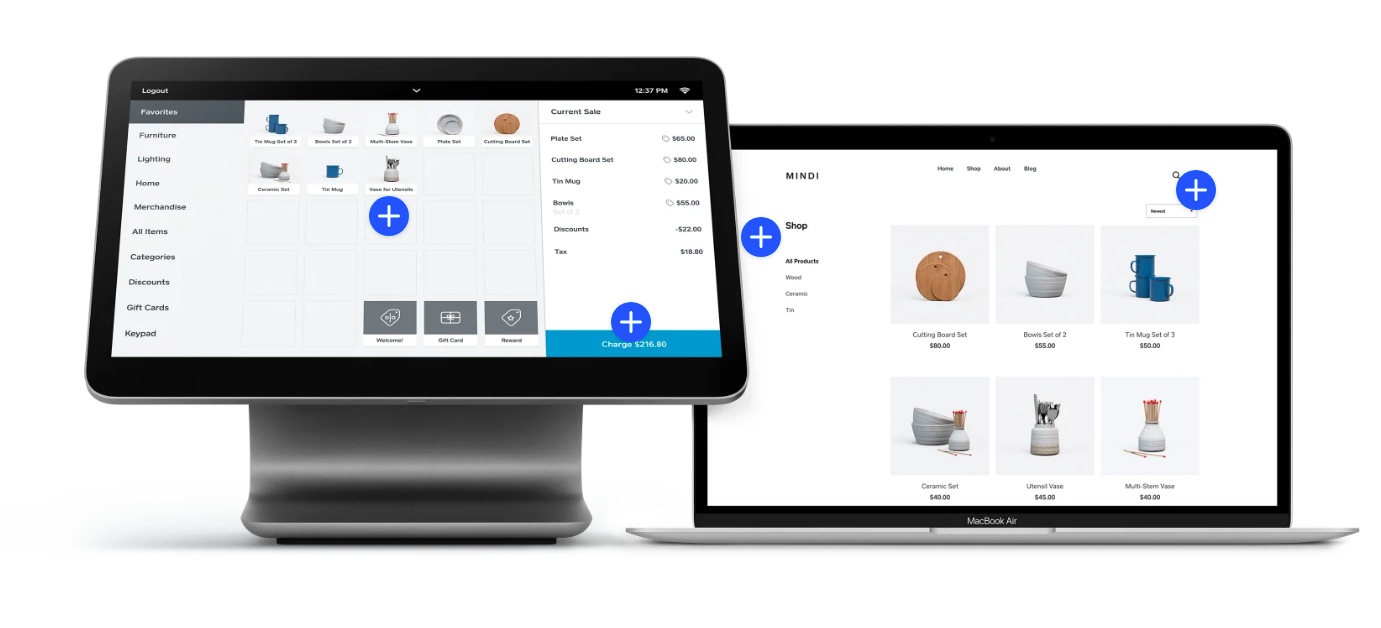
Square is a cloud-based POS that has tools for selling online and in-person, with everything syncing to a central dashboard.
Square syncs with all the major eCommerce platforms including WooCommerce, Magento, BigCommerce, and Wix to unify all your sales and customer data in one place.
You can use Square as a payment gateway on your WooCommerce store as an alternative to Stripe, Paypal, or WooCommerce payments.
One of the main reasons that Square is so popular for small businesses is that it’s extremely versatile and you don’t need to spend a fortune on special registers and card readers.
You can use the Square app to turn your mobile phone or tablet into a POS. Square will even send you a free magstripe card reader that plugs right into your phone.
Benefits of using Square POS
When you link Square POS to your WooCommerce site, you can synchronize online and offline sales, inventory, and customer data in one central management location.
Automatic Inventory Syncing
There’s no need to manually adjust your inventory in WooCommerce when you make sales in places other than your website, as your inventory will automatically sync between Square and WooCommerce.
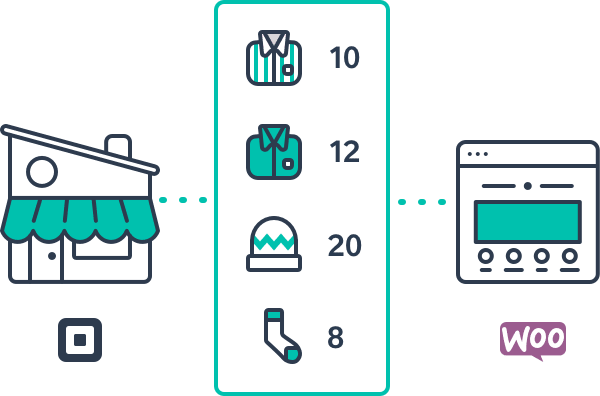
You can also add or edit products with WooCommerce and an auto-sync process will copy product data including price and product name to Square.
At this point, I should point out that while Square has glowing reviews for its payment processing functionality, WooCommerce users are less impressed with its inventory syncing features (you can read them here). It seems the development team could make some improvements here, and hopefully, they’re working on it.
If you’re planning to use Square to manage your inventory across your POS and website, it’s important to understand exactly how to use this feature and what its limitations are. There is more information about this on the WooCommerce website.
Compatible with all major cards and digital wallets
Using Square POS allows you to simplify your finances with a single payment solution for all sales. Square is compatible with all major debit and credit cards as well as digital wallets including Google Pay and Apple Pay.
Free software and affordable transaction fees
The Square extension for WooCommerce is free and Square transaction fees are very affordable. There are no monthly or hidden fees so you can get started without investing any money upfront.
Transaction fees vary slightly depending on what country you’re in. Square POS users in the US will pay 2.75% per in-person transaction and 2.9% + $0.30 for online transactions. Square will deposti your funds within one to two business days so you can get your money fast.
Industry-standard security
Square payment solutions are fully PCI-compliant and use end-to-end encryption. Built-in fraud detection will flag any suspicious activity, and you can customize your security settings with 2-step verification, employee permissions, and account change notifications.
Detailed analytics and reporting
When you sign up with Square you’ll get access to an analytics dashboard that gives you real-time sales data. You can easily see what’s selling and what’s not selling, learn more about your customers, and create weekly or monthly reports.
Easy integration with WooCommerce
As well as providing a WordPress plugin for easy integration with your WooCommerce site, Square also supports WooCommerce Subscriptions and pre-orders.
How to Integrate Square POS with Your WooCommerce Site
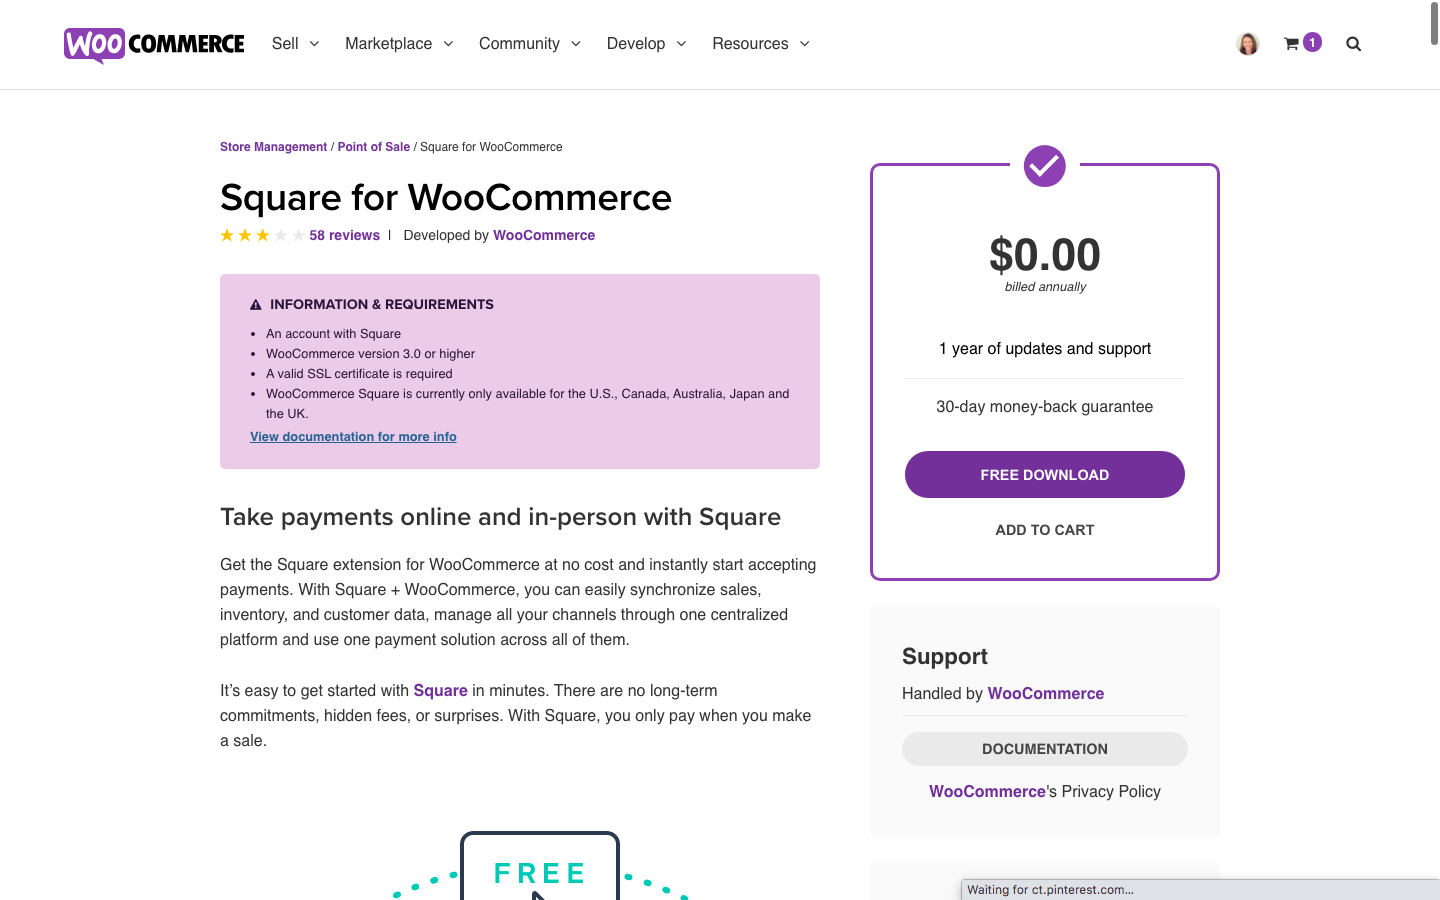
Note: WooCommerce Square is currently only available for stores in the US, Canada, Australia, Japan, and the UK.
1. Open a Square Account
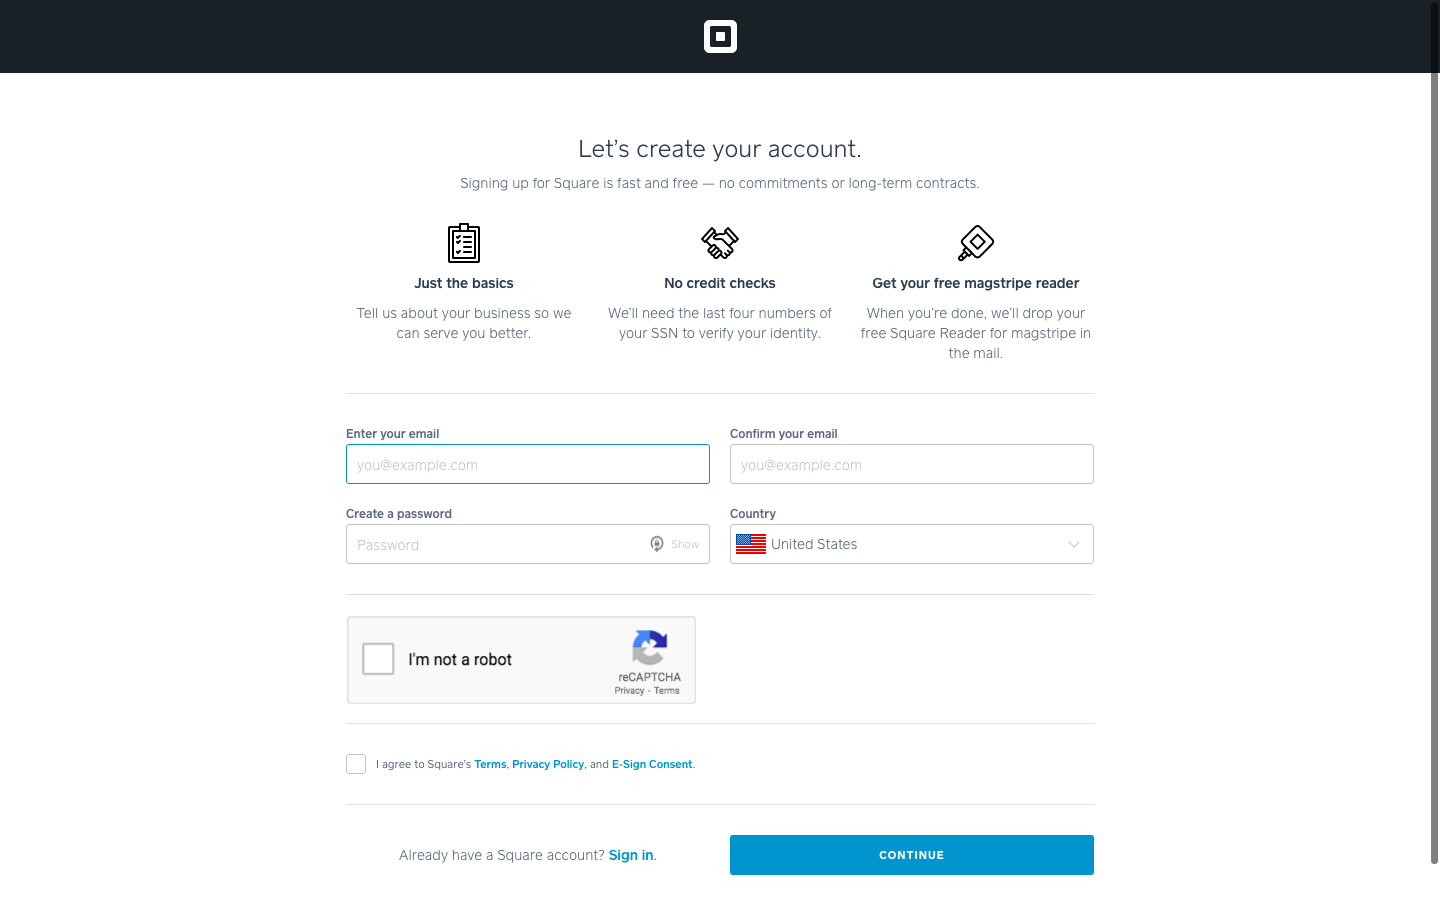
Before you can integrate Square POS with WordPress, you need to sign up for a Square account. Go to squareup.com and click the blue “Get started” button.

It’s free to create your account. You’ll need to confirm your identity, provide your business details, and link your bank account to be able to access funds. The signup process varies slightly depending on what country you’re in.
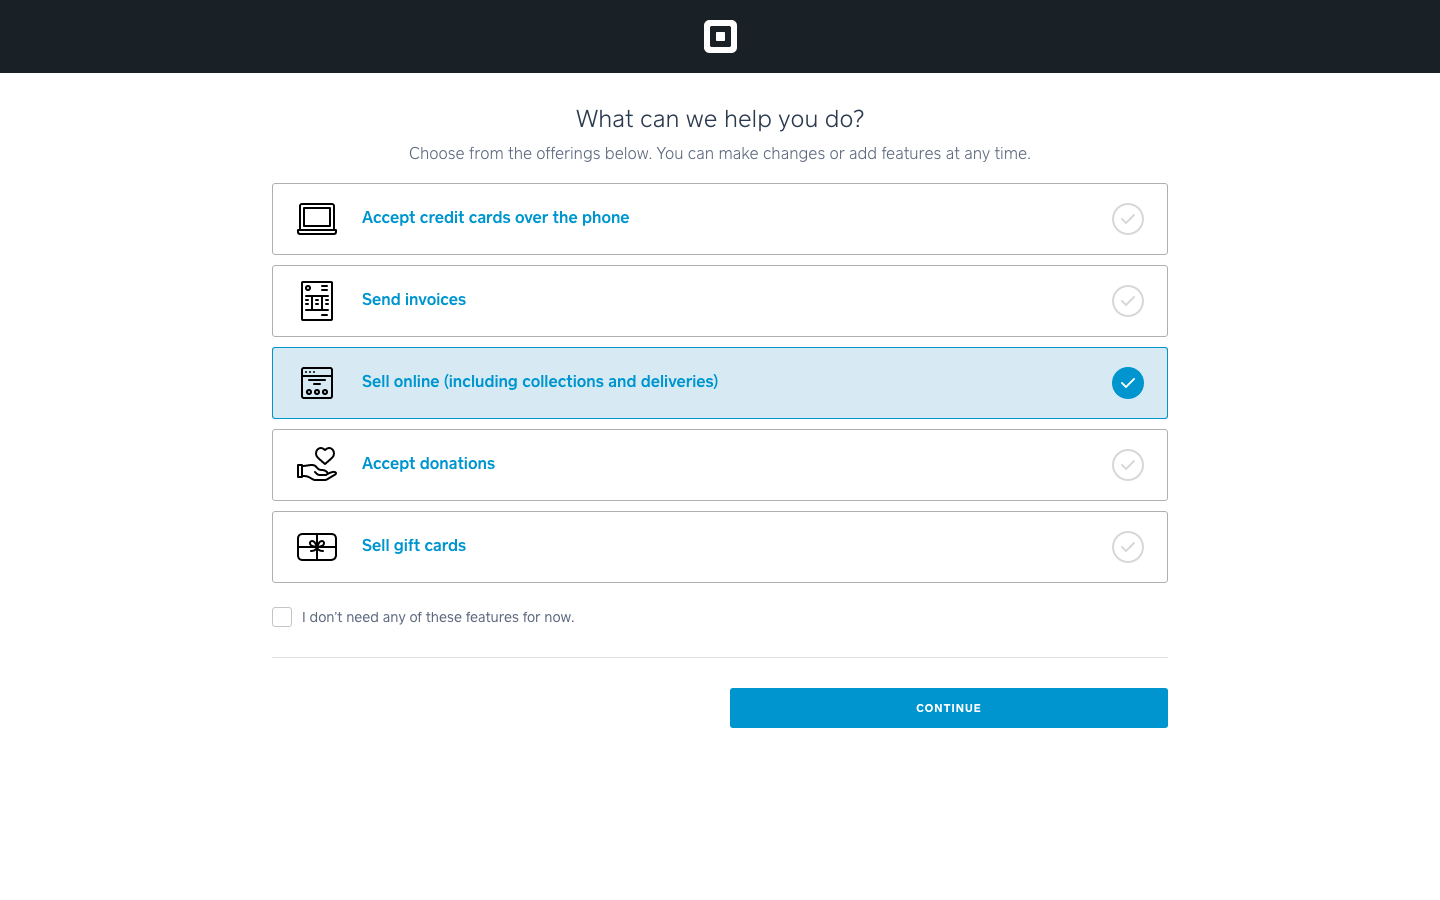
You’ll be taken through a couple of screens to start the account setup. If you just want to use Square on your WooCommerce site, it’s best to opt for quick setup.
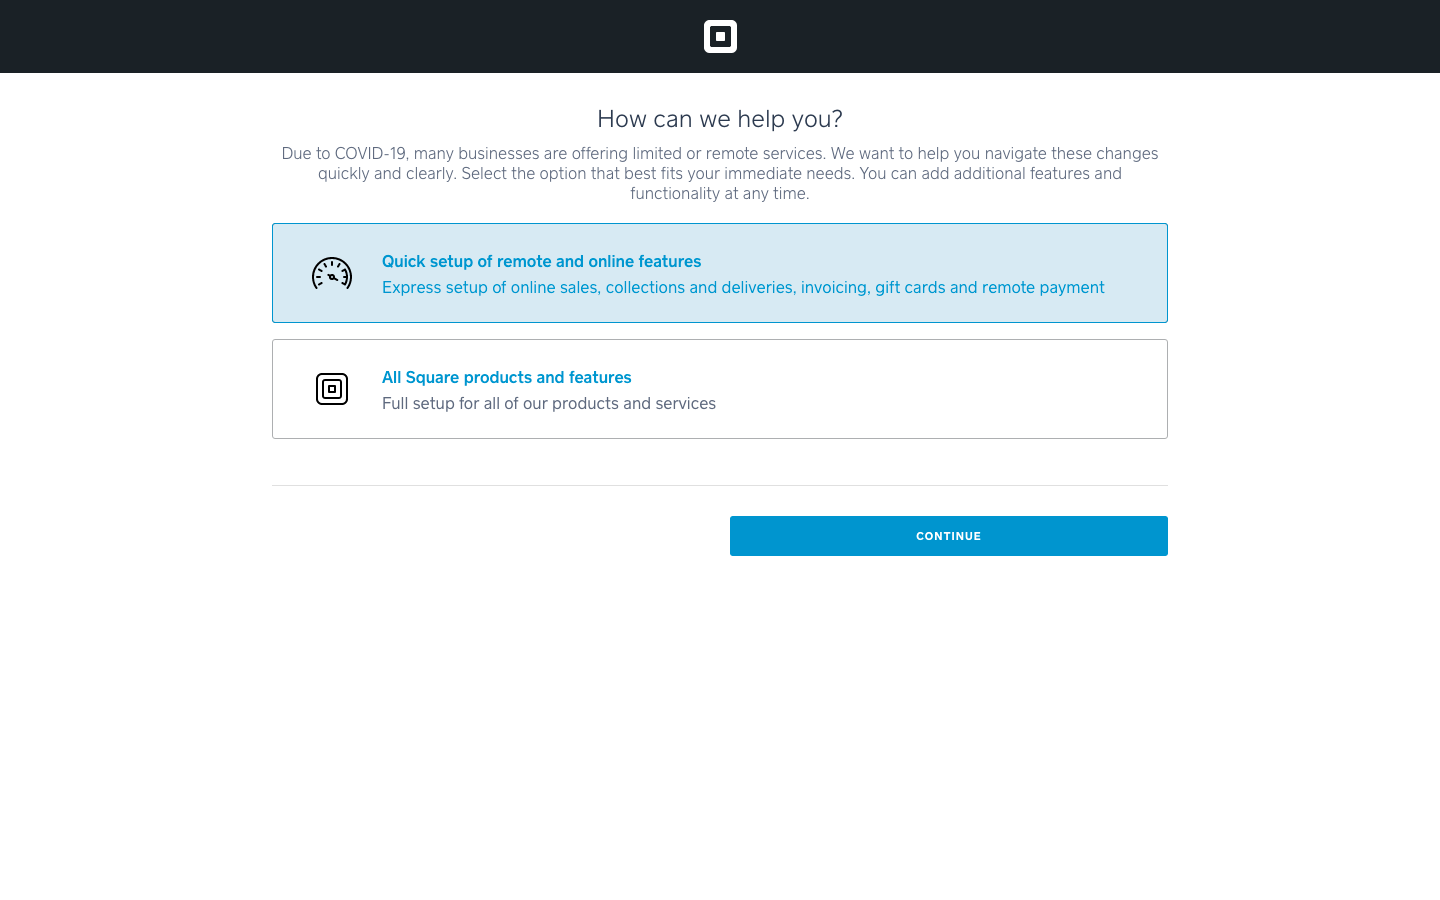
Next, choose the option to sell online. You can easily add additional functionality at a later date.
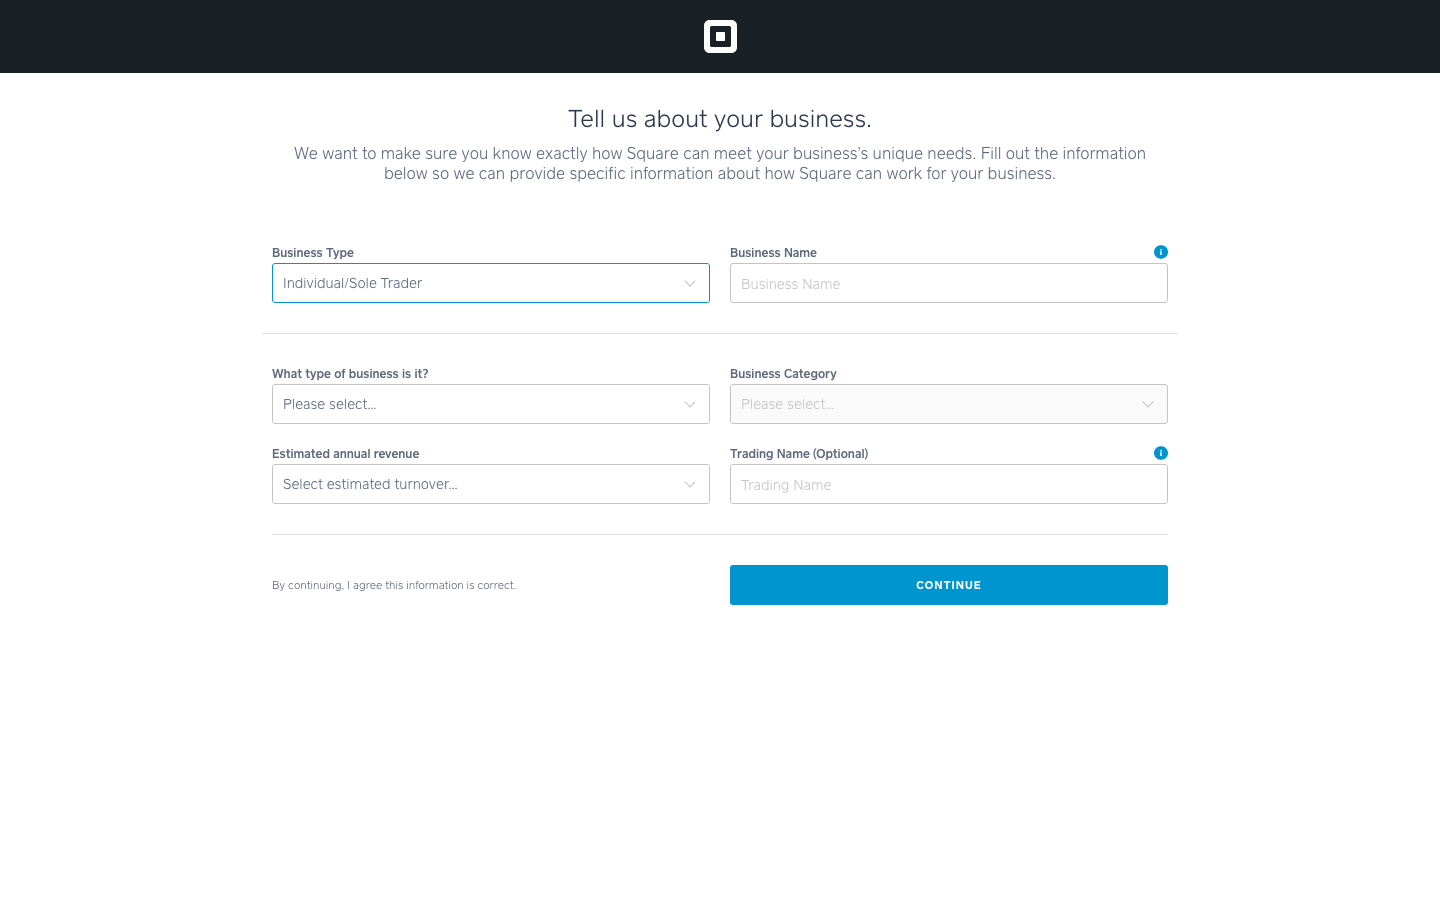
You’ll then go through a couple more screens to fill out information about your business and your personal details.
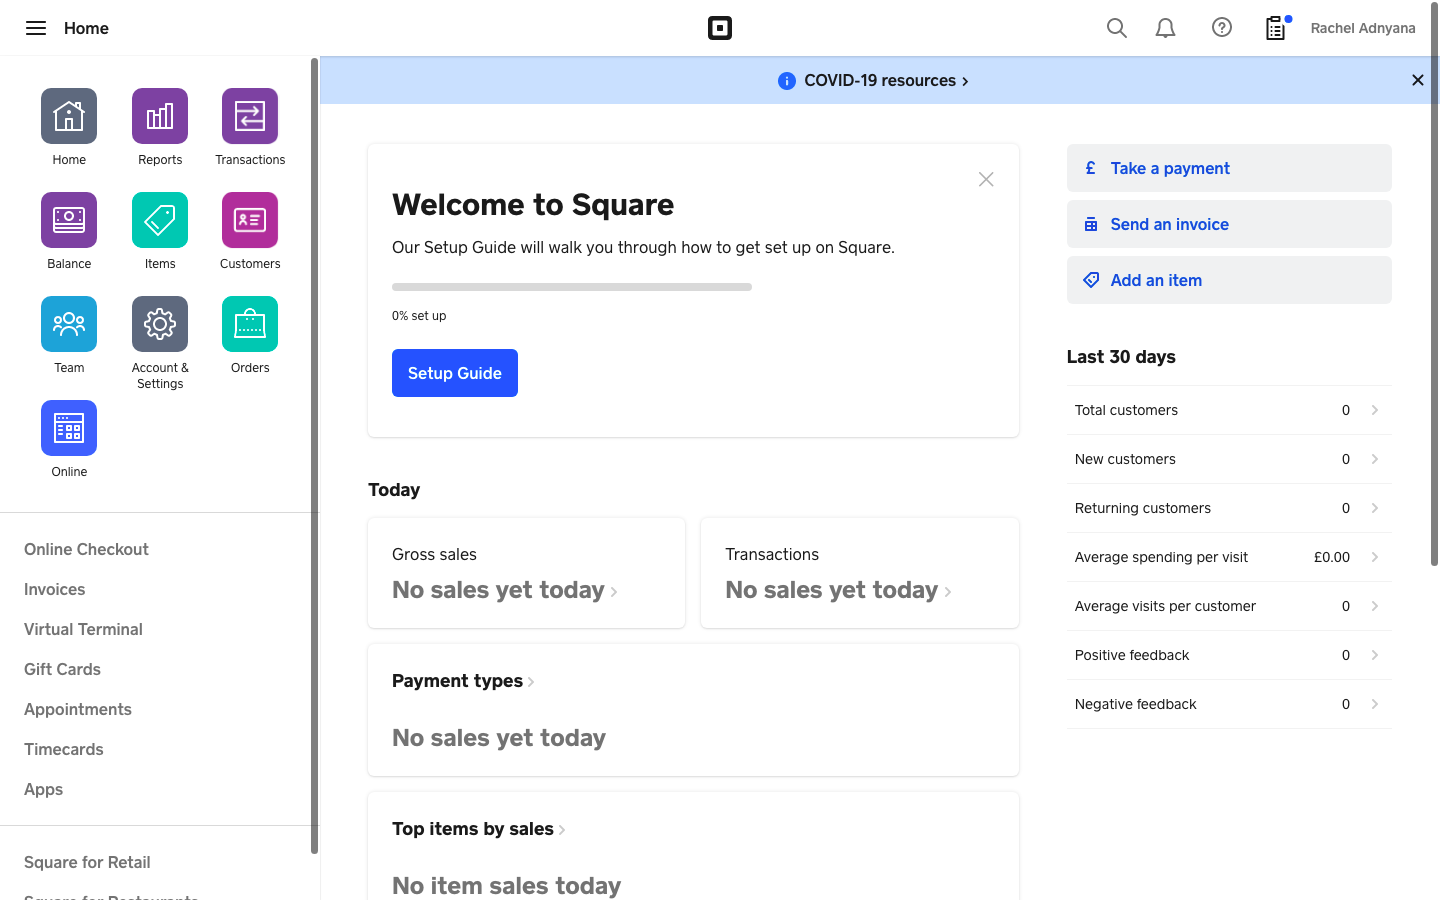
Once you’ve filled out your details, you’ll arrive at your Square dashboard, which comes with a handy setup guide to show you around.
2. Download the Square extension for WooCommerce
Go to https://woocommerce.com/products/square/ and click the purple “FREE DOWNLOAD” button.
You’ll need to sign in with your WordPress.com account to proceed. This will take you to a checkout page but the total should be $0.
Fill out your details and click the purchase button.
You should get a message that your order is complete. Click the download button to download the plugin.
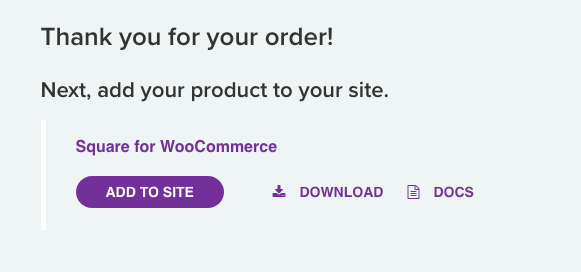
3. Install the Square plugin
Log into the backend of your WooCommerce store and go to Plugins > Add New > Upload in the WordPress dashboard.
Click the “Upload Plugin” button, then the “Choose File” button and select the zip file you just downloaded. Click the “Install Now” button to install the Square plugin.
If all goes well with installation, you should get a message saying that the plugin has been installed successfully. Click the “Activate Plugin” button.
4. Connect your site to Square
Go to WooCommerce > Settings > Square in the WordPress menu.
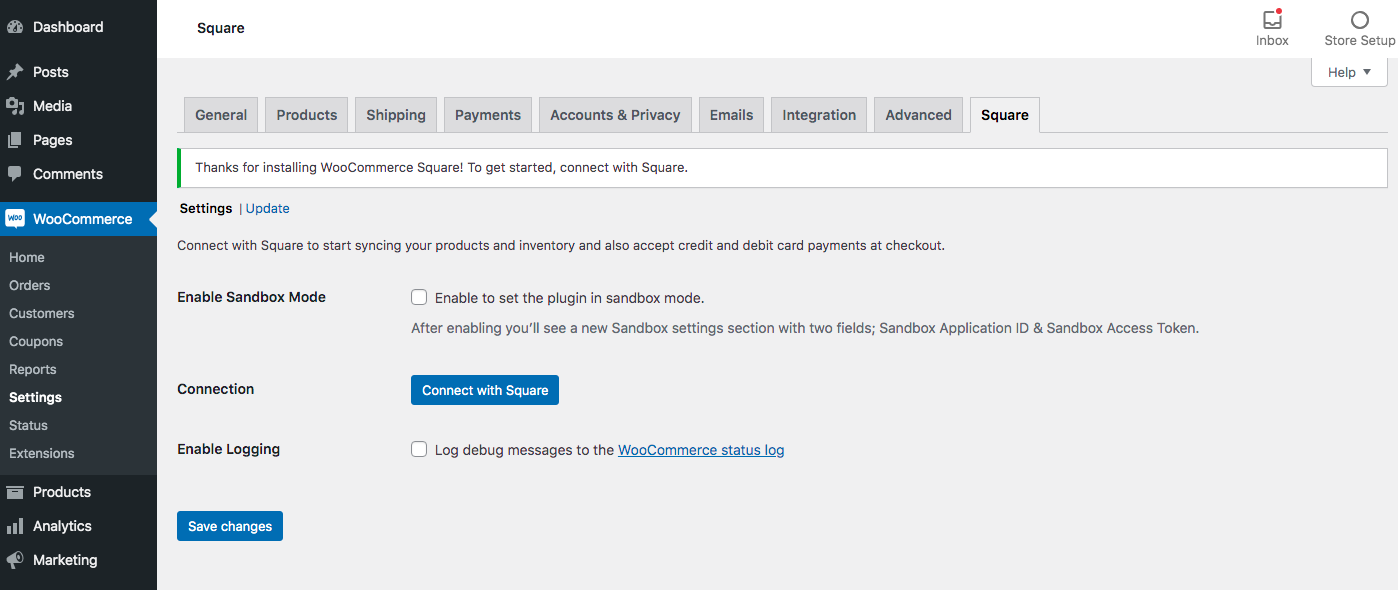
You’ll see a couple of options here. Square sandbox mode is for developers who are building applications that use Square, so you can ignore this.
However, if you want to try out Square without setting up a full account, you can create a developer account and add a new app. Copy the generated application ID and sandbox access token and paste it into WordPress to use the test account.
You can then activate sandbox mode in WordPress to try out Square using test data. Square even provides test card numbers so you can see exactly what happens when a customer makes a purchase or if their card is declined.
You can read more about Square Sandbox at the Square Developer site.
If you’re ready to go ahead with your Square seller account, click the “Connect with Square” button to link your account.
This will take you to a long list of permissions that Square needs in order to sync with your WooCommerce account.
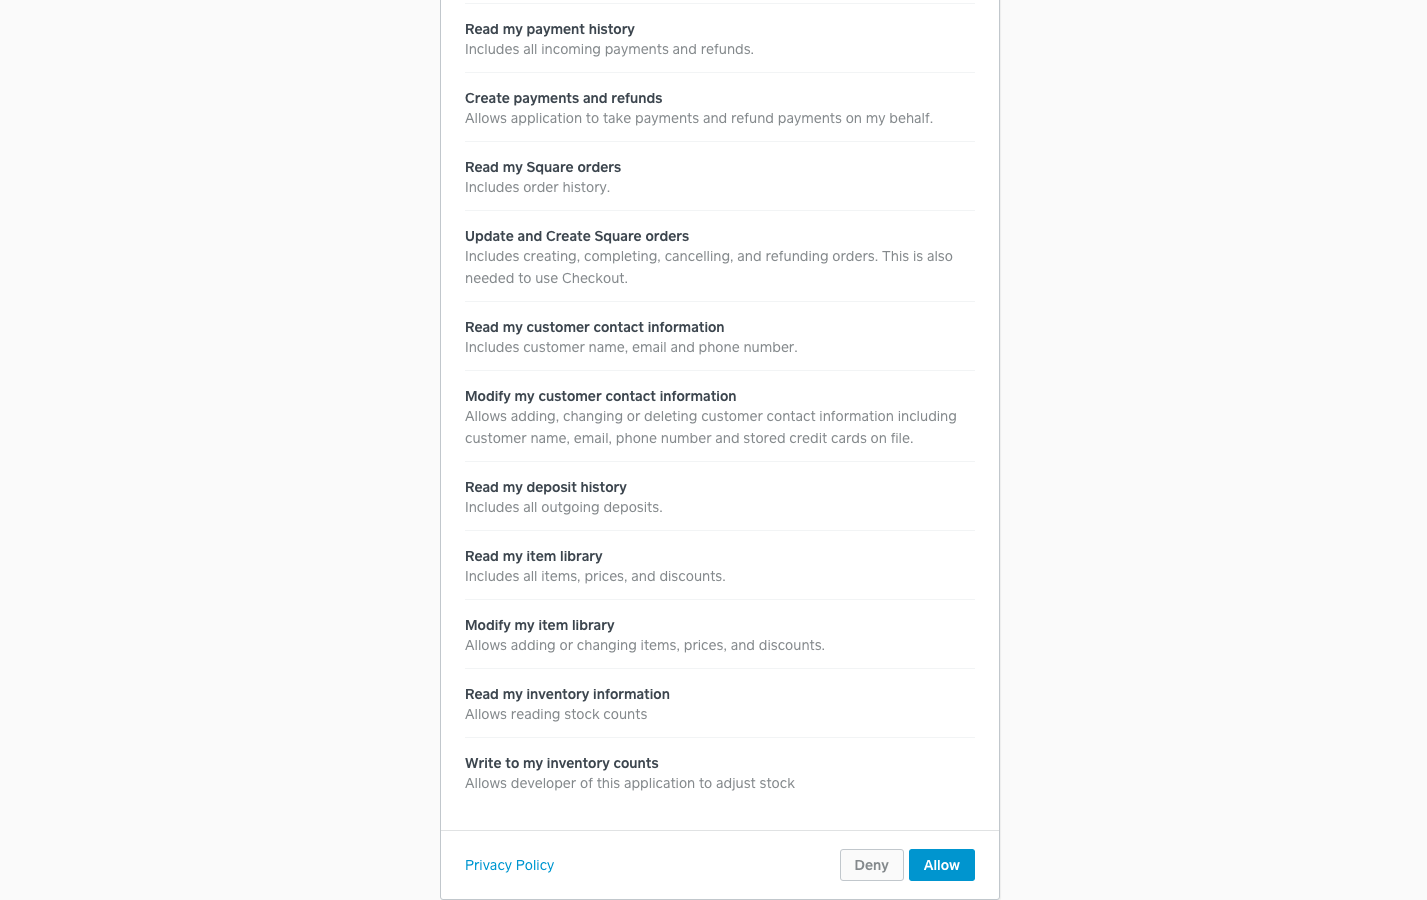
Click the “Allow” button to continue. You should get a message from WooCommerce that Square has been authenticated.
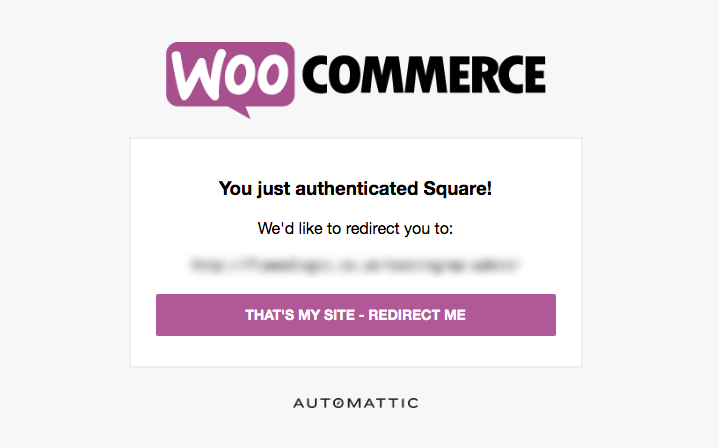
5. Setting Up Square
You should then be taken back to your Square settings page, where you should have some new options available.
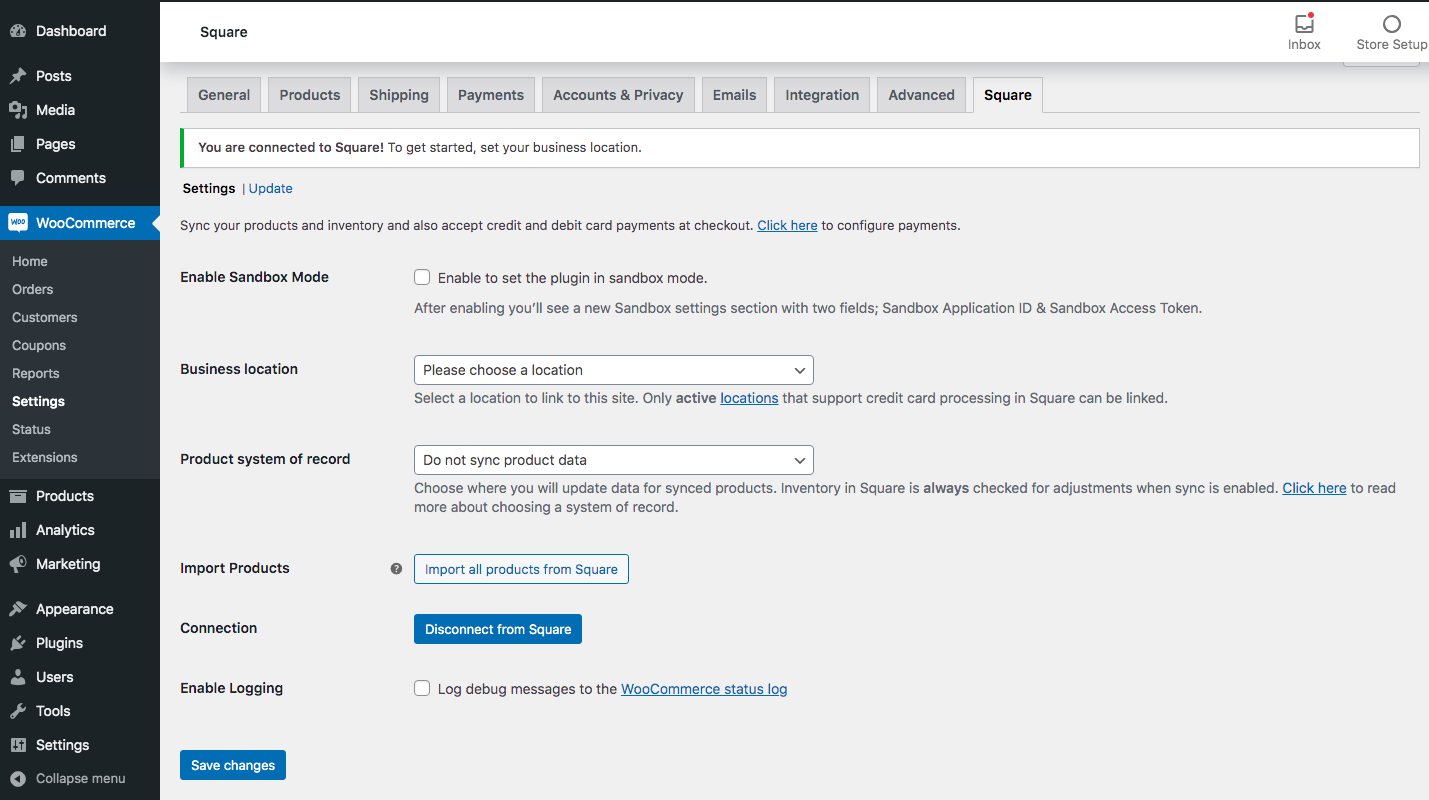
From here you can set your location (you will only have access to locations that your identity has been verified for in Square, and only if they are active and have credit card processing enabled).
You can also choose whether or not to sync product data and select whether you will update product data in WooCommerce or Square. More on product syncing later.
Finally, there’s an import button to import all your product data from Square.
If you change any of these settings, make sure to click the “Save Changes” button at the bottom of the screen before leaving the page.
6. Setup Square Payments
Now that you’ve linked your Square account to your WordPress site, you can go into the main payment settings to get everything set up the way you want. Go to WooCommerce > Settings > Payments in your WordPress dashboard, find Square in the list of payment methods, and click the “Set up” button (this changes to “Manage” when Square is enabled as a payment method.
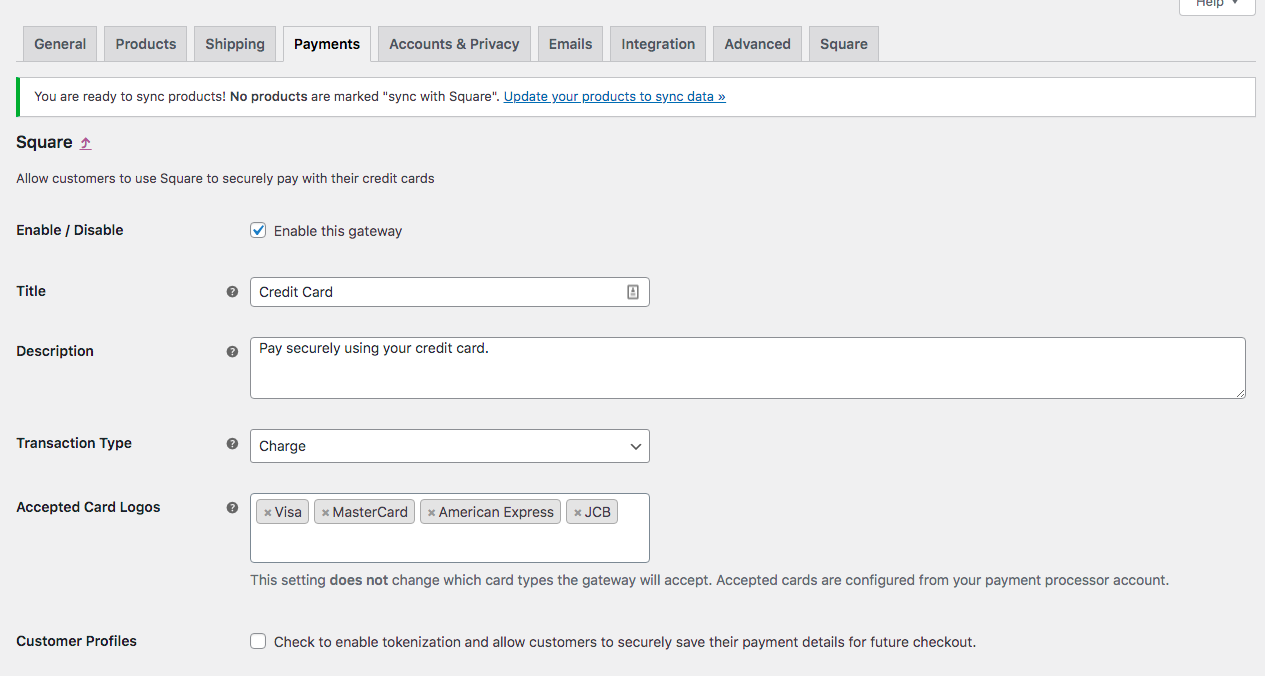
The first set settings mostly control the visual appearance of your checkout.
However, you must make sure to tick the “Enable this gateway” checkbox to enable Square as your payment gateway.
You can change the title of the payment method and the description that the shopper will see when they come to checkout.
You can also choose which card logos are accepted and whether customers can save their payment details for future checkout.
Scroll down the page to your digital wallet settings.
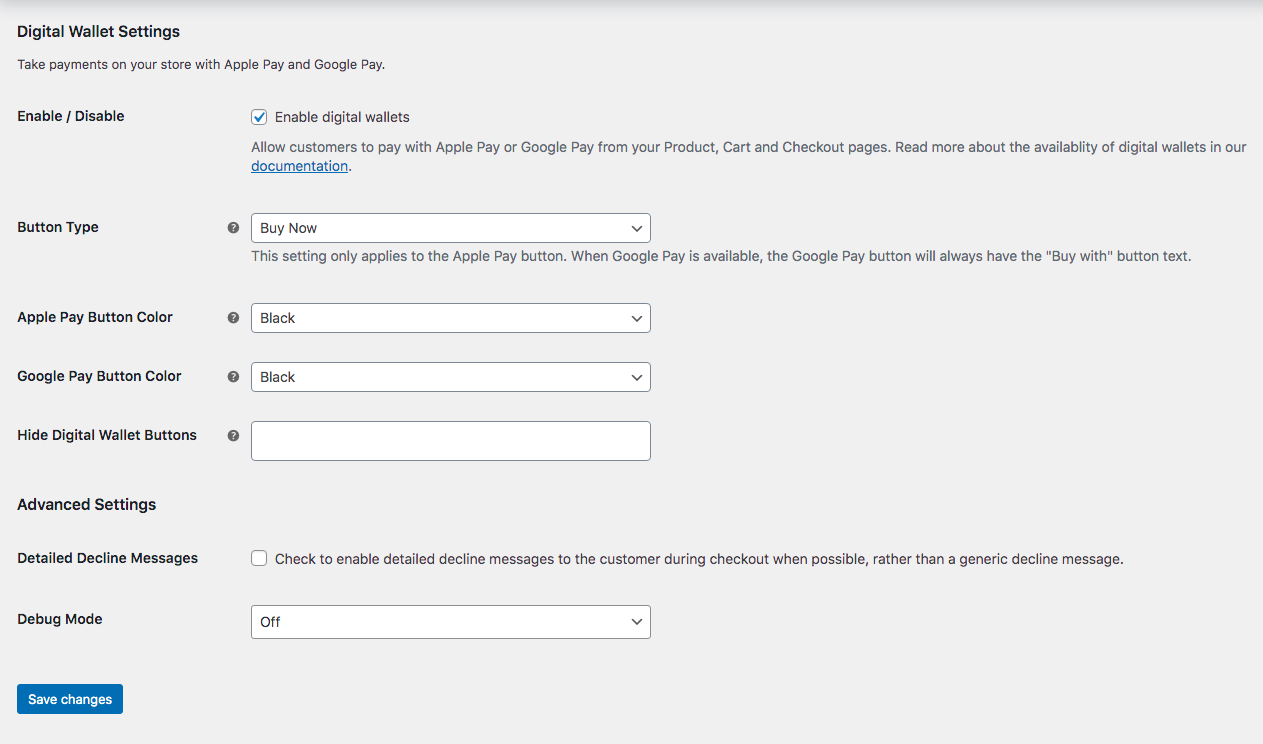
Here you can enable or disable Apple Pay and Google Pay and change the appearance of the payment buttons.
Finally, there’s the option to enable detailed decline messages. If checked, this will give the customer more information about why their card was declined.
Again, remember to click the “Save changes” button if you change any of these settings.
At this point, Square payments should be ready to use on your WooCommerce site. However, if you’ve just set up your Square account, you should walk through the setup guide on your Square dashboard to make sure everything is set up correctly and you’re ready to take payments.
7. Syncing products
If you just want to use Square as a payment gateway, you can skip this section. However, if you also want to use Square to manage your product inventory, you’ll need to set up syncing.
To enable syncing, you first need to go into your products and enable the “Sync with Square” option. You can do this on a single product basis or update it as a bulk edit. Products must have an SKU to be synced to Square.
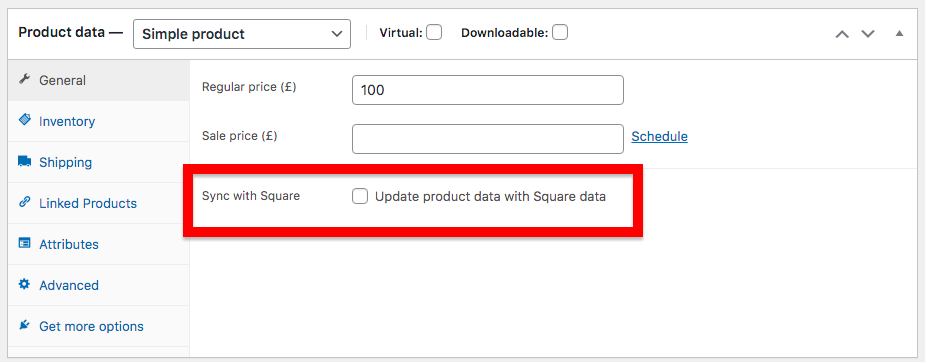
As well as enabling sync on a product basis, you also need to set it in WooCommerce > Settings > Square.
Choose your “Product system of record”. This is where you’ll update data. If you choose Square as your system of record, your WooCommerce products will be overwritten with product data in Square.
New products added to Square will not be synced across. You’ll need to click the “import all products from Square” button if you add new products in this way.
If you choose WooCommerce as your system of record, the data you edit in WooCommerce will be copied to Square, including new products.
It’s important to note that products in Square can only have one category. So if you’re planning to use Square for inventory management, don’t list products under multiple categories in WooCommerce.
Automatic syncing happens approximately every hour. You can also run manual sync to update product info at any time.
8. Check the front end of your WooCommerce Site
Once you’re happy with how everything is set up, you can hop on over to the front end of your site, add something to your cart, and see how checkout will look for your customers.
If you’ve integrated Square correctly, you should see a form for credit card details on the order page, with the wording and card logos you specified in settings.
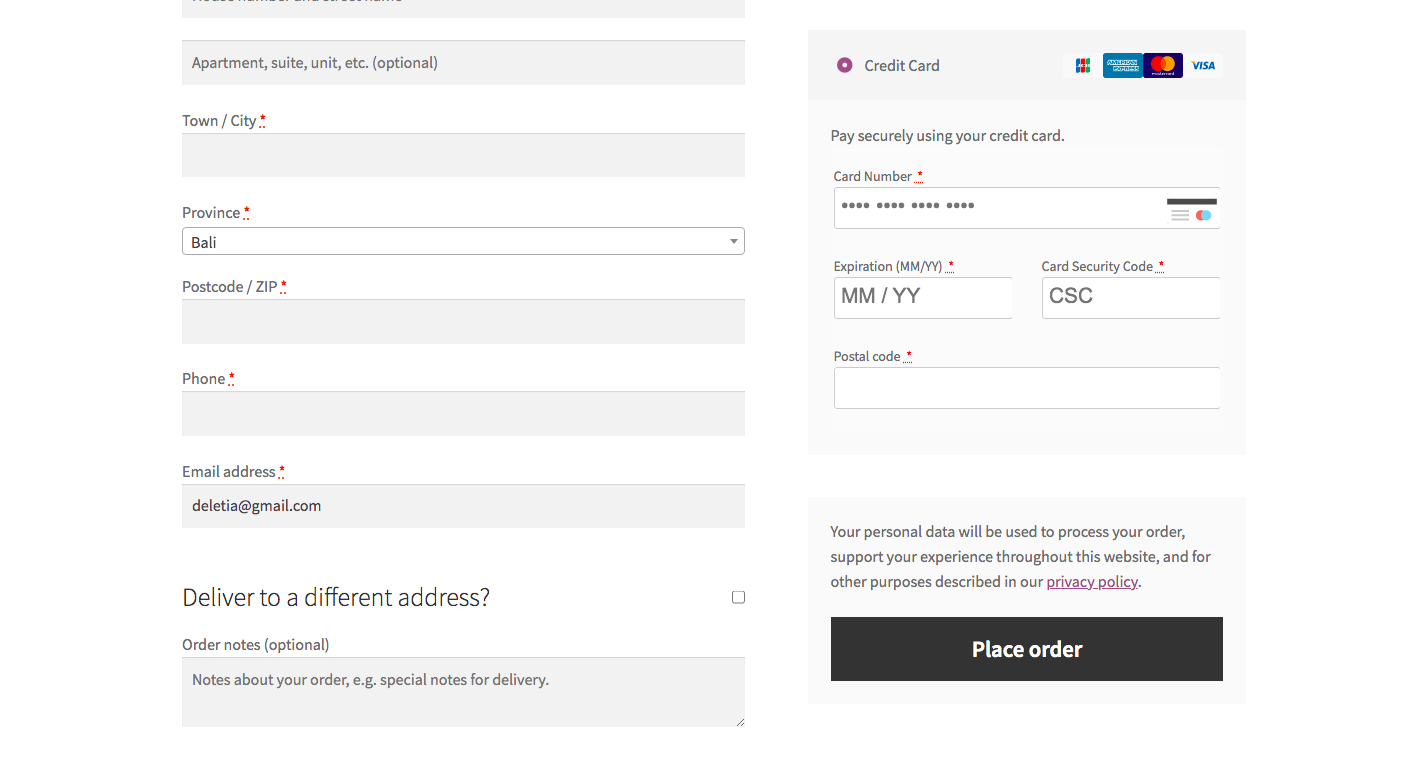
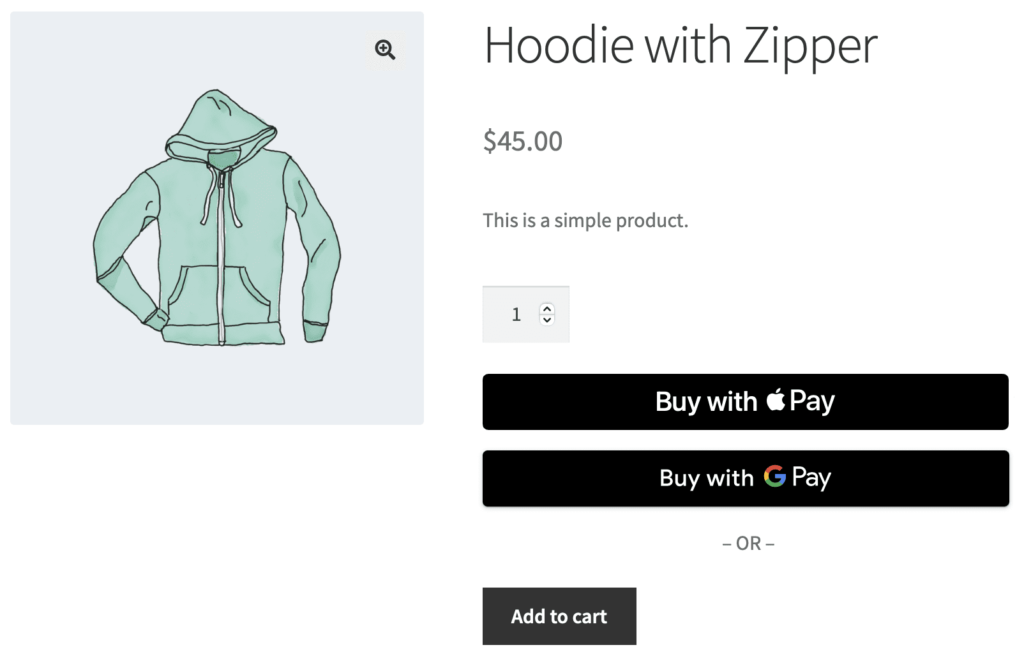
If you enabled digital wallets in your payment settings, you should also see the option to checkout with Google Pay and/or Apple Pay.
Customers will only see the Apply Pay button if they are using an Apple device
Start Taking Payments and Making Money!
Square is a really easy way to get started taking credit card payments on your online store. It’s completely free to setup and offers lots of flexibility for future expansion.
Hopefully, you’ve found this guide useful. If you’re not sure if Square is the right option for you, you might want to consider some other payment gateways. Or if you’re finding the technicalities of working with WooCommerce are too much for you, you might want to consider other alternative eCommerce platforms.
Leave a Reply