How to Create a Facebook Shop Page (Step by Step)
Do you want to make a profit selling your own products online?
Then you’re going to need an online sales platform.
Some companies choose to build an entire website from scratch, implementing eCommerce tools like checkout pages and membership components to boost their chances of sales. However, there is a slightly simpler option available. You could always create a Facebook shop page instead.
A Facebook shop page is an online sales solution that allows business leaders to sell their wares through their favorite social media channel.
Even if you already have a website, creating a Facebook sales page to go alongside it could be an excellent way to boost your chances of conversions. Facebook has over 2.3 billion active users each month. That’s a lot of potential customers.
Selling on Facebook: An Introduction
Facebook is more than just a social media channel where you can connect with potential leads. As more companies have discovered the benefits of social media for eCommerce, Facebook has quickly gained traction as a leading solution for quick sales too.
There are two ways that you can sell on Facebook today:
- Use the Facebook shop platform to create a store, list your products, and connect everything to a digital shopping cart. This is probably the easiest option.
- Use an eCommerce website builder to design your digital store, then link your products to your Facebook store page.
Whichever option you choose, you’ll need to learn the basics on setting up a Facebook store first. Remember, you’ll need a Facebook account and a Facebook Business page to get started.
Your Facebook store will also have to adhere to the Terms and Conditions laid out by Facebook here, so it’s worth double-checking before you begin.
Step 1: Go and Configure Your Shop Page
The first step in creating your Facebook page is to go to your own Facebook page. You’ll need to be logged into your Business account, not your personal account. By default, most Facebook pages will already have the Shop page accessible when they log in.
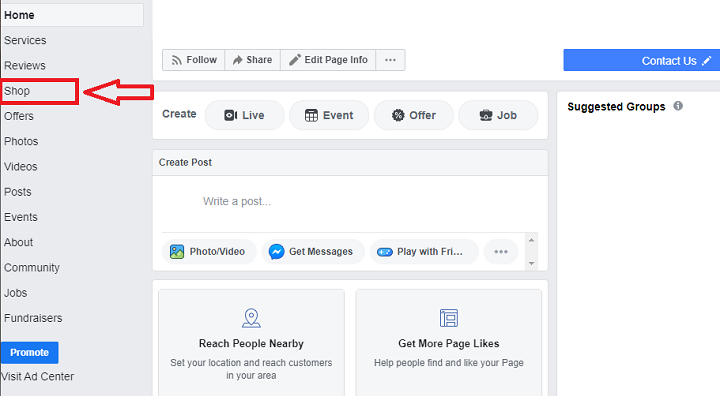
Click on the Shop tab and set up your store details.
You’ll see a pop-up from Facebook explaining that you’re about to create a Facebook page, and you’ll need to click the Get Started Button.
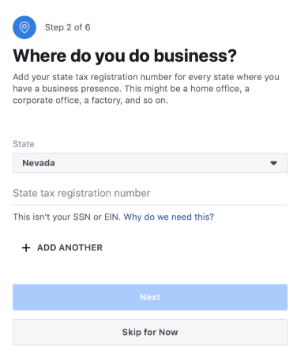
Make sure that you have all of the information you’re going to need for your store laid out already. This includes:
- Your location: The states where you do business (You can add multiple)
- Your state tax registration number
- The name of your business
- The currency that you accept
- The location of your business (street address and zip code)
- Your business email address
- The products that you sell
- Your business representative information (usually you if you’re the owner of the business)
Once you’ve filled out all of that information, you can finalize the set-up of your store, and start working out things like shipping policies and return policies.
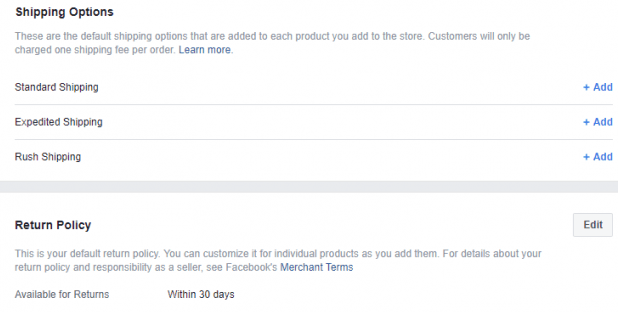
Step 2: Setting up Shipping and Return Options
Facebook won’t allow you to set up a store unless you have some basic shipping and return options in place. You’ll also need to add your email for how customers can get in touch if they have a problem.
It’s worth noting that Facebook does have some restrictions on how fast you need to ship. After receiving an order, you’ll have 3 days to get the package to the post office. Your customer needs to receive the package no more than ten days after paying you.
You’re also going to need to use a shipping service that can provide tracking and delivery information. You could also include this information on your website if you offer memberships and personal account options.
Another important factor: Your customer should be able to cancel an order within 30 minutes of purchase if you don’t immediately mark it as shipped.
Remember to agree to the Merchant Terms and Policies before you finish your set-up.
Step 3: Configuring Payment Options
Congratulations, your Facebook shop page is coming together!
Now you need to ensure that you can get paid.
Your options here will depend on the country that you’re selling in. For instance, if you’re setting up your store in the US, you can link a bank account. You may also be able to process purchases through things like PayPal and Stripe.
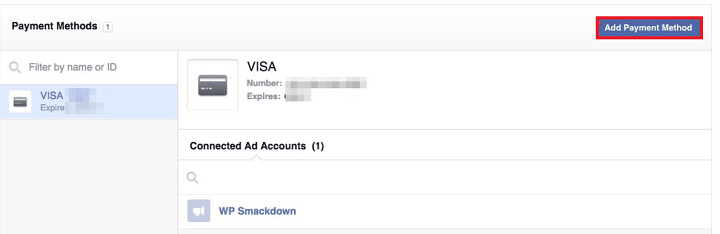
The good thing about building a shop with Facebook, is that the wizard takes you through the whole process step-by-step.
You will need to implement your tax details, so make sure that you have them available before you progress to the payment section. You’ll also need your legal name and business name too.
Remember, when adding your banking and routing numbers, ensure you’re providing your business bank details. This will come in handy at tax season when you need to figure out how much you owe.
Step 4: Adding Products
Once you know how you’re going to get paid, the next step is adding some products!
Facebook will encourage you to do this as soon as you go to your shop page.

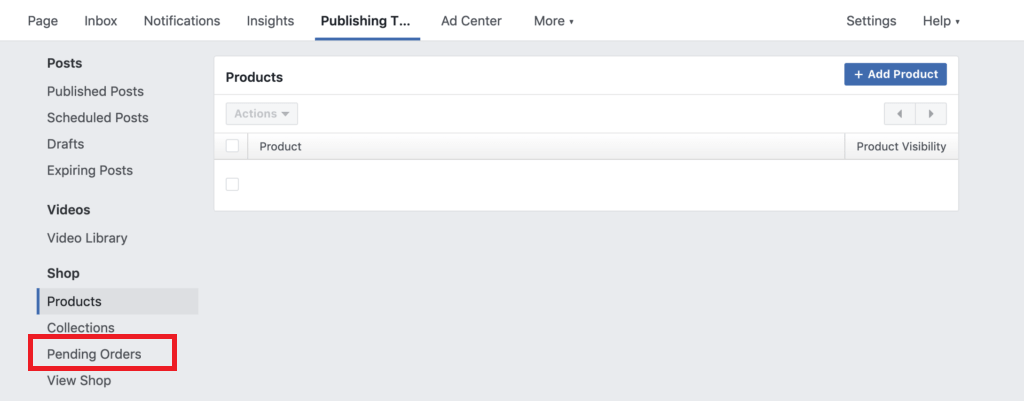
Click the button that says Add Products to begin bringing your online store to life.
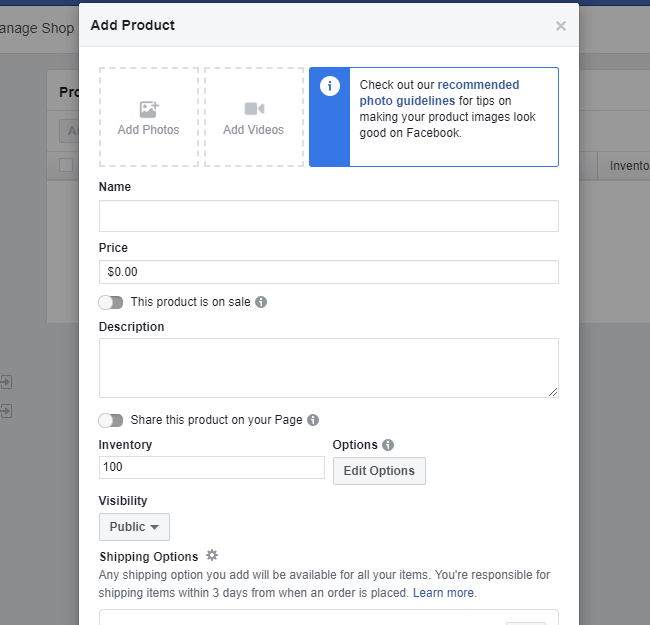
The form that Facebook provides to add a product to your store is very simple. You can add the price that you want to sell your product at, the name of the item, and a description. You can also toggle a “sale” notice on and off and add several products you have in your inventory. This means that your customers will see if you run out of stock.
You can also add any product photos or videos that you like to your product page, which works just the same as adding a selfie to Facebook.
When it comes to choosing Shipping options select from the set options you configured during the set-up process. Additionally, make sure that you share the product on your page, and set the visibility of the page to public.
Remember, the requirements for things like product description lengths and photos can change on Facebook from one algorithm update to the next. Your best bet is to check out the listing guidelines provided by Facebook here. At this point in time, you can use images with a resolution of at least 1024 x 1024.
When you’re done, you’ll have a product on your shop page that your customers can click on. When someone interacts with the product, they’ll see the option to buy, or Check out the item on your website.
Another option that Facebook provides is Product Collections. For instance, if you were selling makeup products, you might have a collection for eye shadows, foundations, and lipsticks.
Step 5: Manage your Orders
Once you’ve started selling your products on Facebook, you need to know how to manage your orders. This is a functionality that’s only available in some regions right now, so you might want to check if you have the Pending orders link in your sidebar before you get started.
When you click on this link, you’ll be able to manage orders, check the details of every order that you get, and even see some essential information on your buyers.
Within the pending orders tab, you can also communicate with customers, and fulfill the order according to the requirements set in place.
Remember to click the Mark as Shipped button when you’ve finalized everything.
Alternative Ways to Sell on Facebook (Shopify)
So, what if you want to increase your average order value with Facebook, but you don’t want to use the full Facebook features? There is an option to sell products from your website instead.
One thing to keep in mind, however, is that you will need an eCommerce solution built-in. Shopify (see our review) allows you to establish your store on Facebook without having to worry about any extra technical hurdles. All you need to do to begin is go into Shopify and add an app called Facebook channel.
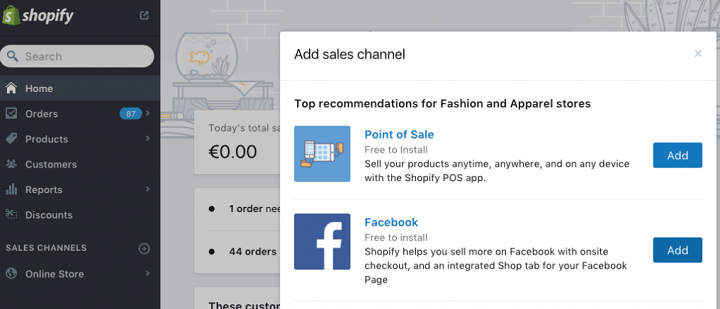
Click on the Add button to add the Facebook app to your store.
Once your app is installed, Shopify will take all the products that you already have on your store and import them into your Facebook page. You sync all your inventory information too, so you can keep track of exactly how much product you have left to sell.
Another option with Shopify is to sell directly through Facebook Messenger. This could be a great option if you’re trying to branch out in the ways that you interact with your customers online.
Keep in mind that you will need to follow a few rules to set up a store with Shopify through Facebook. For instance, you need to list products for sale in your Shopify store in a currency that’s available on Facebook.
You also need a valid customer email address and a Facebook page in the Business format that you can link your Shopify store to.
Alternative Ways to Sell on Facebook (BigCommerce)
If you’re not a massive fan of Shopify and you’d prefer to stick with a different eCommerce provider, there’s no problem. You can always try BigCommerce instead. BigCommerce allows anyone to launch a shop page on Facebook using the information from their BigCommerce store. This is true even if you’re using the free trial version of BigCommerce.
To begin, you’ll need to log into Facebook (hopefully your Business account) and make sure that you’re an admin for your store. You also need to ensure that you have all the right products that you want to sell on Facebook added to your BigCommerce store. Your store also has to be up and running for this to work.
BigCommerce walks you through the process of adding your store contents to Facebook, although the process can be a little trickier than it is with Shopify, for instance.
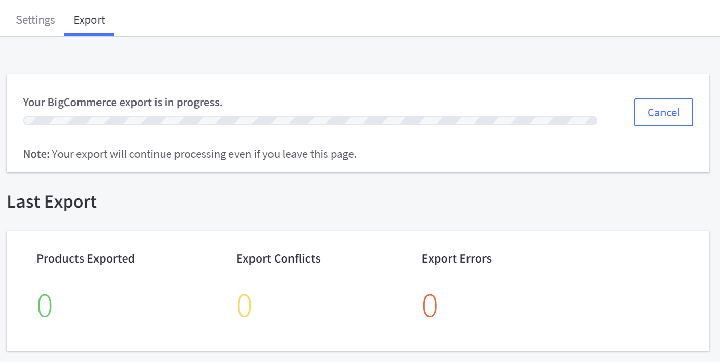
Once you’ve completed set-up with BigCommerce and Facebook, you can export your entire catalog into Facebook, and approve or remove products depending on what you want to sell. Depending on the number of products that you have, you might find that the whole process takes quite a while.
Note that even when you’ve approved all the products that you want to add to your Facebook store through BigCommerce, Facebook will still need to support them too. If you’ve made sure that you’re compliant with the Facebook product and commerce agreement, then this shouldn’t be too much of a problem.
The good thing about BigCommerce is that it also comes with a handy module for Facebook ads, which give you another great way of putting your products in front of as many people as possible. However, there’s no smart back-door interface for setting up your Shop page. You’re still going to be restricted by the rules and regulations of Facebook.
Points to Note About Your Facebook Store
Although selling on Facebook can be an excellent way to increase your revenue and connect with your audience, there are some limitations. For instance, Facebook has a list of prohibited items that you can’t sell on your page, including alcohol, which could be a problem for some sellers.
Additionally, you can only sell physical products through your shop page, so there’s no option for downloads or digital services.
There are also locations where Facebook stores won’t be available to access. That means that you may need to stick with your online store for a while and just use Facebook for advertising.
Go and Set Up Your Store
Now that you know how to create a Facebook shop page, you’re free to go and start building your presence online. Make sure that your shop page always stays optimized so that it can remain at the top of the search results. High-quality images and product descriptions with keywords will help with this.
It’s also worth running regular campaigns both inside and outside of Facebook to attract more customers to your store. For instance, you could also consider signing up with an email marketing tool and sending messages to a list of subscribers.
PPC campaigns and regular paid Facebook campaigns can also increase your chances of earning new customers and conversions.
Remember, the rules and regulations of Facebook stores can change too. With that in mind, it’s essential to keep up to date with all the guidelines that Facebook provides.
We hope you found our guide on how to Create a Facebook Shop Page useful. If you did, you may also want to check out step by step guide on How to Make a Landing Page In WordPress For Free With Elementor.
Leave a Reply