How to Make an Online Marketplace Like eBay or Etsy (with WordPress)

Have you ever wondered how to make an online marketplace like eBay or Etsy? Is there much to it or do you have to spend an insane amount of money to get the ball rolling?
If you complete just a little bit of research on Google you’ll see that all of the most popular marketplaces started as bare-bones as they come. Amazon was initially a basic HTML site, while Etsy and eBay have both seen their fair share of questionable designs (at least when looking back on them).
That said, many marketplaces do take quite a bit of programming knowledge, startup capital and manpower to launch. But things have changed, because now all you have to do is install WordPress and a beautiful marketplace theme to make a pretty incredible marketplace, for both physical and digital products.
The marketplace business is tricky to get into since it seems like every good idea has been taken. However, tons of them pop up every year, with more niche focuses that bring in lots of money.
So, if you’re thinking about making a marketplace eCommerce site like Etsy or eBay, this is the place to be.
Initial Setup: Domain, Hosting, and WordPress Installation
Before doing anything, you must find a domain name, and hosting provider.
I recommend searching for the hosting provider first, since you can generally buy the domain name directly from them.
Some of the best hosting companies include the following:
- InMotion
- HostGator
- Flywheel (use our Flywheel coupon code to get 33% off)
- WPEngine (use our WPEngine coupon code to get 30% off)
All of the above options make for good hosts, at least for startups. Basically, you’ll want to go with a shared hosting account when getting started. This is the cheapest pricing plan, but you can always upgrade when you start getting more traffic.
After you’ve selected your hosting plan, the host will generally ask you what you’d like your domain name to be. Go ahead and search for the domain name of your choice until you find one that’s available.

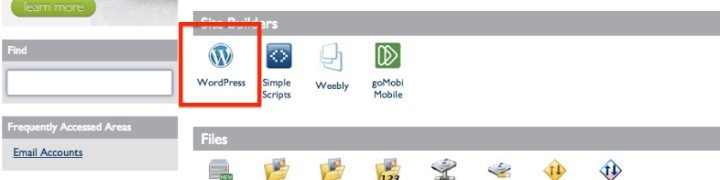
Finally, you’ll want to go to your web host’s admin panel to install WordPress. The majority of reputable hosting companies now offer a one-click WordPress installation. Simply follow the steps on your screen and you shouldn’t have any problems.
After that, you’re ready to move on.
Step 1: Choose a Suitable Marketplace Plugin and/or Theme
There are various WordPress themes and plugins that are designed for WordPress site owners to set up up their own multi-seller marketplace like eBay, Etsy, and AliExpress.
To add the functionality of a marketplace to a website, most people opt for a marketplace plugin. Some options to consider include:
There’s also the option of using a theme with built-in marketplace functionality.
Walletto is a WordPress marketplace theme that includes a product custom post type, shopping cart, payment gateway integrations, and the ability for users to create their own shops. No third party plugins are needed as all functionality is included in the theme.
I’m a fan of keeping the design and functionality of your site separate as much as possible. So for this tutorial I’ll be using the WCVendors plugin to talk you through the steps of setting up an online marketplace.
WCVendors works with any theme that’s compatible with WooCommerce, including the free Storefront theme.
Some marketplace themes designed specifically to work with WC Vendors as a multi-seller marketplace include:
Other free and premium compatible WordPress themes are listed on the WC Vendors website.
Step 2: Installing WC Vendors and a Marketplace Theme
Before you can start using the WC Vendors plugin you’ll need to install WooCommerce.
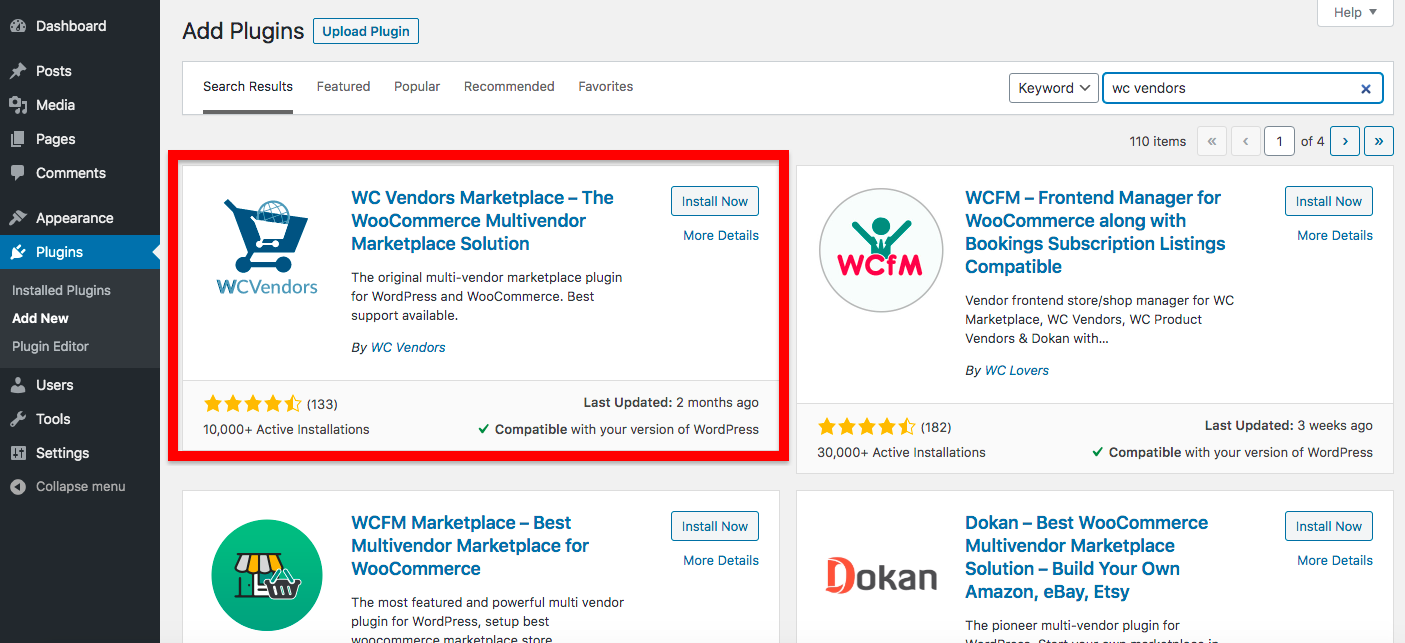
To install the WC Vendors plugin, simply go to your WordPress dashboard and select Plugins > Add New from the menu. You can then search for “woocommerce” and click the “Install Now” button.
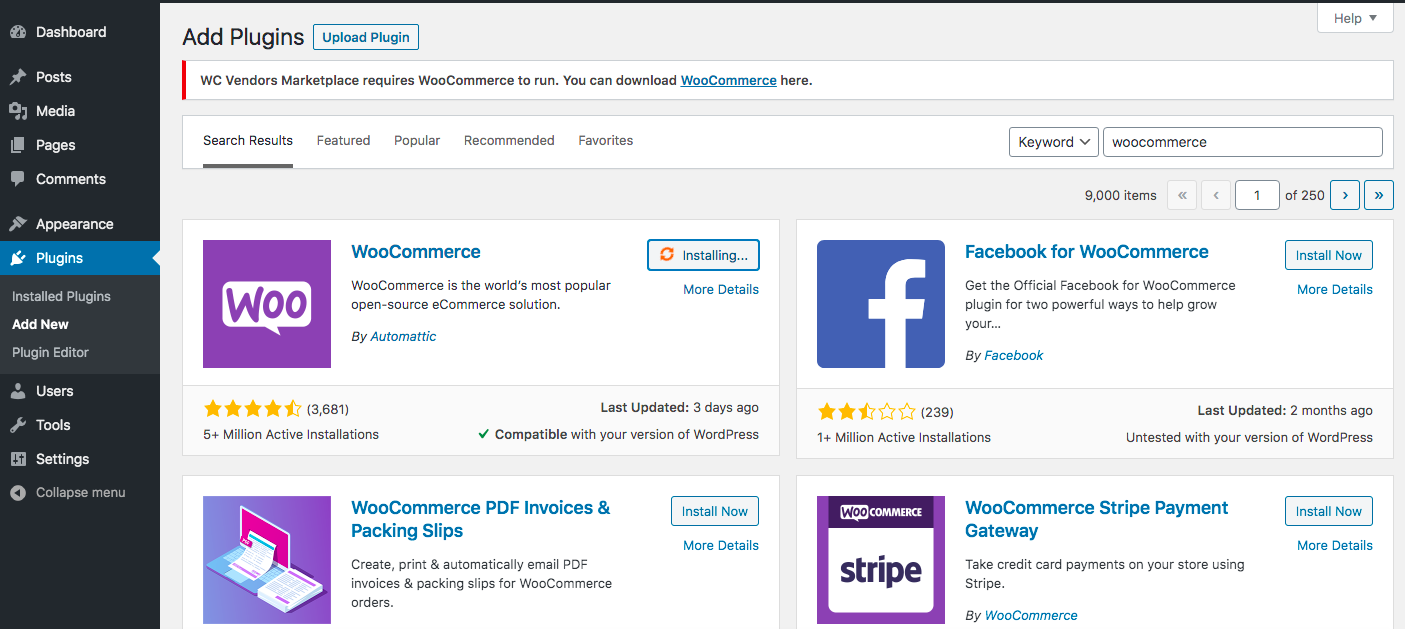
After the plugin has finished installing, click the “activate” button to activate the plugin and go to the store setup wizard.
WooCommerce Setup
You’ll need to setup WooCommerce beforce you can get started with WC Vendors.
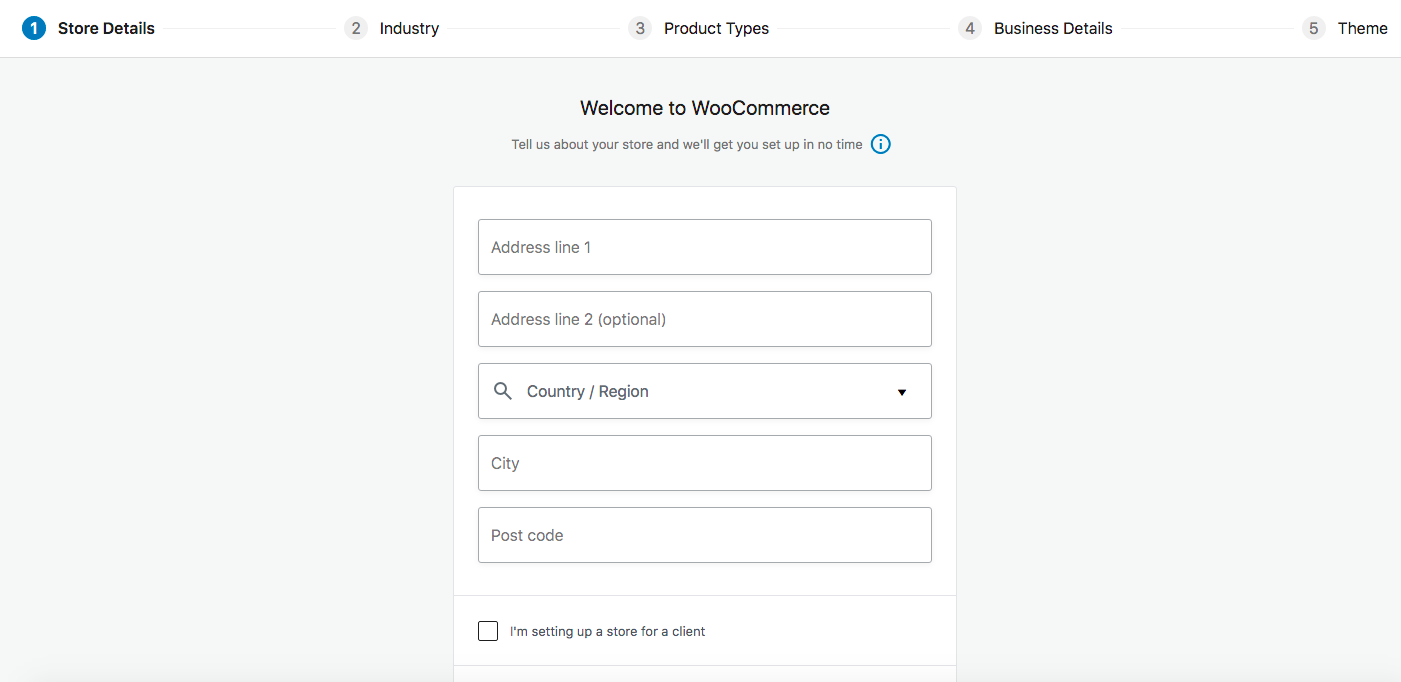
Go ahead and fill out your store details including address, industry, and product types. You can also choose your theme at this stage.
I’d advise starting with the free Storefront theme, which you can then change to a different theme later if you wish.

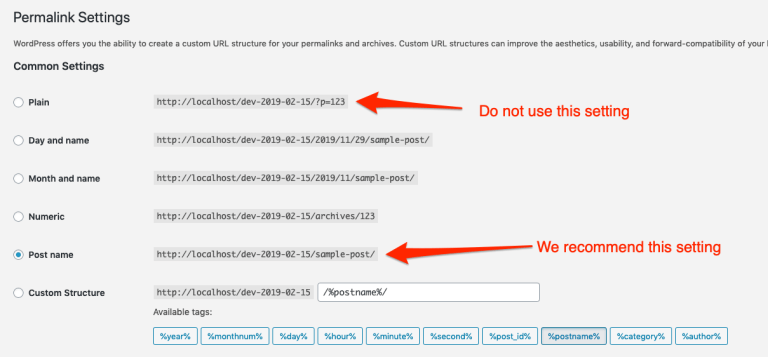
Permalink Settings
WooCommerce and WC Vendors both require your permalinks to use a structure other than the “Plain” setting. You can find this setting in your WordPress dashboard under Settings > Permalink Settings.
WooCommerce Account Settings
You’ll also have to ensure that WooCommerce is configured correctly to allow vendors to create an account. You’ll find these settings in WooCommerce > Settings > Accounts & Privacy under the Account Creation section.
Check the following options:
- Allow customers to create an account during checkout
- Allow customers to create an account on the “My account” page
Disable these options:
- When creating an account, automatically generate an account username for the customer based on their name, surname or email
- When creating an account, automatically generate an account password

Make sure to click the blue “save changes” button at the bottom of the screen before you leave this page.
WC Vendors Setup
After you’ve installed and setup WooCommerce, you can go ahead and use the same process to search for, install, and activate the WC Vendors plugin.
Click the “Install Now” button to install the plugin on your WordPress site, and then click the “Activate” button to make it active.
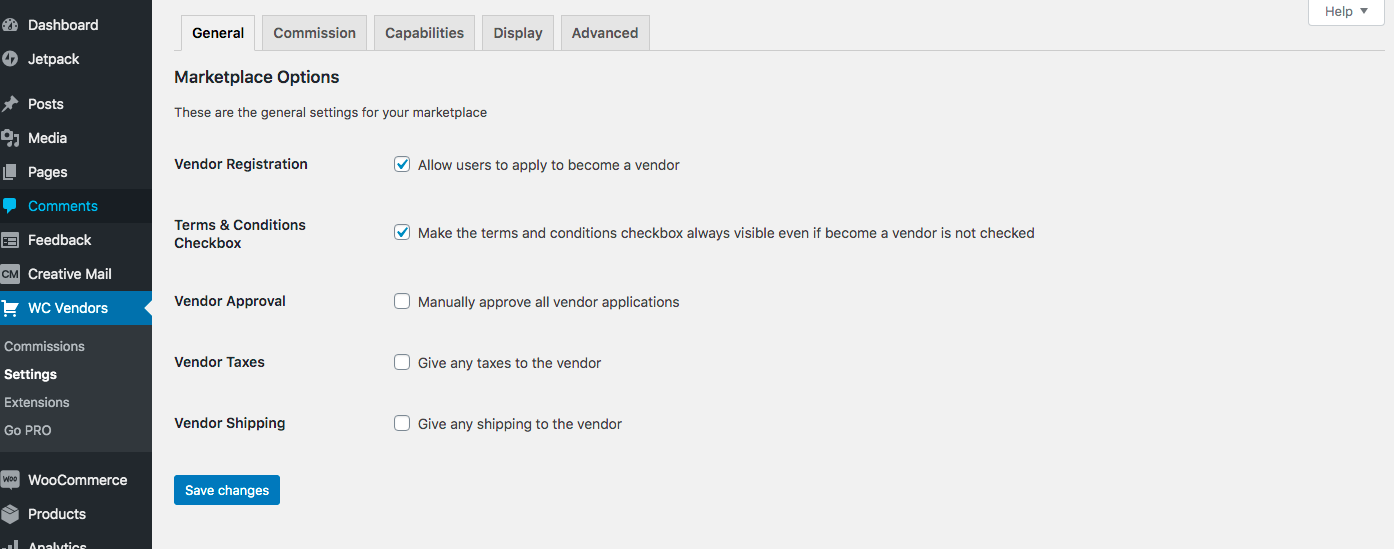
You’ll then be taken to the WC Vendors setup wizard, which will walk you through the basic steps of getting your marketplace up and running.
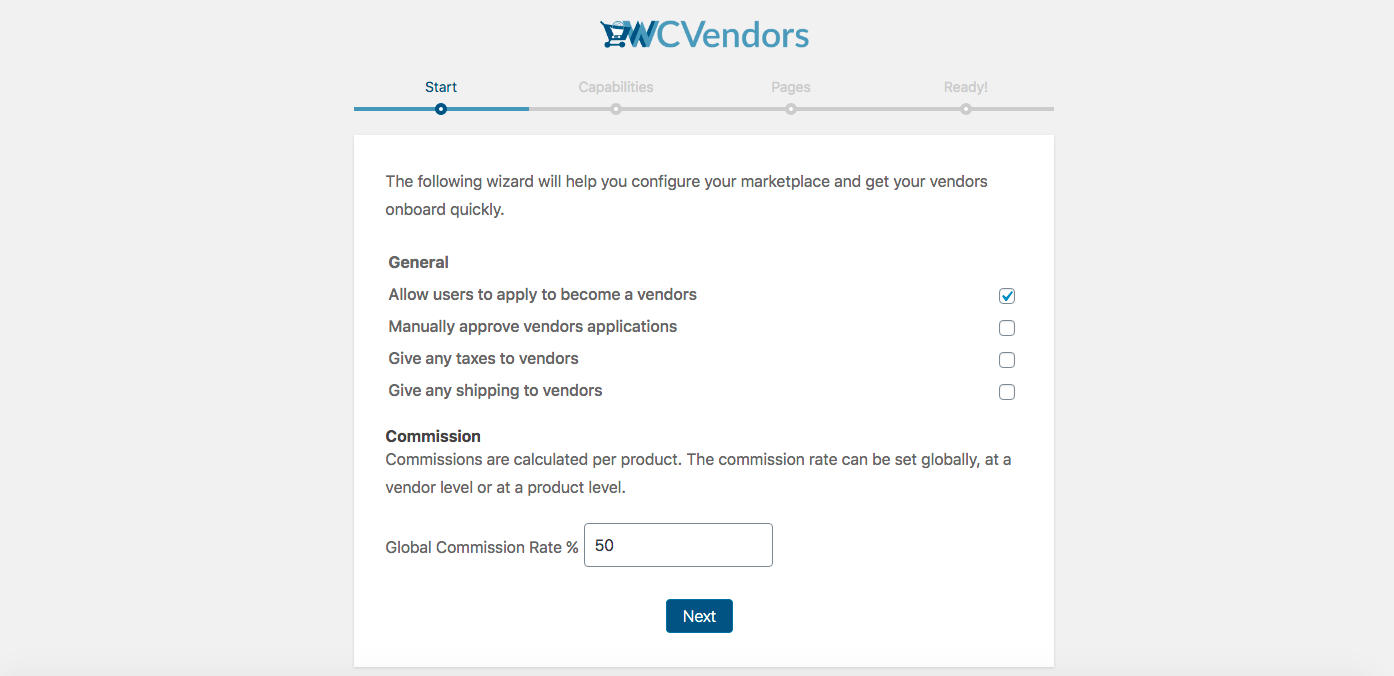
Most of the options on this are pretty self-explanatory. You’ll want to make sure you’ve ticked “Allow users to apply to become a vendor” and you can opt to manually approve applications if you wish.
One important thing to note is that “commission” refers to the commission that the vendor receives for each sale, not the site owner. So for example, if you put 70% in the commission field, this means the vendor will receive 70% of the price the customer pays for an item and the marketplace owner will receive 30%.
For most users it will be sufficient to leave the default settings for now. You can change these later if you wish.
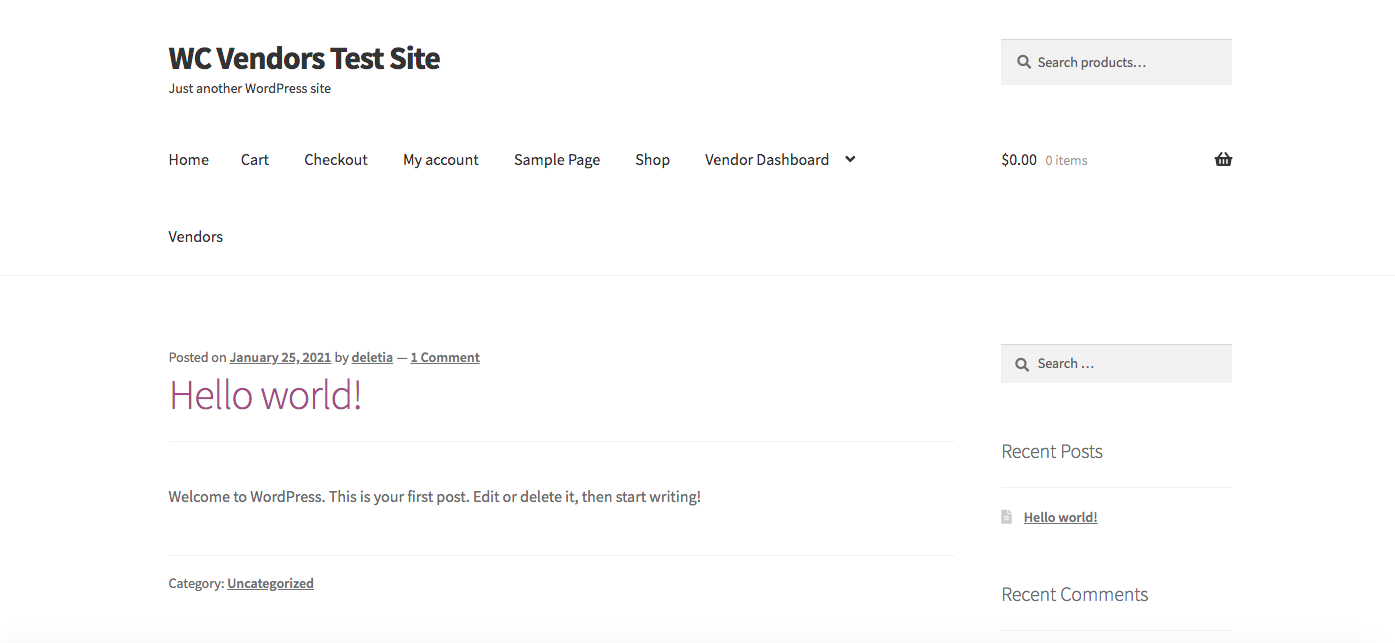
Once you’ve finished the wizard you should have a basic but functional marketplace website. You can return to the WordPress dashboard or visit your site to check it out.
If you go to your site, you’ll see the plugin has added new pages for Vendors and Orders and Shop Settings under the Vendor Dashboard, plus the Shop, Cart, Checkout, Checkout, and My Account pages created by WooCommerce.
Step 3. Testing and Exploring the Vendor Dashboard
The next step is to make sure the site works for registering new vendors and allowing them to manage their individual shops.
If you click on “Vendor Dashboard” in the menu of your site, you’ll be taken to a “My account page” where vendors can log in or create a new account.
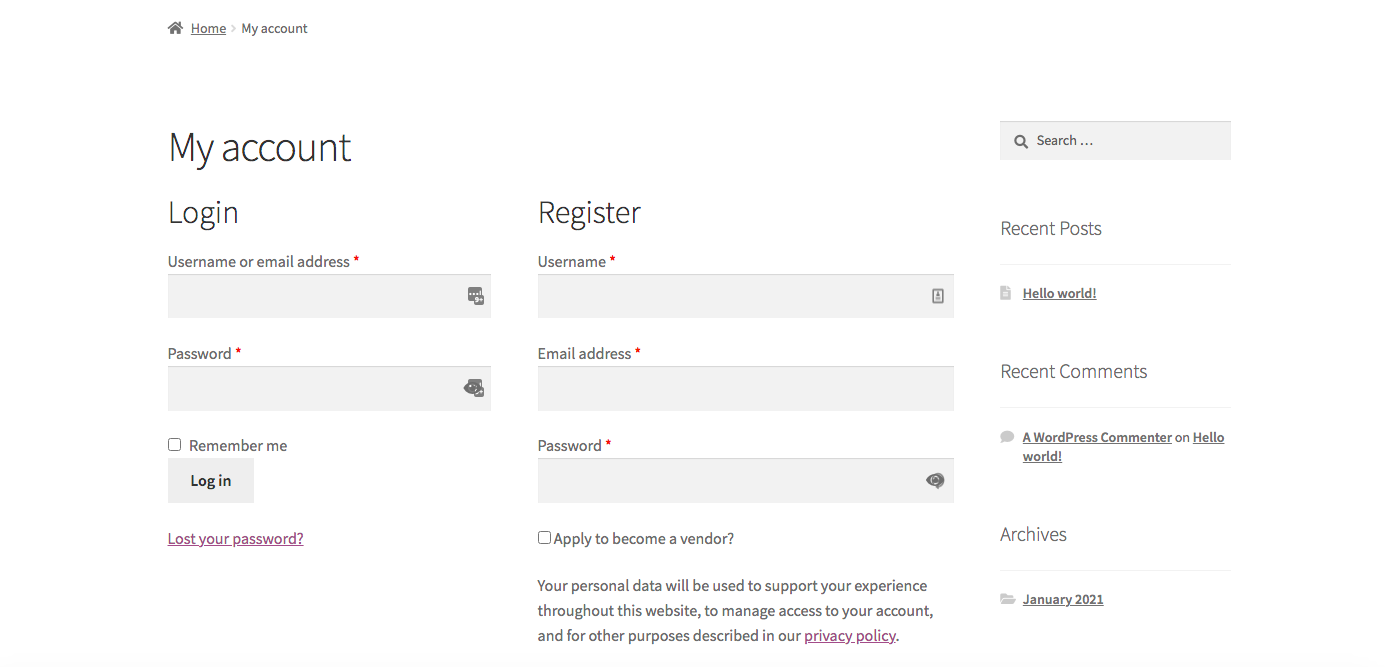
Go ahead and fill out the registration section with some test data and be sure to check the “Apply to become a vendor” checkbox before clicking the “Register” button. You’ll need to use a different email address to the WordPress admin user.
After registering your account, you’ll be taken to the Vendor Dashboard where vendors can see sales reports, view their store, add and edit products, and change the settings of their store.
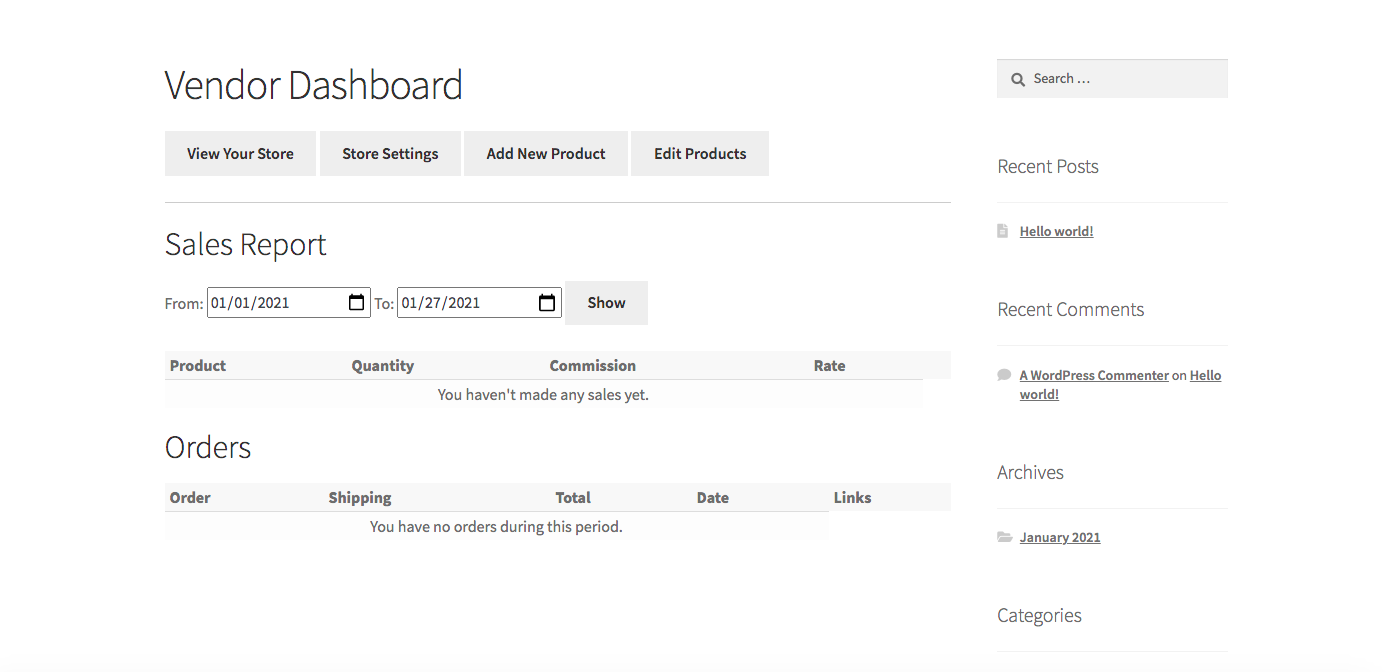
As we’re testing out the experience of a new vendor, let’s add some products to our store.
Step 4: Adding Products as a Vendor
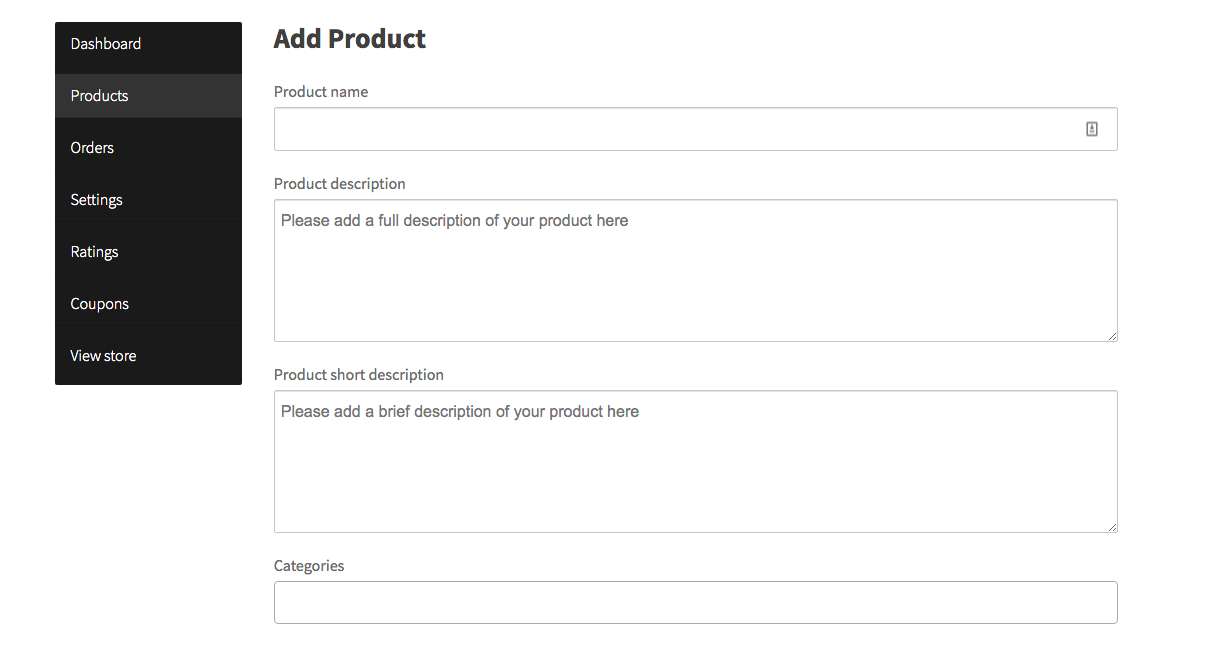
Click the “Add new product” tab and you’ll be taken to the Vendor view of the WordPress dashboard. The process for adding a new product is very similar to adding a new page or post to your WordPress site, with some additional options.
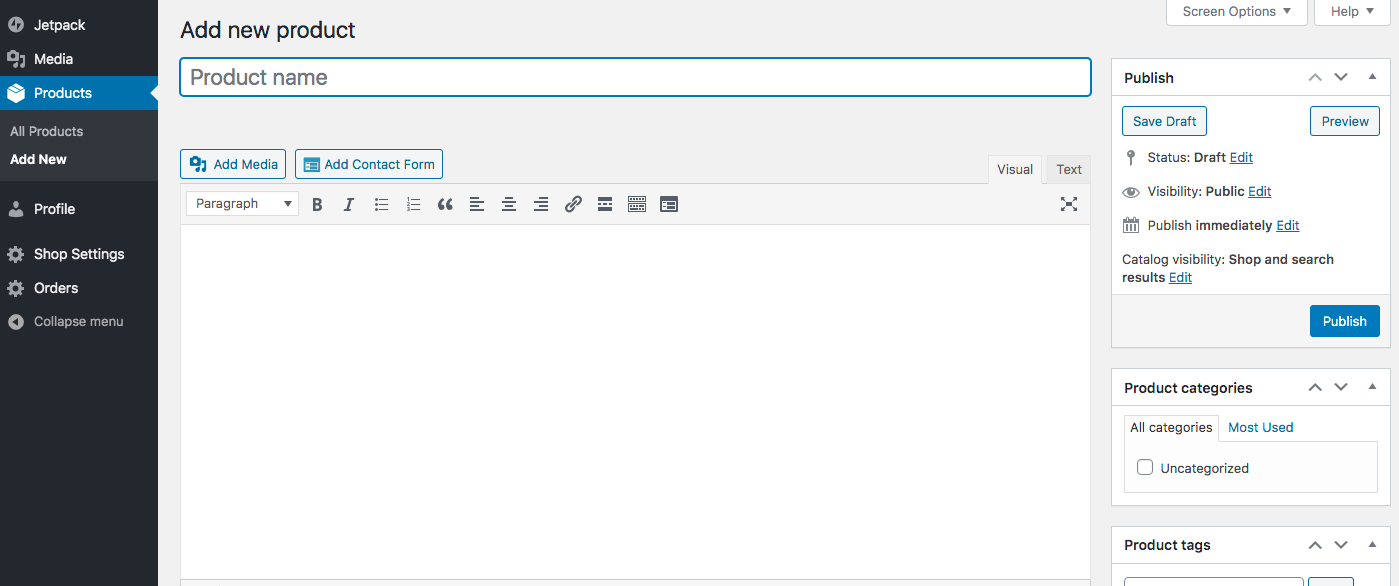
Go ahead and fill out your sample product name and description. You can upload images within the main text area, but the main product image should be set in the “Product image” section to the right of the main content area. You can also choose a product category (categories are set up by the site admin rather than vendors – more on this later) and add product tags.
Below the product description is a section for adding data about the product including price, SKU and stock control data, shipping information, other products for upsells and cross-sells, and other optional notes and custom attributes for internal use.
Finally there is a short product description, which most themes use as a product preview.
Once you’re finished adding product information, click the “Publish” button to upload the product to your vendor store. You can complete this for a couple more test products if you wish.
Step 5: Viewing Product Inventory and Shop Settings as a Vendor
After you’ve finished adding a few products, you can see how this looks from both the frontend and the vendor backend.
Click on “Products” and you’ll see the vendor view of all products. Vendors can easily find and edit products from this view.
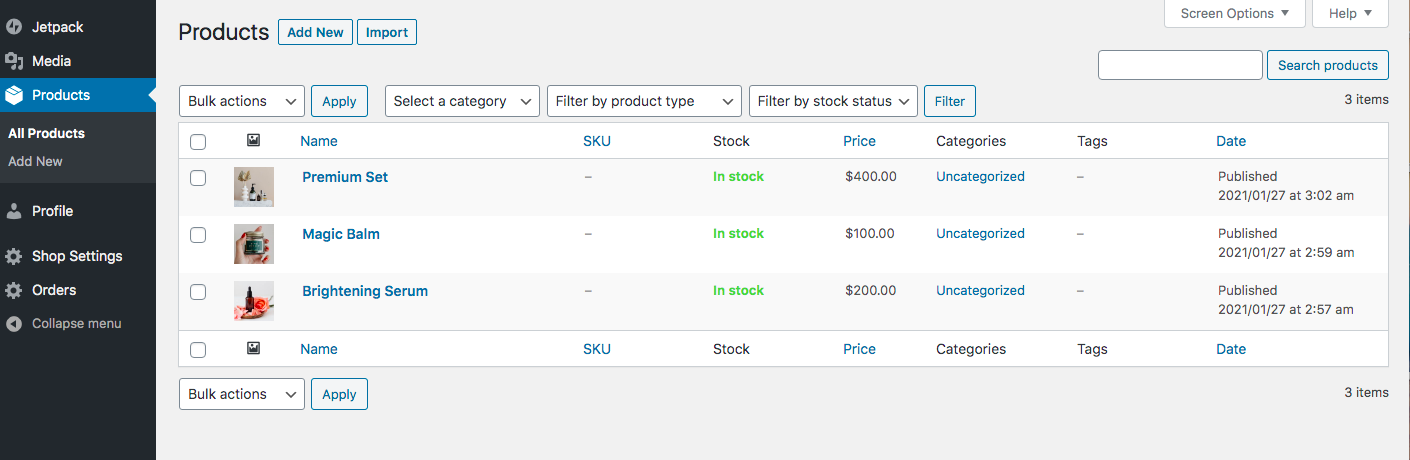
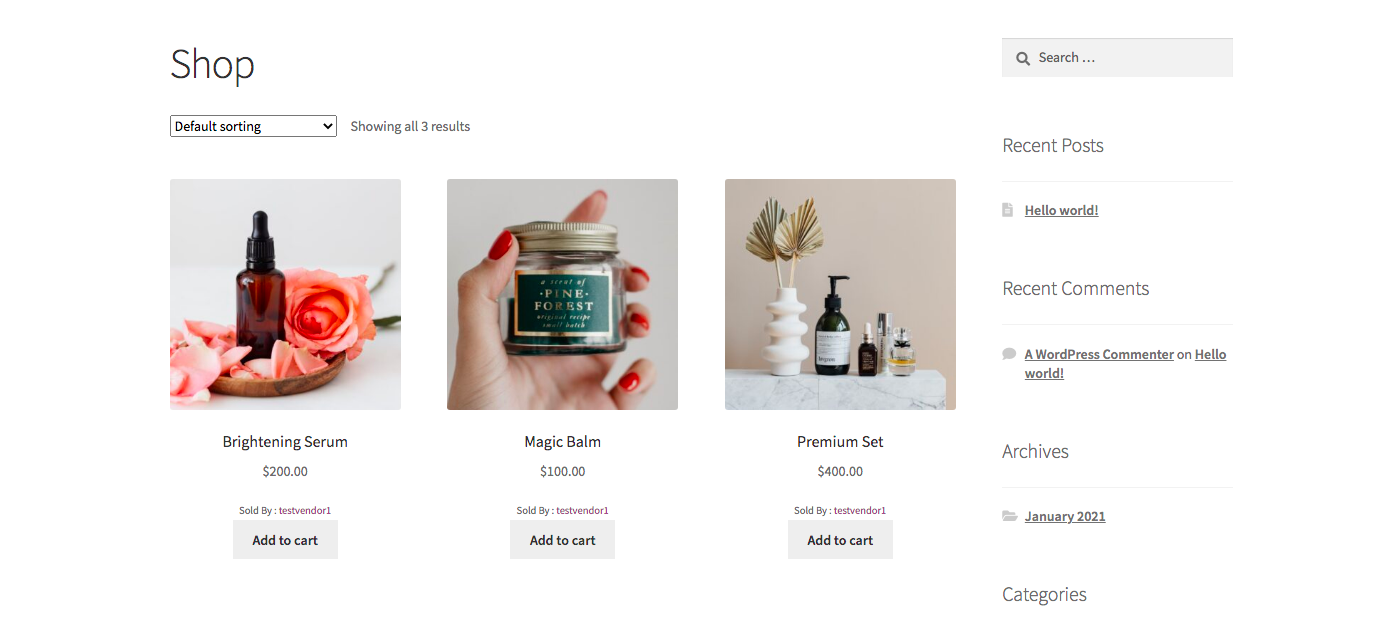
To see how this looks on the frontend, click the “View Products” link at the very top of the WordPress dashboard. This will take the vendor directly to their shop.
Vendors can also change their shop settings from the Vendor dashboard. These settings include payment details, shop name, seller info, and shop description.
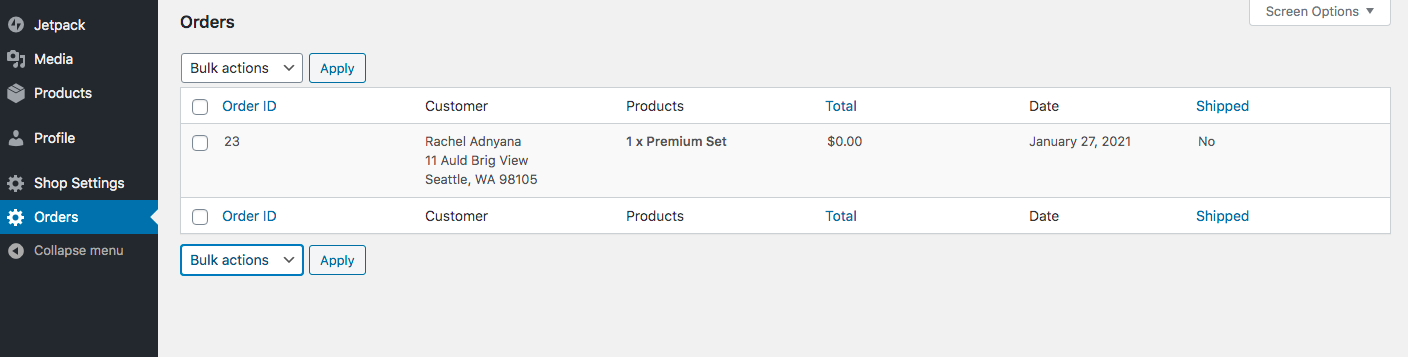
Step 6: Viewing and Processing Orders as a Vendor
Finally, vendors can view their orders and mark them as shipped.
Before moving on, a quick note that this is what vendors will see if you’re using the free version of WC Vendors. The Pro version adds a lot more functionality to the front-end dashboard so that Vendors won’t need to go the WordPress dashboard to manage their products and stores. This makes everything a lot more user-friendly for vendors.
This is what the front-end vendor dashboard looks like with the pro version of the plugin:
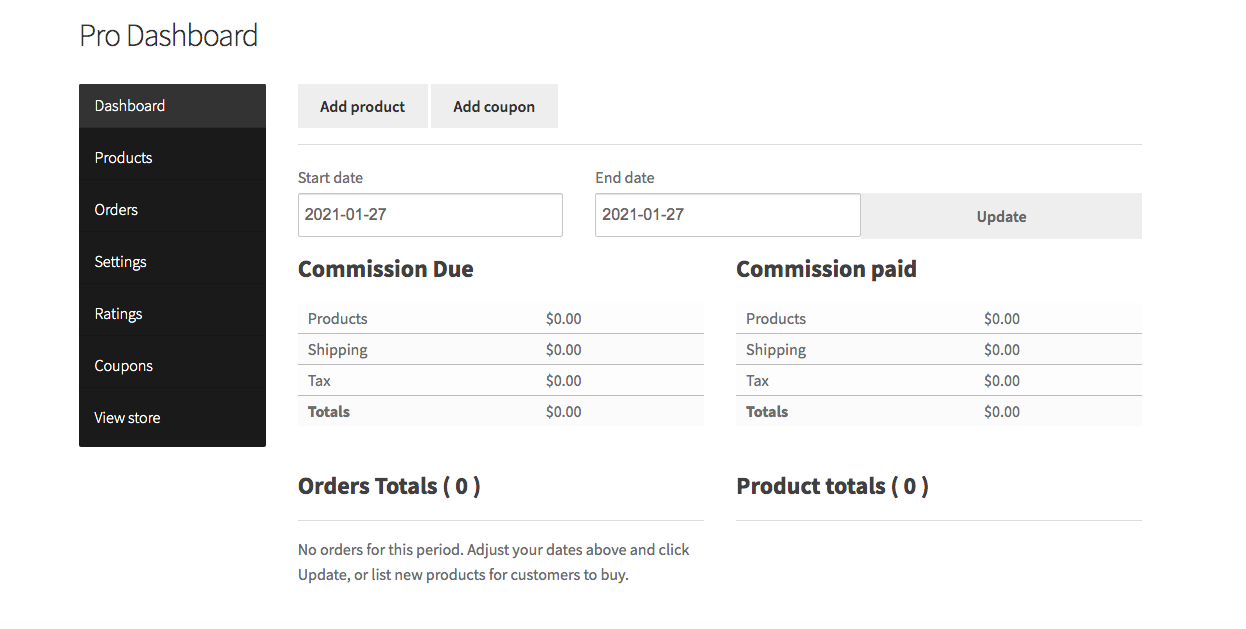
For example, you can see that adding a product looks a lot cleaner and simpler and is more intuitive for users who aren’t used to using the WordPress dashboard.
You can create your own WC Vendors Pro demo site to try out the front-end vendor dashboard and other features of the pro plugin.
Step 7: Managing Your Marketplace as Admin
Now we’ve had a quick overview of using your new marketplace site as a vendor, it’s time to go back and explore how to manage your site as an admin more thoroughly.
If you log back into your WordPress dashboard with your admin user account and click on “WC Vendors” in the menu, you’ll be taken back to the original settings that you chose in the setup wizard.
From here you can change vendor permissions such as adding and editing products, requiring admin approval before product publication, set your commission percentage for sales, and select who receives tax and shipping costs.
You can also make changes to how the vendor dashboard and store pages are displayed by editing the pages directly and enabling or disabling store and product headers and descriptions.
Step 8: Setting up Payments
Before you can launch your store, you’ll need to make sure you can accept online payments from customers browsing your site.
To do this, scroll in your WordPress dashboard and scroll down to review the steps you need to take to complete your store setup.
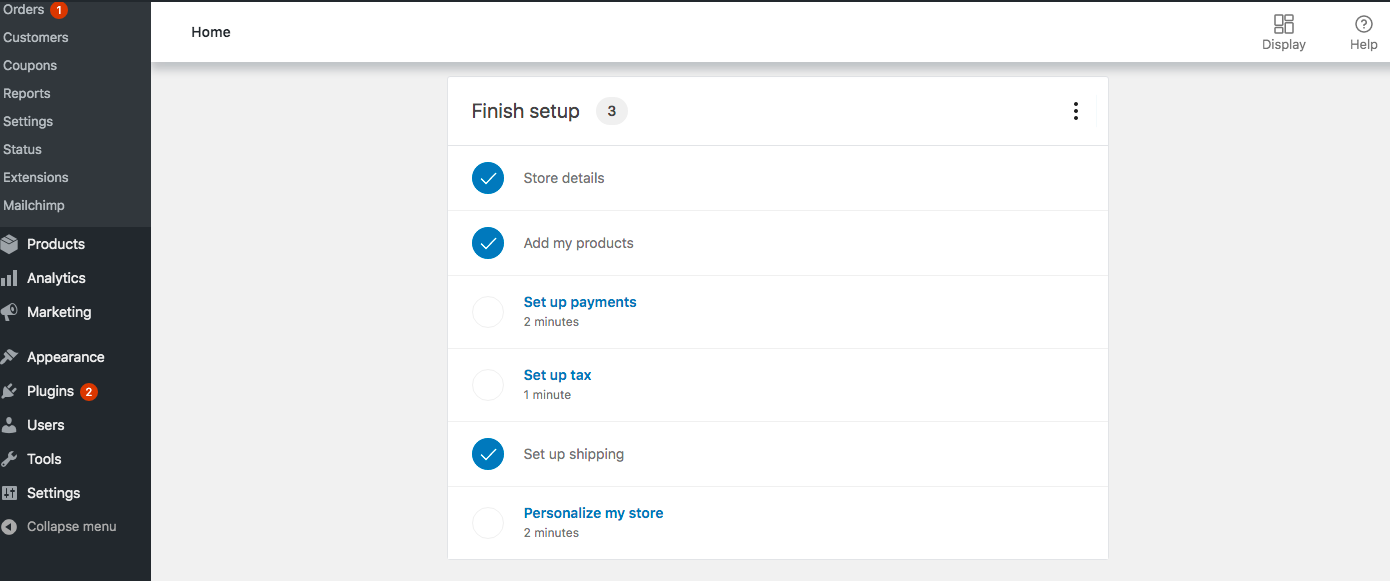
Click on “Set up payments”.
Here you have a few different options you can choose from when it comes to taking payments from customers:
- Credit card payments via WooCommerce payments
- Credit card payments via Stripe
- Credit card payments via PayPal
- Cash on delivery
- Direct bank transfer
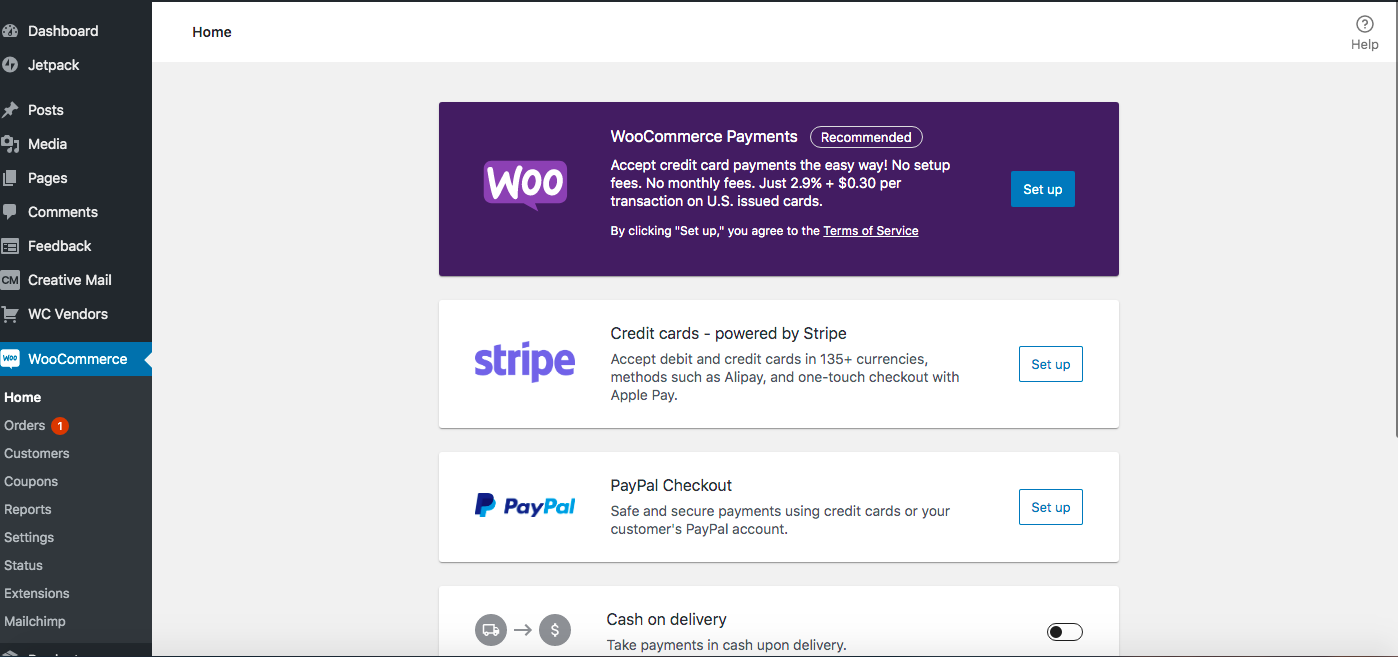
Most stores will want to choose one of the first 3 options so they can directly take card payments from customers.
Each payment gateway has its own pros and cons in terms of fees, security, and ease of use. You can see our comparison of some of the most common payment gateways for more details or read our comparison of PayPal vs. Stripe.
WooCommerce payments is a new option, launched in 2020 and powered by Stripe. The advantage of using this option is that you can manage your payments such as viewing charges and issuing refunds via the WordPress dashboard without having to visit a third-party site. However, this option is currently only available to stores based in the USA.
When you’ve decided on your payment gateway, click the appropriate “Set up” button. Depending on the option you choose, you’ll then need to enter your details or connect your store to your PayPal account.
Step 9: Setting up Marketplace Product Categories
Remember when you were exploring the vendor account and didn’t have any categories to choose from when you added a new product? Now is the time to set up those categories.
You can find this setting in Products > Categories in your WordPress dashboard.
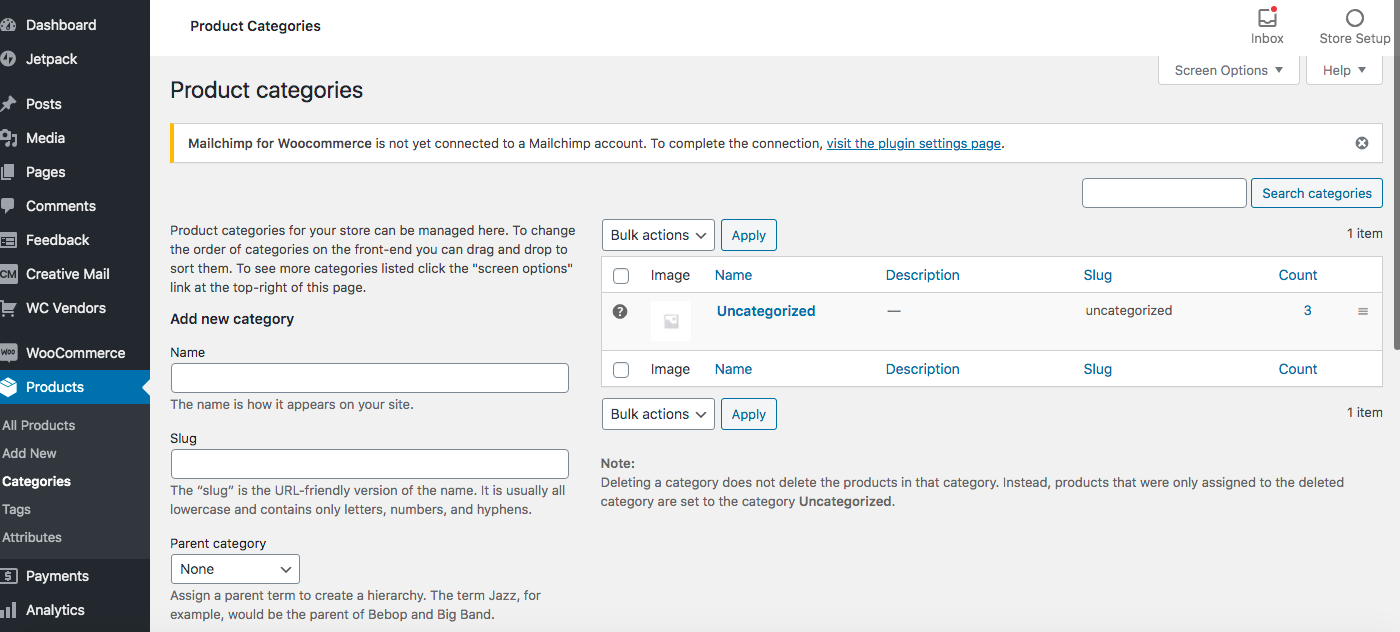
Setting up categories for products is just the same as setting up categories for blog posts. You can create hierarchies and assign parent categories, add a description, a slug, and a thumbnail if you wish.
Think about creating a great user experience when you’re deciding on your product categories. You want to create a marketplace that’s easy to browse so shoppers can find what they’re looking for.
You can also look at other eCommerce stores to see how they have categorized their products. For a general marketplace you might like to model your category structure from sites like Amazon and eBay. If you’re attracting vendors that sell handmade or artisan products, look to Etsy for inspiration or look at specialist online stores if you plan to sell more specific categories of products.
Step 10. Checking on Commissions and Orders
The whole point of setting up an online store is to make money. The beauty of a multi-vendor marketplace like this is that you don’t have to deal with sourcing and storing products, stock control, shipping and refunds, and dealing with customers (unless you wish to do any of these tasks). All of that is left to the individual vendors and you can simply take a percentage of the sale.
We already covered how to set the vendor commission percentage (it’s in the WC Vendors settings in your WordPress dashboard) but you’ll also need a record of the orders coming in and the commissions due to your vendors.
The basic WC Vendors plugin does not allow for payments to be paid directly to vendors. Instead, you as the site owner will receive all the payments and you’ll then need to pay commissions to vendors manually.
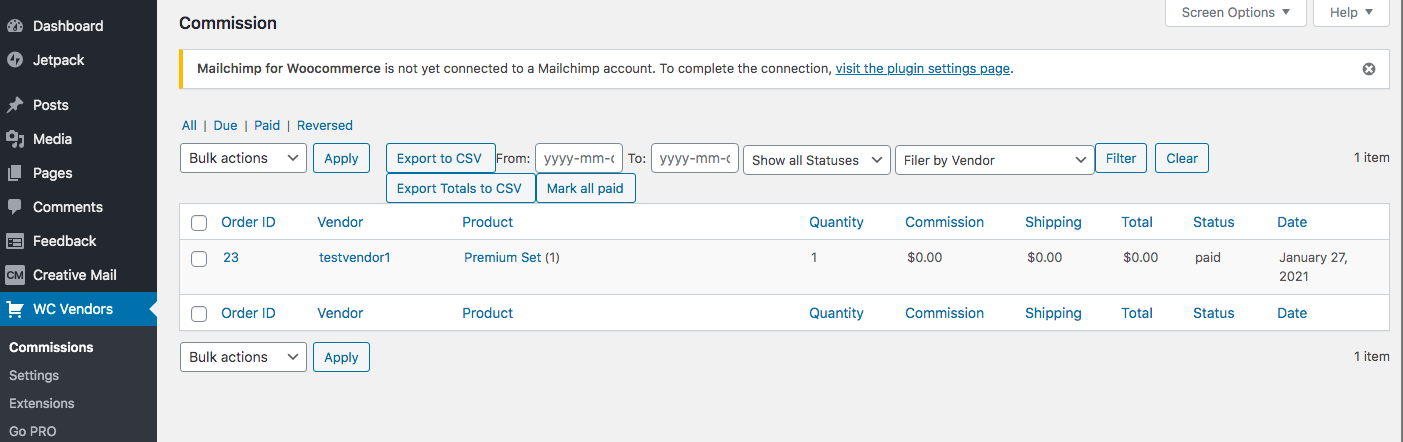
You can see commissions in WC Vendors > Commission. This will give you information including the name of the vendor, the products sold, the amount of commission, and what the customer paid, including shipping. You can export this data to CSV for accounting purposes if you wish.
You can also see full details of orders and customers in the WooCommerce section of your WordPress dashboard. This can be handy for keeping an eye on order status. For example if a particular vendor is taking a long time to process orders you might want to delay paying commissions or investigate the matter further.
There’s a lot more that you can do with WooCommerce such as running reports and connecting to social media for marketing campaigns, so it’s worth taking some time to explore all the options fully.
Step 11. Expanding Your Marketplace Functionality
At this point you have a fully working multi-vendor marketplace and you can concentrate on tweaking the design or installing a different theme, and attracting vendors and customers to your site.
However, there are some further possibilities with WC Vendors that you might want to consider, including:
- Setting up Stripe payments so your vendors are paid instantly and you don’t have to manually send commissions
- Charging vendors to list products on your marketplace
- Allowing vendors to create bookings (to create a service or event) marketplace
- Allowing vendors to create subscriptions
- Allowing vendors to create auctions for an eBay-style site
All of this is possible with paid WC Vendors extensions. You can find links to these on your WordPress dashboard under WC Vendors > Extensions or you can opt for a bundle of multiple extensions for a discounted price.
Step 12. Upgrading to WC Vendors Pro
The free version of WC Vendors is an ideal solution when you’re just starting out, but the Pro version offers a lot more features and flexibility.
We’ve already touched on the front-end vendor dashboard in the Pro plugin that will make your site much easier to use for vendors.
Some of the other advantages of using the Pro version of the plugin include:
- Let vendors manage their own shipping with flat or table rate shipping options
- Enable vendors to print shipping labels
- Supports over 100 payment gateways
- Multiple commission options including flat percentage, percentage + fee, or tier rates based on category, sales, or product prices
- Additional vendor features such as verified and trusted
- Additional store customization features including social media profiles and contact form
- Coupon management
- Premium support
Price of WC Vendors Pro: $199 per year
Over to You…
We’ve gone over the basics of setting up a WordPress site, installing WooCommerce and WC Vendors, and setting up your marketplace site.
You can use these plugins to make any kind of marketplace site and this type of site is a great way to dip your toes into the world of ecommerce without needing to research products or spend a fortune on stock.
Some examples of other types of marketplace site you could set up include:
- A digital products marketplace for ebooks, videos, online courses, and other digital assets like Gumroad
- A services marketplace like Fivver
- An events marketplace (either online or offline events) like Eventbrite
The possibilities with this business model are really limitless. If you’ve set up a unique marketplace and have any advice to offer, please feel free to contribute in the comments section.
For another way to set up an eCommerce site that doesn’t involve dealing with stock, you could consider dropshipping. Take a look at our rundown of the best dropshipping plugins for WooCommerce if you’re interested in this idea. You also might want to consider some other platforms for selling digital products.
Leave a Reply